Are you a kimchi lover who’s wondered how to make kimchi at home? Here’s how to make your own easy, fermented kimchi with this authentic Korean recipe (without the fish sauce!)
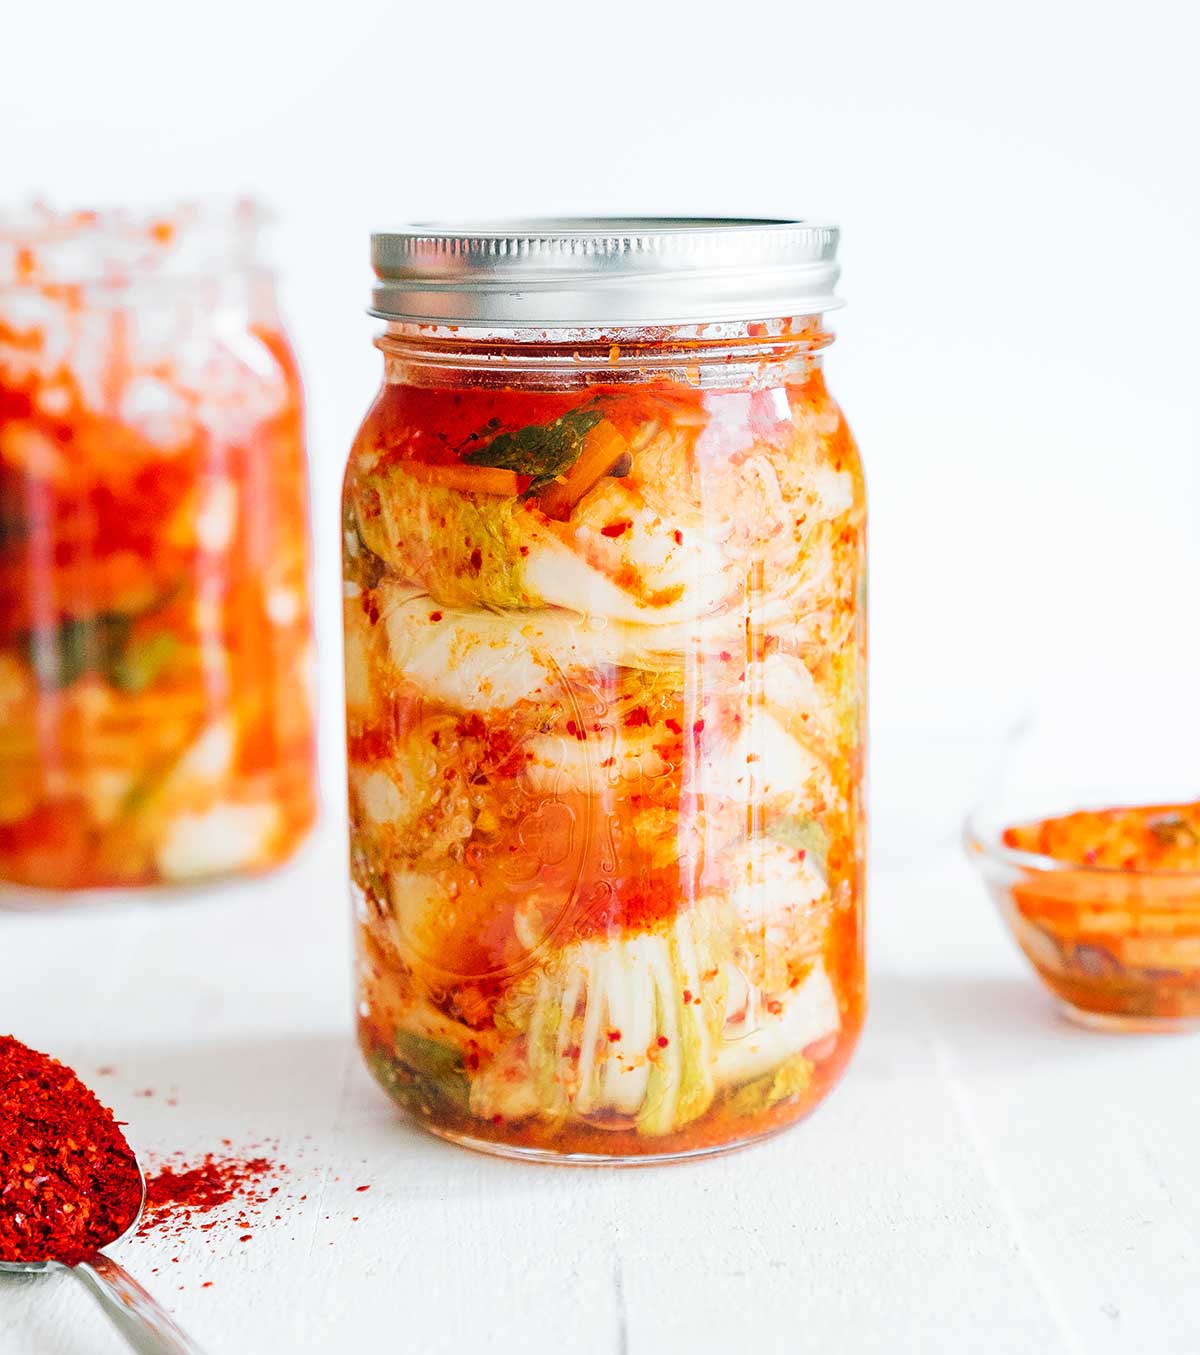
We’re kicking off the year with a new fermentation project that you’re going to love! We did kombucha, then kefir, and now…we kimchi!
Kimchi can be a bit of a mystery for those who haven’t tried it (it can be a mystery even if you have tried it).
At its core, kimchi is fermented cabbage. But it’s so much more. It’s spicy and umami and sour and perfect for adding zing to everything from fried rice to tacos!
Reader rating

What is kimchi?
Kimchi is made by lacto-fermentation of napa cabbage, which is fermentation by Lactobacillus bacteria (the same kind of fermentation that gives us yogurt and dill pickles!). Basically, basteria are converting sugars into lactic acid!
As with many fermentation products, kimchi is incredibly healthy! It’s packed with probiotics, which help promote a healthy gut microbiome. Its main ingredient, Napa cabbage, brings another punch of healthy properties, like being an excellent source of vitamins K, C, and folate. And when the fermentation is complete, 1 cup (150 g) of kimchi has just 23 calories while being relatively high fiber (2.4 g).
Kimchi…but make it vegan
So obviously with the promise of major flavor and health benefits like that, I had to try my hand at making kimchi. But the thing is, traditional kimchi isn’t vegetarian. Most authentic kimchi recipes include fish sauce, which adds umami taste.
To make this kimchi plant-based, I tried two variations without fish sauce: in the first I simply omitted it, in the second I used miso paste instead. Both vegan kimchi variations were delicious, and the recipes are included below!
Kimchi’s Cousin…
Did you know that sauerkraut is also a fermented type of cabbage? Learn about the differences between kimchi and sauerkraut here, and try your hand at making homemade sauerkraut!

Kimchi Ingredients
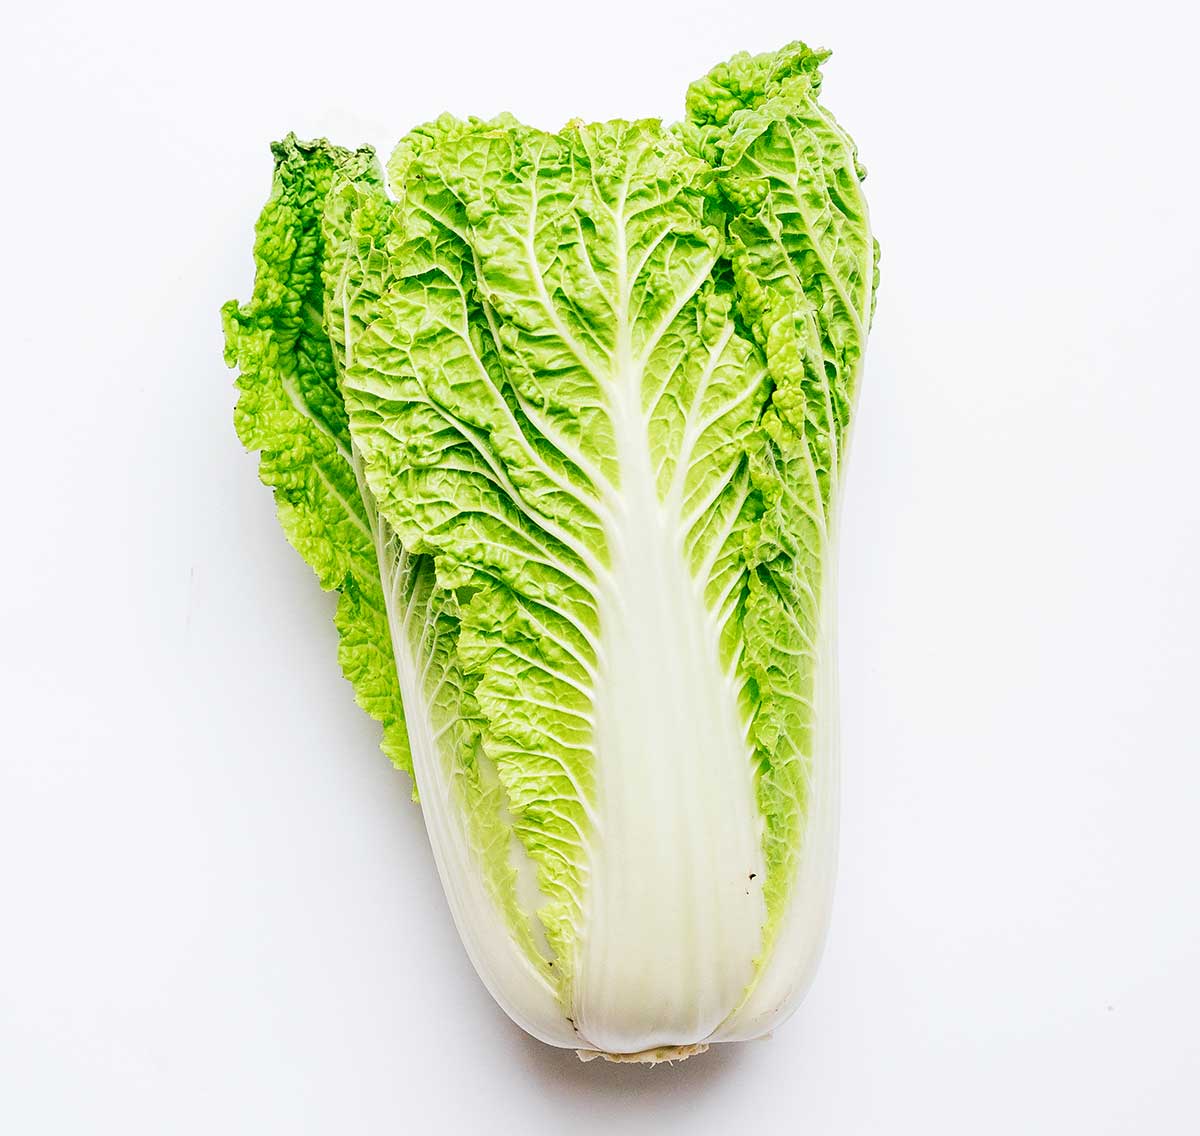
- Napa Cabbage: Otherwise known as Chinese cabbage, this will form the base of the kimchi.
- Non-Iodized Salt: Aim for iodine-free or kosher salt (iodized salt may prevent fermentation and can lead to a metallic taste).
- Korean Pepper Flakes: Otherwise known as gochugaru. Find it online or check out your nearest Asian supermarket. If you’ve looked everywhere and can’t find gochugaru, you can sub hot paprika powder (but I recommend giving gochugaru a try if possible).
- Garlic: You only have to be in the general vicinity of kimchi to know it contains garlic. That smell 😅 Just be sure not to add too much garlic, as it can cause the kimchi to become bitter.
- Ginger: Ginger brings a fresh flavor while contributing to the fermentation (like it does in kombucha!)
- Sugar: Just a dash of sugar is enough to kickstart the fermentation, giving the bacteria something to “feed” on.
- Carrot or Daikon Radish: Traditional kimchi uses daikon radish for added crunch, though carrot works just as well (use whichever you have access to).
- Green Onions: Finally, green onions for flavor!
Can you add other vegetables?
Traditional kimchi is made with napa cabbage, but you can try adding more or other vegetables, like cucumber, radish, or even collard greens!
How to make kimchi
There are two main stages to making homemade kimchi. In the first, you salt brine the cabbage to kill off any bad bacteria and release moisture. In the second stage, the good Lactobacillus bacteria take over and convert all the sugars into lactic acids. Let’s get into it!
Step 1: Sterilize everything
Wash your hands well before every time you touch the ingredients. Wash supplies with hot water. Clean is key with any fermentation!
Step 2: Brine the cabbage
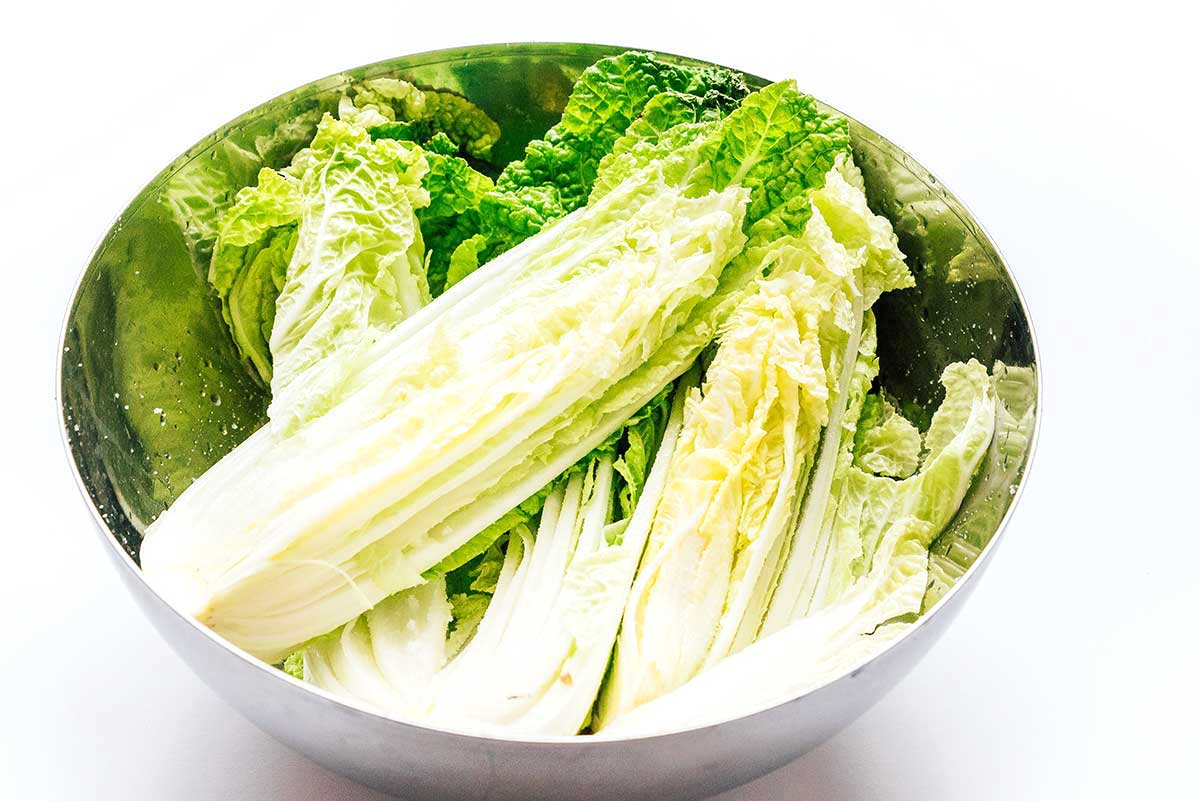
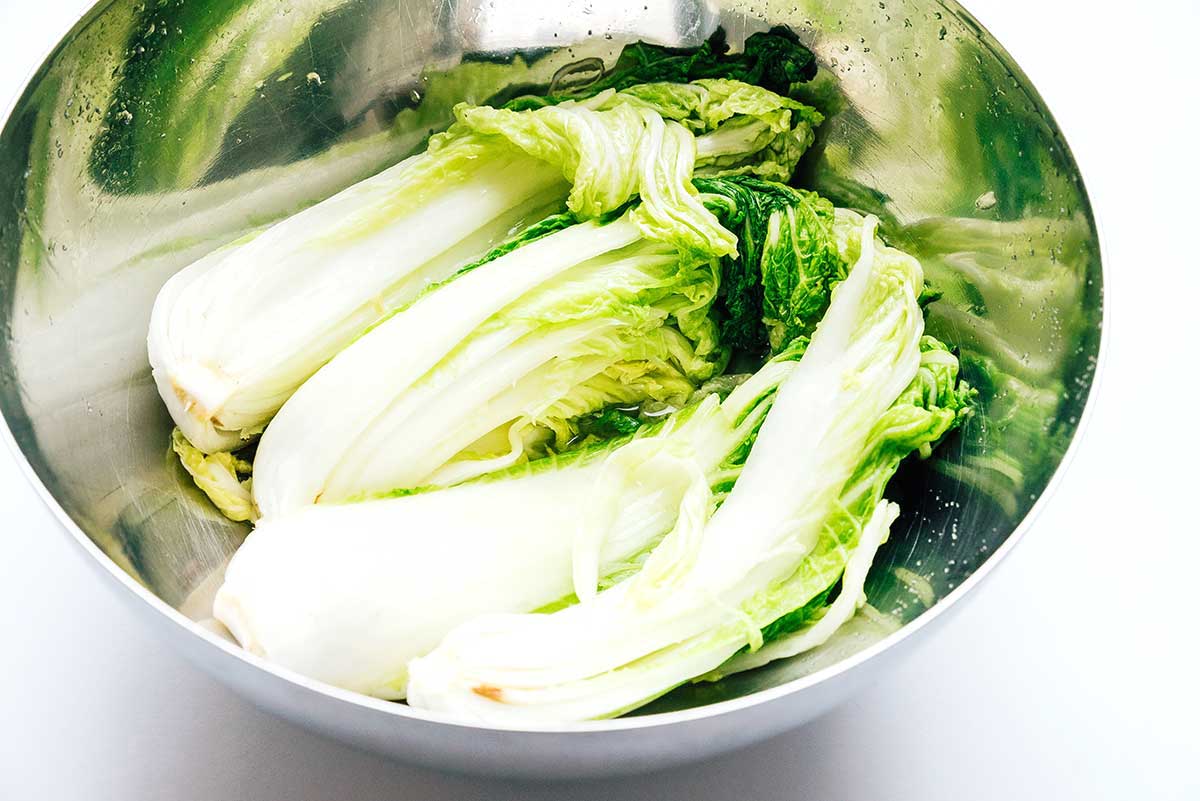
Rinse the cabbage well, then cut it into quarters, lengthwise. Place in a large bowl and sprinkle completely with salt, working the salt in between each cabbage leaf. Let sit for about 2 hours, massaging and turning the cabbage every 30 minutes, until cabbage has wilted down. When finished, drain and rinse the cabbage very well (until a torn-off piece no longer tastes overly salty). Squeeze out the excess water.
Step 3: Flavor it up
While cabbage is sitting in the brine, add your Korean pepper flakes, garlic, ginger, and sugar to a clean food processor, along with some water to get things moving. If desired, add miso paste as well (for umami taste). Blitz until smooth.
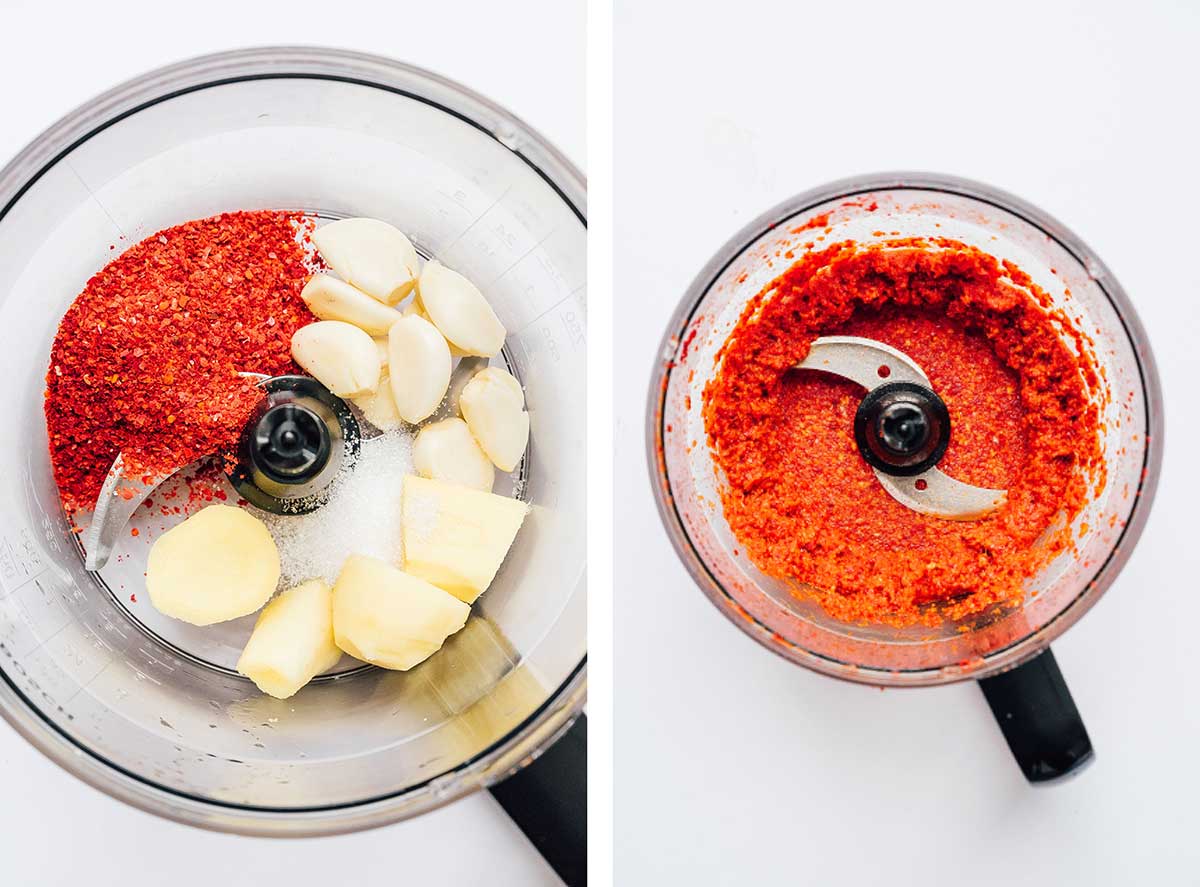
This pepper paste, along with the carrots (or daikon radish) and scallions (green and white parts), will bring major flavor to the kimchi!
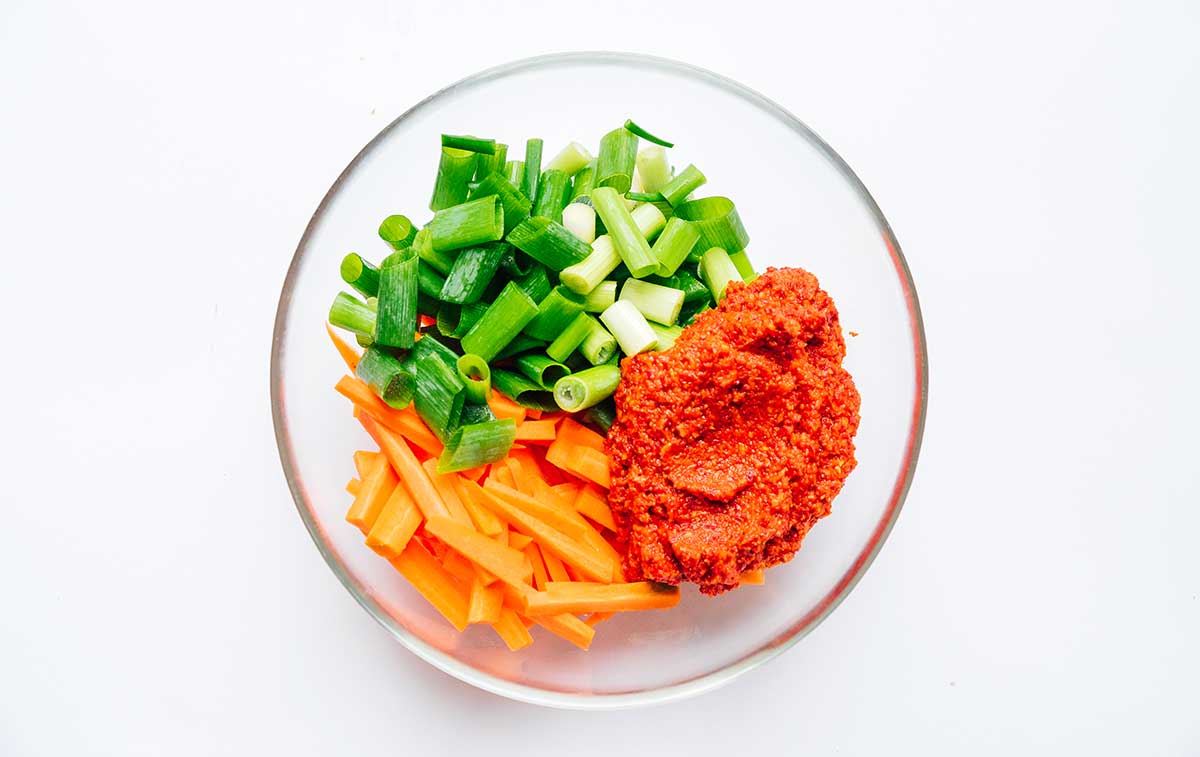
Step 4: Mix
Combine the well-rinsed cabbage (either whole leaves or roughly chopped), pepper paste, carrot (or daikon radish), and green onions in a large bowl, mixing well with clean hands (you may choose to use gloves here to prevent your hands from smelling).

Step 5: Ferment
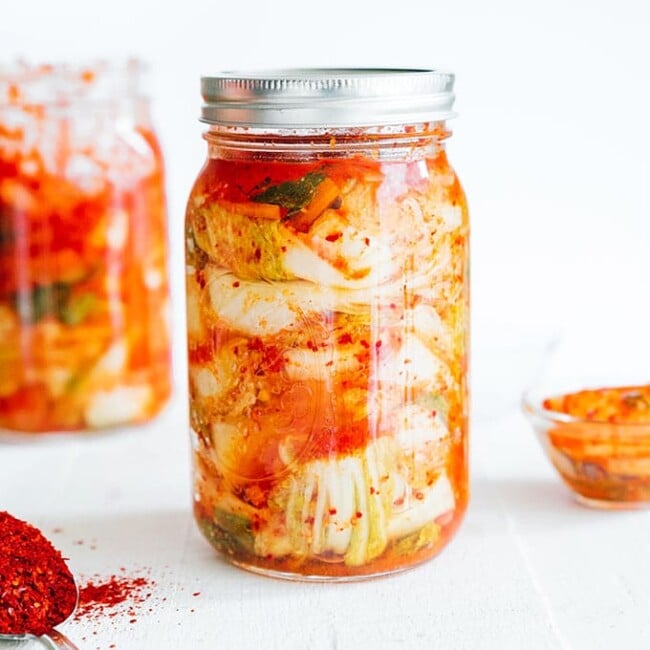
Pack the mixture into clean glass jar(s), pressing down so that the veggies are submerged in the juices. Leave at least an inch of empty space at the top of the jar, then seal shut with a lid. Set the sealed jar on a plate or bowl (to catch possible leaks), and place somewhere room temperature and out of direct sunlight, letting it ferment for 2 to 5 days. Check on it everyday, pushing the cabbage down to release gasses and prevent leaks. The kimchi is finished when the taste is slightly sour and cabbage is a bit soft.
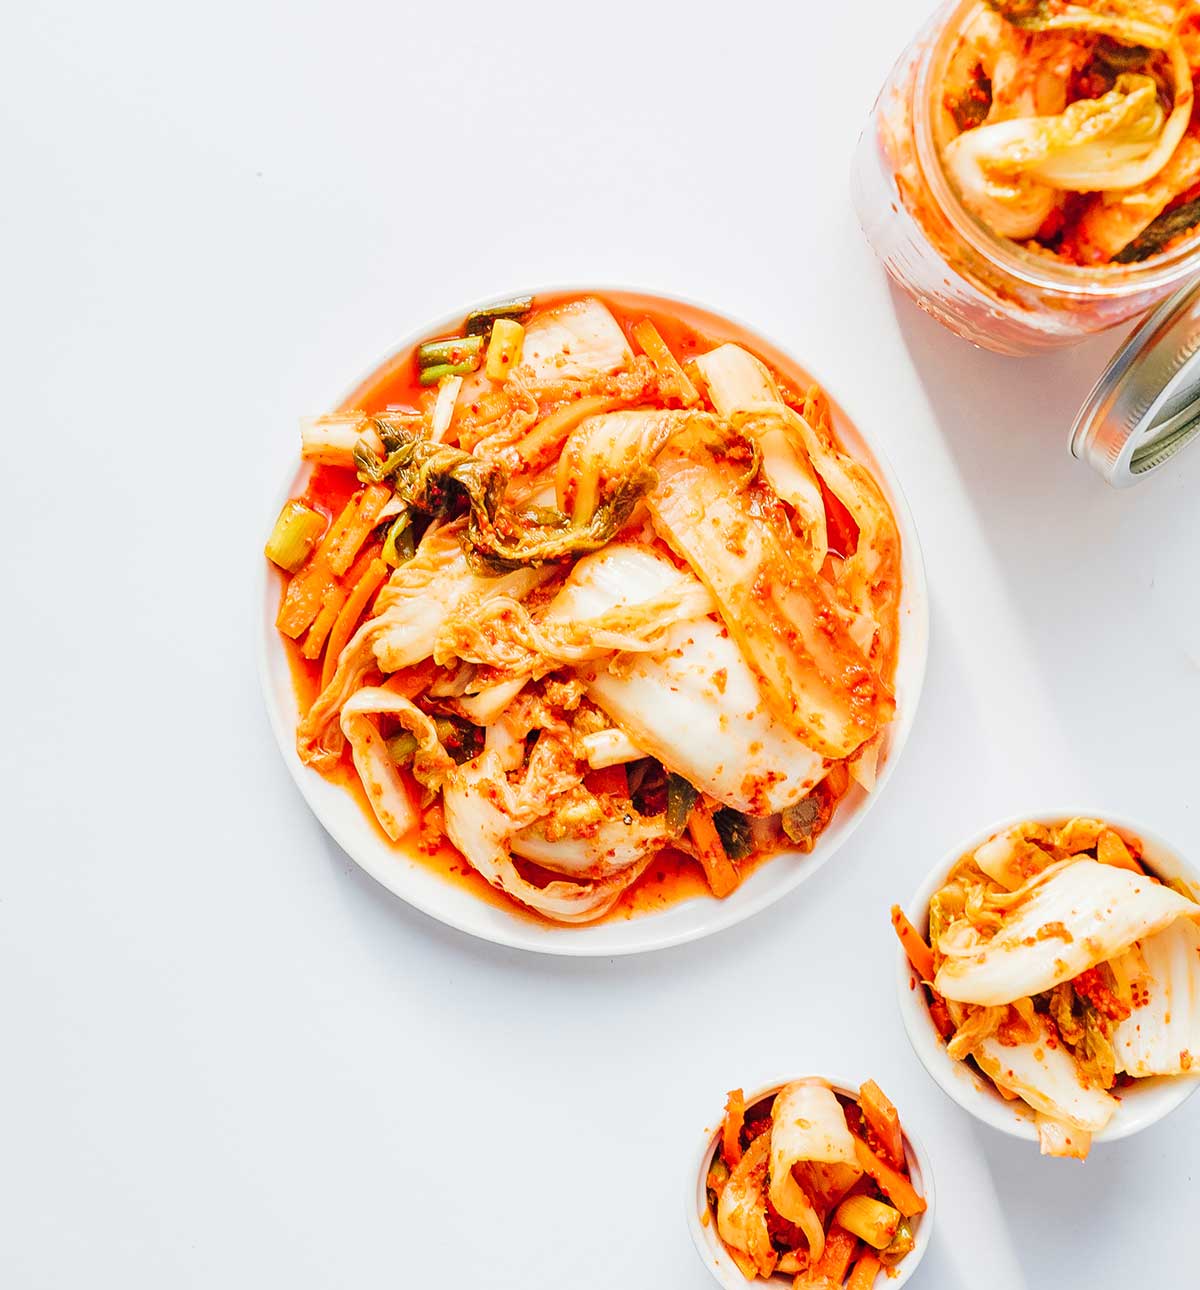
The “finish point” depends on your taste. The longer you let the kimchi ferment, the more sour and less crunchy it will become. This will also go faster in a warmer environment. Simply taste it each day when you check on it, and transfer it to the fridge when it’s the perfect amount of ripe! Refrigeration will pause the fermentation process, where it will stay fresh for several weeks or months.
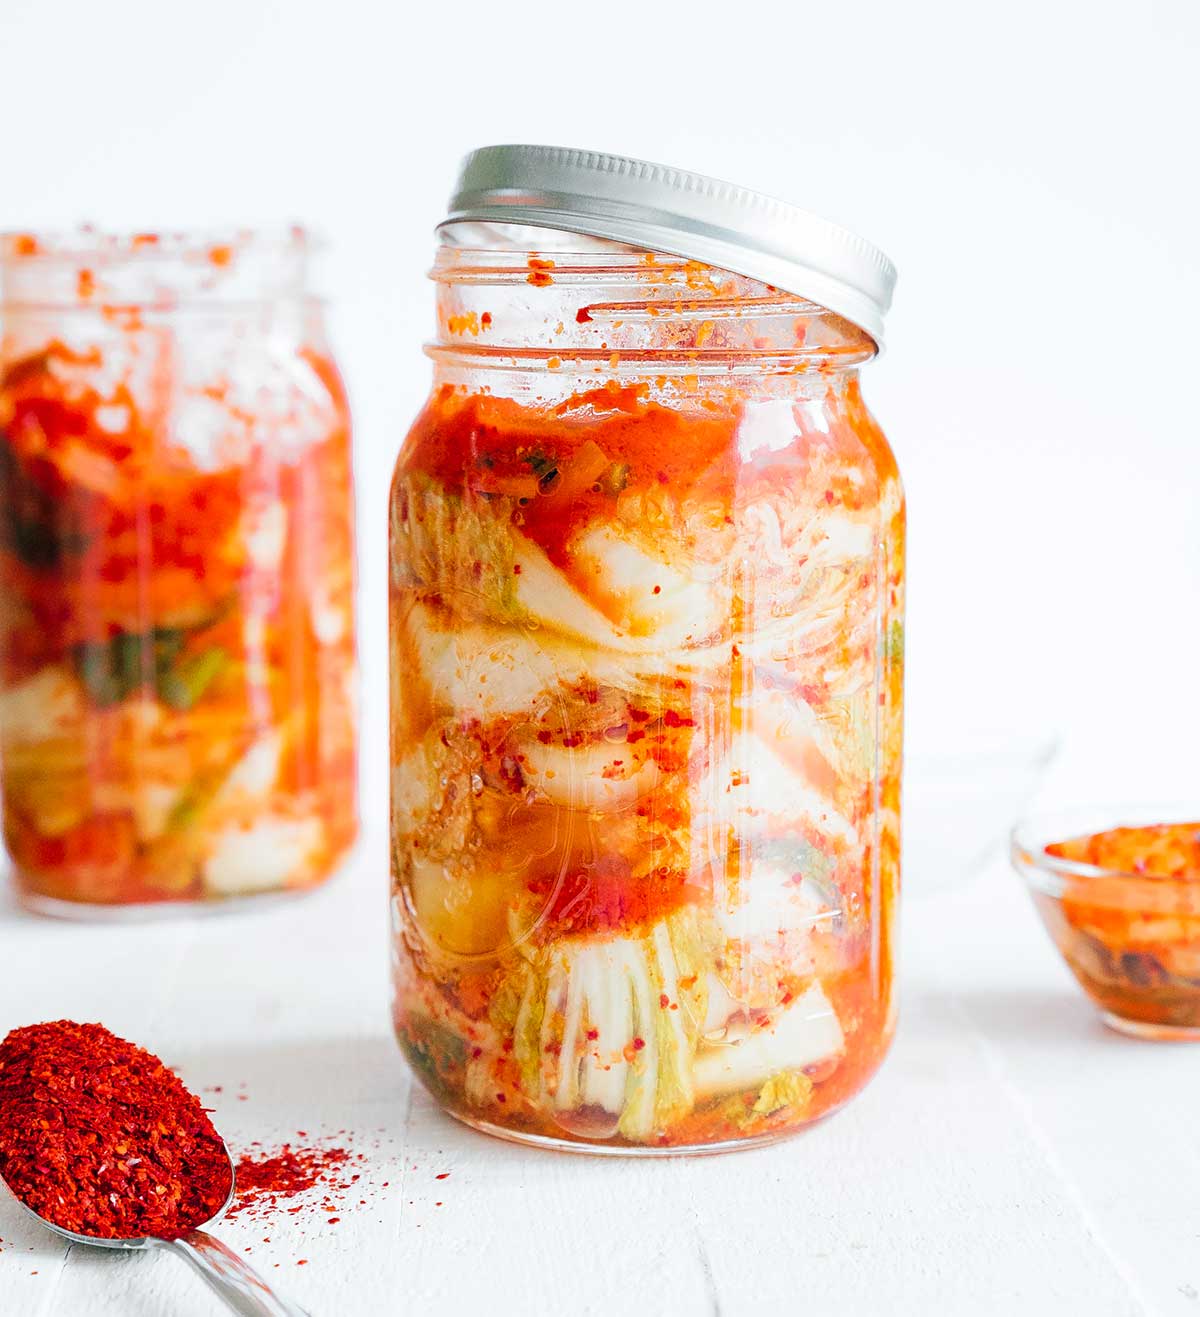
What should kimchi taste like when it’s done?
Finished kimchi will be spicy and a little tangy! You should also notice a bit of bubbling in the kimchi juices.
Recipes that use kimchi
Kimchi is great served on its own as a side dish of sorts, but you can also use it as a condiment or topping on a bunch of recipes! Here are our favorite ways to use kimchi, from Korean cooking to unique twists:
- Kimchi Udon Noodles
- Kimchi Fries
- Kimchi Bibimbap
- Kimchi Instant Ramen
- Kimchi on Tacos
- Kimchi Fried Rice
- Korean Eggplant Tacos
- Kimchi Soup
- Korean Kimchi Pizza
Questions? Ask Sarah!
Hi, friends! Sarah here, food scientist, nutritionist, and creator if this easy kimchi recipe! If you have any questions, just leave a comment below. I personally answer comments and questions weekday!
Reader rating
“I couldn’t find the Korean pepper flakes, so subbed in red pepper flakes…..it came out PERFECT! Thank you for this awesome recipe!” —Victoria
Be sure to try our other fermentation projects, like kimchi, tepache, Greek Yogurt, sauerkraut, and kombucha!
Ingredients
- 1 large head napa cabbage 3 to 5 lbs, 1.3 to 2.2 kg
- ¼ cup non-iodized salt 60 g
- ¼ to ½ cup gochugaru Korean pepper flakes, depending on your spice tolerance, 30 to 60 g
- 7 to 10 cloves garlic
- 3 to 4 inches ginger 7½ to 10 cm
- 1 tsp sugar
- 3 to 4 Tbsp water 45 to 60 mL
- Optional: 3 Tbsp miso paste
- 2 carrots cut into strips, or 8 oz daikon radish
- 4 green onions cut into 1-inch pieces
Instructions
- Sterilize: Wash your hands well before every time you touch the ingredients. Wash all supplies with hot water.
- Brine: Rinse the cabbage well, then cut it into quarters, lengthwise. Place in a large bowl and cover completely with salt, working the salt between all the leaves. Let sit for about 2 hours, massaging and turning the cabbage every 30 minutes, until cabbage has wilted down. When finished, drain and rinse the cabbage very well (until a torn-off piece no longer tastes overly salty). Squeeze out excess water.
- Flavor: While cabbage is in the brine, add the gochugaru, garlic, ginger, sugar, and water* to a clean food processor. If desired, add miso paste as well (for umami taste). Blitz until smooth.
- Mix: Cut the bottom stem from the cabbage so the leaves are loose. Optionally chop into bite-sized pieces. Combine the well-rinsed cabbage, pepper paste, carrot (or daikon radish), and green onions in a large bowl, mixing well with clean hands (you may choose to use gloves here to prevent your hands from smelling).
- Ferment: Pack the mixture into clean glass jar(s), pressing down so that it’s submerged by the juices and there are as few air pockets as possible. Leave at least an inch of free space at the top of the jar, then seal shut with a lid. Set the sealed jar on a plate or bowl (to catch possible spills), and place somewhere room temperature and out of direct sunlight, letting it ferment for 2 to 5 days.
- Upkeep and storage: Check on the kimchi everyday, pushing the cabbage down with clean fingers or a spoon to release gasses and prevent leaks. It's done when the taste is slightly sour and cabbage is a bit soft (depends on your taste – longer fermentation will result in a more sour, less crunchy kimchi). When finished, store in the fridge to stop the fermentation process.
Tips & Tricks
- *For traditional kimchi, sub 2 Tbsp of the water for fish sauce.
- Kimchi that has been made in a sterile environment can be stored in the fridge for several weeks or months!




Valentina Oliverio says
Hello, I love this recipe, I use it often. Thank you!
Sarah says
So happy to hear it, Valentina! 😀
Nava Atlas says
I made this recipe pretty much as you present it, though during this week of lockdown I had to use what I have on hand; I substituted savoy for the napa cabbage, and used dried hot red pepper flakes instead of the Korean hot seasoning. Other than that, I followed it as is, and it came out perfectly — as good or better than any kimchi I’ve bought in a jar. So easy! Also, I’m so wary of raw garlic, but after fermenting, it doesn’t linger on the palate at all — you just know that garlic goodness is in there. Thanks for a great recipe, Sarah! I’ll be making this regularly.
Sarah says
So happy to hear it, Nava! Kimchi is actually quite flexible, so you can throw all sorts of veggies in there that you might have on hand 🙂 Happy fermenting!
Terry says
How would I substitute gochujang since that is what I have or would dried red chili flakes be better
Sarah says
You can substitute hot paprika powder! With that said, the results will be a bit different, and I definitely recommend ordering some gochujang if you can.
Joah says
Hey! Can you put it directly in the fridge without letting it to ferment? I don’t really like that fermented kimchi taste.
Sarah says
I haven’t tried this, but I don’t see why it would be a problem! 😀
Beth says
Hello..can I use cayenne pepper instead?
Sarah says
While I haven’t tried it I’ve read that you can use it, but you will need much less than of the gochugaru. I’d start with 1 Tbsp or so.
Jeannie says
I love kimchi. I saw gochujang hot pepper paste and I was wondering is this to make kimchi?
Sarah says
It could probably be used! We obviously use the flakes here, but I don’t see why the paste couldn’t be subbed in if that’s what you have on hand.
Savio Wandera says
Hi Sarah,
This is very interesting and sounds easy to make. I have bough Kimchi from Asian stores and I love the taste.
Which ingredient supplies lactobacillus bacteria?
Sarah says
Lactobacillus is naturally occurring on the cabbage, and that’s what will fuel the fermentation! 😀
Savio Wandera says
Hi Sarah,
I didn’t think you would see and answer my question about the source of the bacteria. Now I know and I’m ready to make some delicious kimchi.
Thank you very much.
Katherine says
I mixed up the amount of salt with another recipe and used 4 tablespoons of kosher salt instead of 1/4c for the brine. All the ingredients I kept the same. Is this a safe amount still to ferment with?
Sarah says
It should be fine! 😀
Wmily says
I know this is an old comment, but 4T is the same as 1/4 cup! 🙂
Simone says
Hi.
Thank you for the Kimchi recipe, it looks delicious.
Is it possible to seal the jar and store it on the shelf, like other pickled goods?
Thank you
Sarah says
No, kimchi needs air and a way to let out excess carbonation. You can seal it before placing in the fridge, though! 😀
ALison says
I am going to try this and am wondering if some type of seaweed might be a good addition to replace the fish sauce?
Sarah says
I haven’t tried this so I can’t say for sure, but I think it’d be tasty! 😀
Heidi says
I use equal parts miso paste and kelp powder, 2-3 tsp each, and think it gives the earthy savory taste like fish sauce without the fishy-ness. 🙂 Kelp powder comes in a much-too-large bag but it keeps well in the freezer.
Louie says
Hi . Could I substitute Worcestershire sauce in place of the miso paste . Are they similar in flavor and is the Worcestershire sauce ok with the fermentation process. Thank you
Sarah says
Hi Louie! I haven’t tried this before but I would be wary of adding an ingredient so different. If you do try it, I’d love to hear how it goes!
MARI says
Hello, just to be sure, in the 1st step, I onlycover the napa cabbage leaves with salt, no water, correct?
I’m excited to try this recipe.
Sarah says
Yep, that’s correct! 😀
Li says
Hi,
I am making this for the first time. I had rinced the cabbage 4 times it is still a bit salty. Does it have to taste saltless or not or should I soak it overnight to desalt it more? I mean now does that mean that I messed up the kimchi?
Sarah says
It’s okay if it still tastes a little salty, no need to soak overnight!
alice says
what is the red color in kimchi?
Sarah says
That’s the Korean Pepper Flakes, otherwise known as gochugaru 😀
FRANCES says
I have made this kimchi but never saw bubbles, even after 4 days; plus I ‘think’ it may have needed some water added to the packed jars. It did have a fantastic taste after several days. Also, I have an immunosuppressed child due to a transplant. Is this safe for him to eat?
Sarah says
Glad it tasted good in the end! And I really can’t say – that’s something you might want to talk to his pediatrician about. Enjoy! 😀
ANDREW says
You mention to seal the jars in the fermentation step, but then you say they need to let out the carbonization??? Then you say to only SEAL the jars when putting in the fridge.
What do i cover the jars with in fermentation to also let the carbonized gas out?
Sarah says
Great question, Andrew! Just use a lid and open it once a day to let out the built up carbonation 😀
Katrina says
Hi!
How many jars does this make, and what size are they?
Sarah says
About 2 quart-sized jars!
Joanna Edwards says
Hi quick question on step 5 please. Are the juices you refer to just the ingredients from step 3? Many thanks
Sarah says
Yep exactly! And the cabbage will naturally release water which will also become part of that liquid.
ESTELLA says
I have made it, let’s see how it goes 😅
I loved the smell though 😋. Thank you for this amazing recipie Sarah 😊.
Kristi tharp says
Thanks for sharing the amazing gf recipes. Can’t wait to make! Stay safe and God Bless!!!!
Diane says
When I made mine there wasn’t juice to cover the veggies. I pushed the veggies down and there was liquid but not to cover them. What do you suggest?
Sarah says
You can either add some salted water, or wait a few hours (up to a day) for the veggies to release liquid, stamping them down often to help release the liquid more quickly.
Elisa says
Excellent recipe! I used fresh (new) garlic cloves instead of the dried ones. It was delicious. Thank you. Will try and find some white radish for the next batch instead of cabbage.
Victoria says
I couldn’t find the Korean pepper flakes, so subbed in red pepper flakes…..it came out PERFECT! Thank you for this awesome recipe!
Tammy Brinkley says
Where can I buy it already made Kimchee and noodles
Sarah Bond says
Kimchi can be found at most grocery stores in the refrigerator aisle! 😀
Zella says
Hi Sarah!
Love the recipe, but double checking something. I’ve read in a few places that sealing the jar shut will stop/ slow the fermentation process and could result in the jar shattering. I understand the ‘beltching’ is supposed to release the gases, but will having the lid on tight slow the process?
Thanks Z 🙂
Sarah Bond says
I like to keep the lid on to make it a little carbonated and bubbly, but burping should prevent explosions! You can also make it by putting a clean cloth over it and securing with a rubber band 😀
Andy says
Wow, this is so amazing. So fresh tasting and better than any supermarket bought alternatives.
I actually used some miso and fish sauce for a flavour packed Kimchi.
I also used hot paprika as didn’t have any Korean pepper
Sarah Bond says
YAY! I love adding fun new flavors like that – so much possibility. Enjoy!
Karen says
I am very used to kimchi as I grew up in a Japanese/hawaiian household. I usually buy in store. I just made your recipe but added some Asian pear since I had it. So far tastes delicious. Can’t believe my huge cabbage shrunk to 2 scant qt jars. Thanks for this easy recioe
Sarah Bond says
Isn’t it wild how much it shrinks?? Have fun!
Alex says
Hi Sarah, Can I use an immersion blender instead of a food processor?
Sarah Bond says
Yes that should work! 😀
Dee says
Some recipes say to cover the kimchi in the jar with a cabbage leaf and a tablespoon of salt, what does that do please,
Sarah Bond says
This would be to push down all the kimchi and prevent mold from growing! I haven’t found it to be necessary though.
VAnissa says
Hi Sarah, can I skip the sugar on the recipe? Thank you!
Sarah Bond says
The sugar here is actually to “feed” the yeast that make this fermentation happen! Which means you won’t actually be consuming it as it will mostly be gone by the time your kimchi is ready 😀
Holly says
Great recipe! Thank you. Looking at adding the liquid from a good quality s small container bought at a natural store so I make sure it ferments. I really like this recipe. This is a miracle food!
Jay says
Ms Sarah: This looks great and not burying it underground is much more convenient! .^_^.
* Your readers should keep in mind that worcester sauce frequently has anchovies / anchovy paste. Even many home-made recipes call for it.
* I have not tried this, but Olive Nation sells worcester POWDER, no anchovy. (They also sell gochugaru chili flakes, if anyone needs a source. Beautiful color!)
Can’t wait to try this.
Nancy Miller says
Thank you for this recipe! The Korean meal, kimchi, usually contains Korean radishes, Napa cabbage, and various flavors such as ginger, garlic, pepper, and fish sauce. Drying and salting are the oldest food conservation methodology’s most well-known practices. Likewise, the most common way of making kimchi includes tenderizing the vegetables to draw out the water.
Brant hendley says
The recipe said pour the brine off the cabbage…so now it’s gone. Then it said keep pressing it down in the juices in the jar. What juices..you have poured them off before putting in jar?
Sarah Bond says
That brine you pour off in the beginning is very salty so you don’t want that in the finished kimchi. As you add the remaining ingredients, the cabbage will continue to release water and the juices should come back!
Becky says
Hi I have tried to make kimchi before but it went mouldy, I’m looking at getting a fermentation jar with a book that is a beginner guide to fermentation and a couple of airtight boxes to store the kimchi in. Is it worth getting a weight to hold the kimchi submerged? I’ve seen someone on Instagram use one for making Chung. Thank you
Sarah Bond says
The weight is definitely worth it! Keeping the kimchi submerged will GREATLY help to prevent mold.
Clare says
Was disappointed with this recipe. I really wanted to react it as I’ve found one in a supermarket that I love but there’s a lot more liquid in it. This one was so dry.
Heidi says
The first couple of times I made kimchi it came out too dry. I just rotated the jar everyday to keep it all moist. It still came out great, without mold, just not enough juice. A lot of the juices come from fish sauce, which is a salty liquid. So now I add a quarter cup of water with a half tablespoon of non-iodized kosher salt because I use the juice in other recipes. I also don’t squeeze the extra water out of the cabbage before mixing and packing. You can certainly add more water, just keep in mind that you might want to add a tad more of the flavorful ingredients so that it doesn’t come out tasting weak, unless you like it mild. After mixing everything together, eat a small piece of cabbage to get an idea of what it will taste like and make sure everything is nice and wet before packing. Add more of whatever you want to your taste. Keep in mind that the flavors will get stronger and more sour during fermentation.
DENISE says
Can the kimchi be fermented in quart size plastic containers with screw on lids, or do they need to be glass jars?
Sarah Bond says
It should really be glass to prevent chemicals in the plastic from leaching into the kimchi (plastic is also porous and can house bacteria). Unless it’s specifically “brew safe plastic” then I would avoid it.
Jinju says
i have a question about your steps above:
First you said to DRAIN AND RINSE cabbage…squeezing out the excess water…
but then in step 3, say: while the cabbage is sitting in the brine… what is the brine if you drained and rinsed it?….
“When finished, drain and rinse the cabbage very well (until a torn-off piece no longer tastes overly salty). Squeeze out the excess water.
Step 3: Flavor it up
While cabbage is sitting in the brine,…”
Sarah Bond says
Hi Jinji! Thanks for pointing out the confusion. I meant that while the cabbage is sitting in the salt brine during that 2 hours, you can multi taask by making the paste. Then, when the cabbage is done brining and you have rinsed it, you’ll be ready to go for step 4!
Amy says
This Kimchi recipe is fantastic! I’ve used it as a guide for many months now. I do add 1/2 chopped onion to the ginger garlic blended mix and I omit the green onion and carrot, just my preference. I play around with it from time to time as well. I’m making it today and trying it with Miso paste since I have some on hand. I’ve added an apple pear before for added sweetness, that worked out beautifully. Thank you so much for helping a beginner learn how to make Kimchi. I’ve shared this recipe on your site to many other people that have tried my Kimchi and loved it.
Sarah Bond says
I’m so happy to hear this, Amy!! Those modifications sound amazing – nice to see you making it your own! 😀
Aisha Abshir says
thank you for the amazing recipe
Chuck Morlan says
Great recipe! It never fails. Thank you!
Sarah Bond says
So happy to hear it, Chuck! Enjoy! 😀
Jane hill says
Hi, I made this recipe last Saturday and after a couple of days it started to bubble slowly but now there are no more bubbles so I assume it has used up the sugar and can’t ferment any more? Should I assume it’s done and put it in the fridge now? I got the impression it would keep on fermenting until you put it in the fridge but mine gas stopped. It is day 9 now!! Thanks Jane x
Sarah Bond says
The best test is to taste it! When it has that nice tangy flavor, it’s ready 😀
Amy says
So good and authentic flavor!
Julia Borisenko says
I made this recipe and loved it !