
This post contains affiliate links.

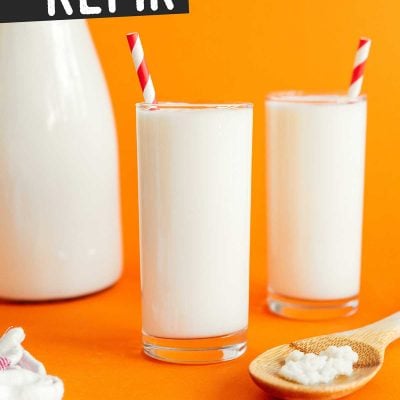

We’re breaking down the basics of how to make homemade milk kefir, a probiotic-rich fermented drink that’s soon to be a staple in your kitchen! This easy fermentation project is incredibly simple and produces perfectly creamy kefir in about 24 hours.

After having delicious success with home brewing kombucha, I got to thinking about what other tasty fermented things we could brew up at home. And over the course of a day I went from not having a clue how kefir worked to biking across town to buy my very first kefir grains from a passionate home brewer.
I spent the next few weeks getting to know my new kefir baby. Our relationship was first one of fear. When I wasn’t scared of killing it, I was scared of drinking it. But after a few weeks, I started to get the hang of what it needed (and it started to turn out some delicious kefir!).
So years later, after fermenting hundreds of batches of kefir at home, I’m excited to share with you the secrets to seriously delicious, creamy, homemade kefir. Click the links below to jump around the post, or scroll on to dive into the world of homemade kefir!
- What is kefir 🥛
- Kefir grains (and where to get them) 🧐
- Best milk for kefir 🐮
- Step-by-step instructions 📝
- Kefir FAQ 👩🏫
Reader rating
“Thank you for your directions. I am new and hooked on making Kefir, both water and milk. The milk Kefir is so delicious and simple. My grains keep multiplying and can produce a quart in less than 24 hours.” —Barbara

Okay, so What is kefir?
For the unfamiliar, kefir is a thick, fermented milk drink. It tastes a bit like plain Greek yogurt – slightly sour and ultra-creamy. But even more so than most types of yogurt, kefir is jam-packed with all kinds of gut-friendly probiotics!

What are kefir grains?
To start off this kef-venture, you’ll need to get your hands on some kefir grains. Kefir “grains” are the engine of this whole process, containing all the yeasts and bacteria needed to ferment the milk into creamy kefir. (The gluten-free folks don’t need to worry – these aren’t true grains, but rather rubbery, cellular structures).
They’re like what the SCOBY is to kombucha, only instead of looking like alien pancakes they look like cauliflower! But unlike kombucha, you cannot grow your own kefir grains and will need to acquire them somewhere.
Finding The grains
Unless you have a friend who makes kefir, it’s easiest to get your grains online (you can find them on Amazon here or check your local Facebook marketplace). Once you have your kefir grains, you won’t have to buy them again. They will grow and continue to ferment many batches of kefir.

The best milk for making kefir
The only other ingredient besides kefir grains in this recipe is the milk! You’ll want to use pasteurized milk to start, but can switch to raw milk slowly after a few weeks of getting your kefir grains used to their new environment.
In terms of fat level, the grains will be a lot happier in whole milk, though you can slowly transition to a lower-fat option over time.
And finally, though you can use cow’s or goat’s milk, though I’ve only had experience with whole cow’s milk for making kefir.
Be sure to try our other fermentation projects, like kimchi, Greek yogurt, tepache, and kombucha!

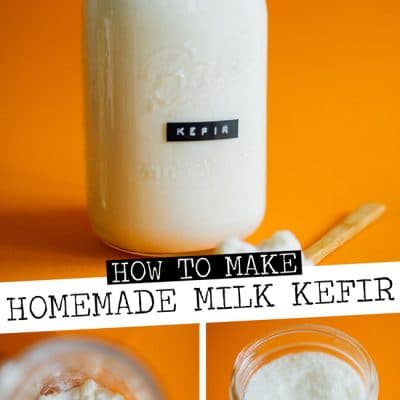
How To Make Milk Kefir (Easy Tutorial!)
Ingredients
- 1 Tbsp kefir grains
- 4 cups whole cow’s milk, 960 mL
Instructions
- Clean: Clean everything well with regular soap (avoid antimicrobial soaps). I’m talking the hands, glass jugs, spoons – everything!
- Assemble: Add 1 Tbsp (ish) of the kefir grains and 4 cups of whole milk to a large glass jug. Cover the jug with either a few layers of paper towels or a few paper coffee filters. Secure with a rubber band to prevent any bugs or dust from getting in.
- Ferment: Set in a warm, dark spot (65 to 85°F / 18 to 29°C) for about 24 hours. You’ll know your kefir is done when it has slightly thickened and smells fermented. If you kefir has separated into yellowish watery-looking whey, that’s fine! It’s just a sign that you can either reduce the length of fermentation next time or use more milk next time.
- Strain: Place a wide non-metal* bowl under a fine-mesh non-metal colander. Pour your finished kefir into the colander, stirring with a plastic or wooden spoon to gently force kefir through. The grains will be left.
- Start new batch: Rinse out the large jar that you fermented the grains in, then add the grains back into it. Add 4 cups of fresh milk to start the process over.
- Store fresh kefir: Transfer the finished kefir that collected in the wide bowl and transfer it to a sealable jar. Store in the fridge for around 2 weeks.
Notes
Nutrition
Nutrition information calculated by Sarah Bond, degreed nutritionist.
kefir Commonly Asked Questions
How do I take a break from making kefir? Give your kefir grains fresh milk, cover with paper towels or coffee filters as described, then set in the refrigerator. This dramatically slows down the fermentation process, so you will only have to change out the milk every 1 to 2 weeks (or when you see the milk separating into layers).
Why did my kefir form a yellowish watery layer on the bottom? This is normal! When the milk separates into layers, it’s a sign that the kefir as “eaten” everything it can. You can prevent it by either reducing the time you let it ferment (ex: 18 hours instead of 24), or by giving it more milk. It depends on your grains, house temperature, and milk, so don’t worry if it takes a few batches to understand how your kefir will brew best.
Why do I have to use non-metal everything? Metals can hurt the microbial wonderland that is kefir. Avoid contact of the kefir with metal where possible (and definitely don’t brew the kefir in a metal vessel).
What are the health benefits of kefir? As with other fermentations, kefir is full of probiotics which promote good digestion and a healthy gut. The fermentation also breaks down a lot of the lactose in the milk, meaning kefir may be more easily digested than other dairy products for people with lactose intolerance.
Is milk kefir the same as water kefir? Milk and water kefir are two different types of fermentations, using different ingredients and different kefir grains. You cannot use milk kefir grains to make water kefir.
Can you flavor kefir? Yes! 1 cup of kefir can be flavored by blending in fresh fruit (¼ cup), chocolate (1 Tbsp cocoa powder), vanilla (¼ tsp vanilla extract), or dates (1 pitted date).


Hi
I think this may have been answered, the Kefir seeds, how do you store them if you like go away for the weekend and unable to use them ? and how long do you keep reusing them fore ?
New to this but keen to give it a go 🙂 we have access to Kefir Grains.
Thanks !
So exciting that you’re giving kefir a go! For a short break like a weekend, just pop your grains in a jar with fresh milk, put a tight lid on it, and store in the fridge. They’ll be happy for up to 3 weeks that way. As for how long you can keep reusing them, kefir grains can last indefinitely with proper care. As long as you’re feeding them regularly and they’re culturing well, they’ll keep going!
Going to get my supplies to get started making Kefir for the first time.
can the Kefir grains be reused indefinitely with proper care.
Thank you , I like your website, Lowell
Yes, you can reuse the grains virtually forever as long as they are properly cared for. Happy brewing!