
This post contains affiliate links.
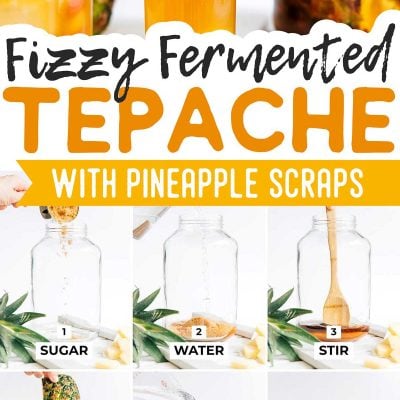
This foolproof guide will teach you how to make pineapple tepache, a fizzy fermented Mexican drink made from just 3 ingredients!
This pineapple tepache is the result of countless test batches and fine-tuning—and trust me, this is the only recipe you need!
Here’s how it works: Yeast lives virtually everywhere, and it can be harnessed to make tasty things! Yeast on flour makes sourdough, yeast on tea makes kombucha, and yeast on pineapple skin makes…tepache!
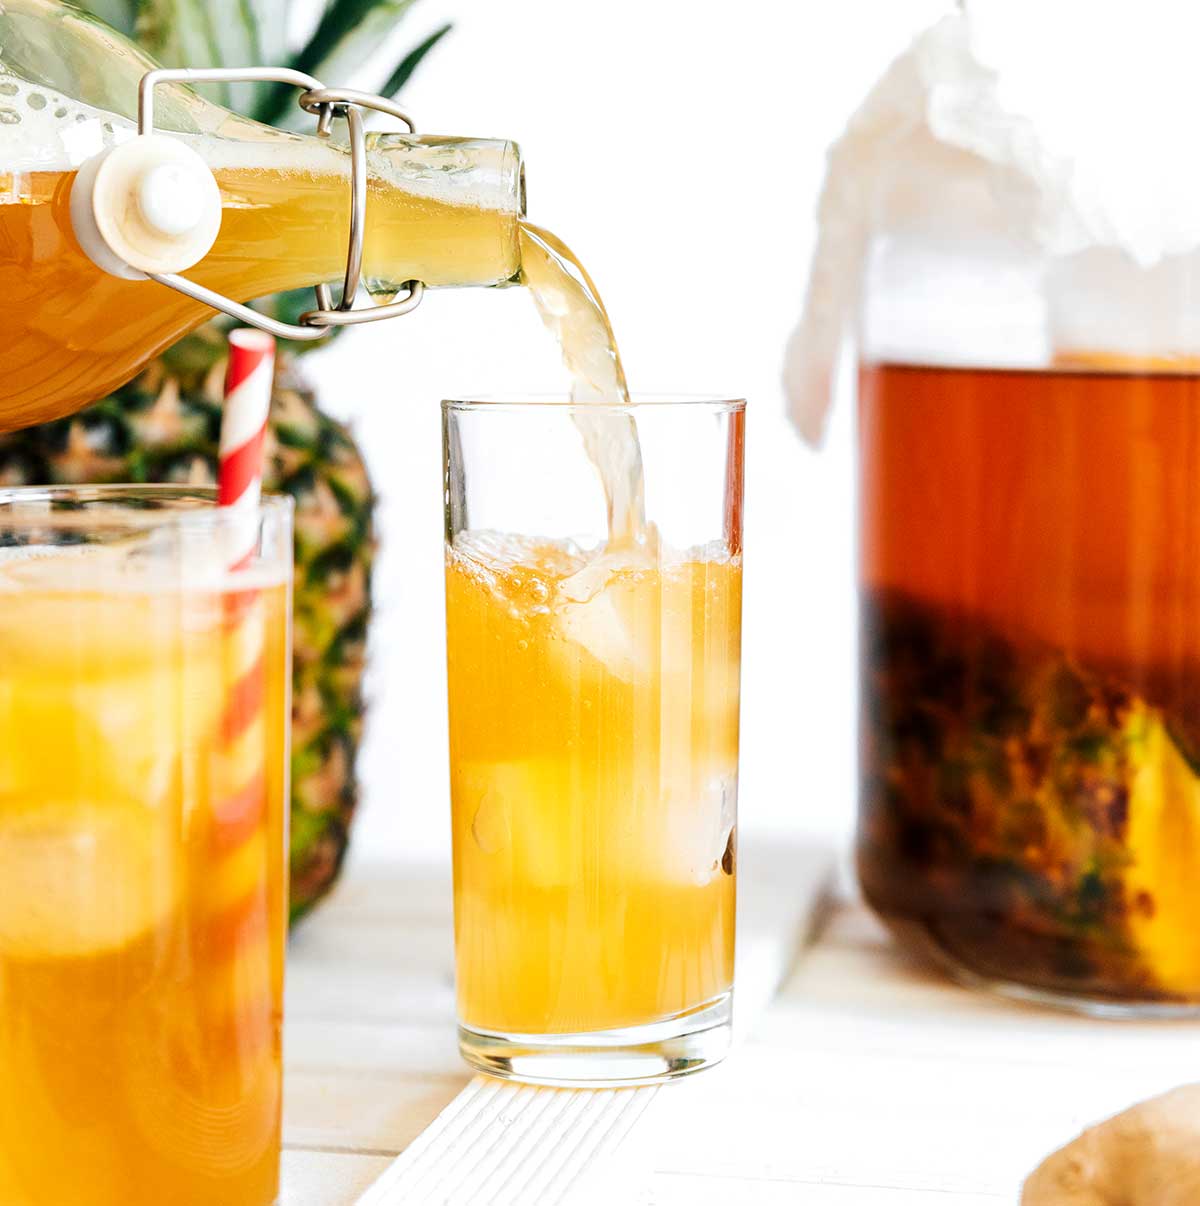
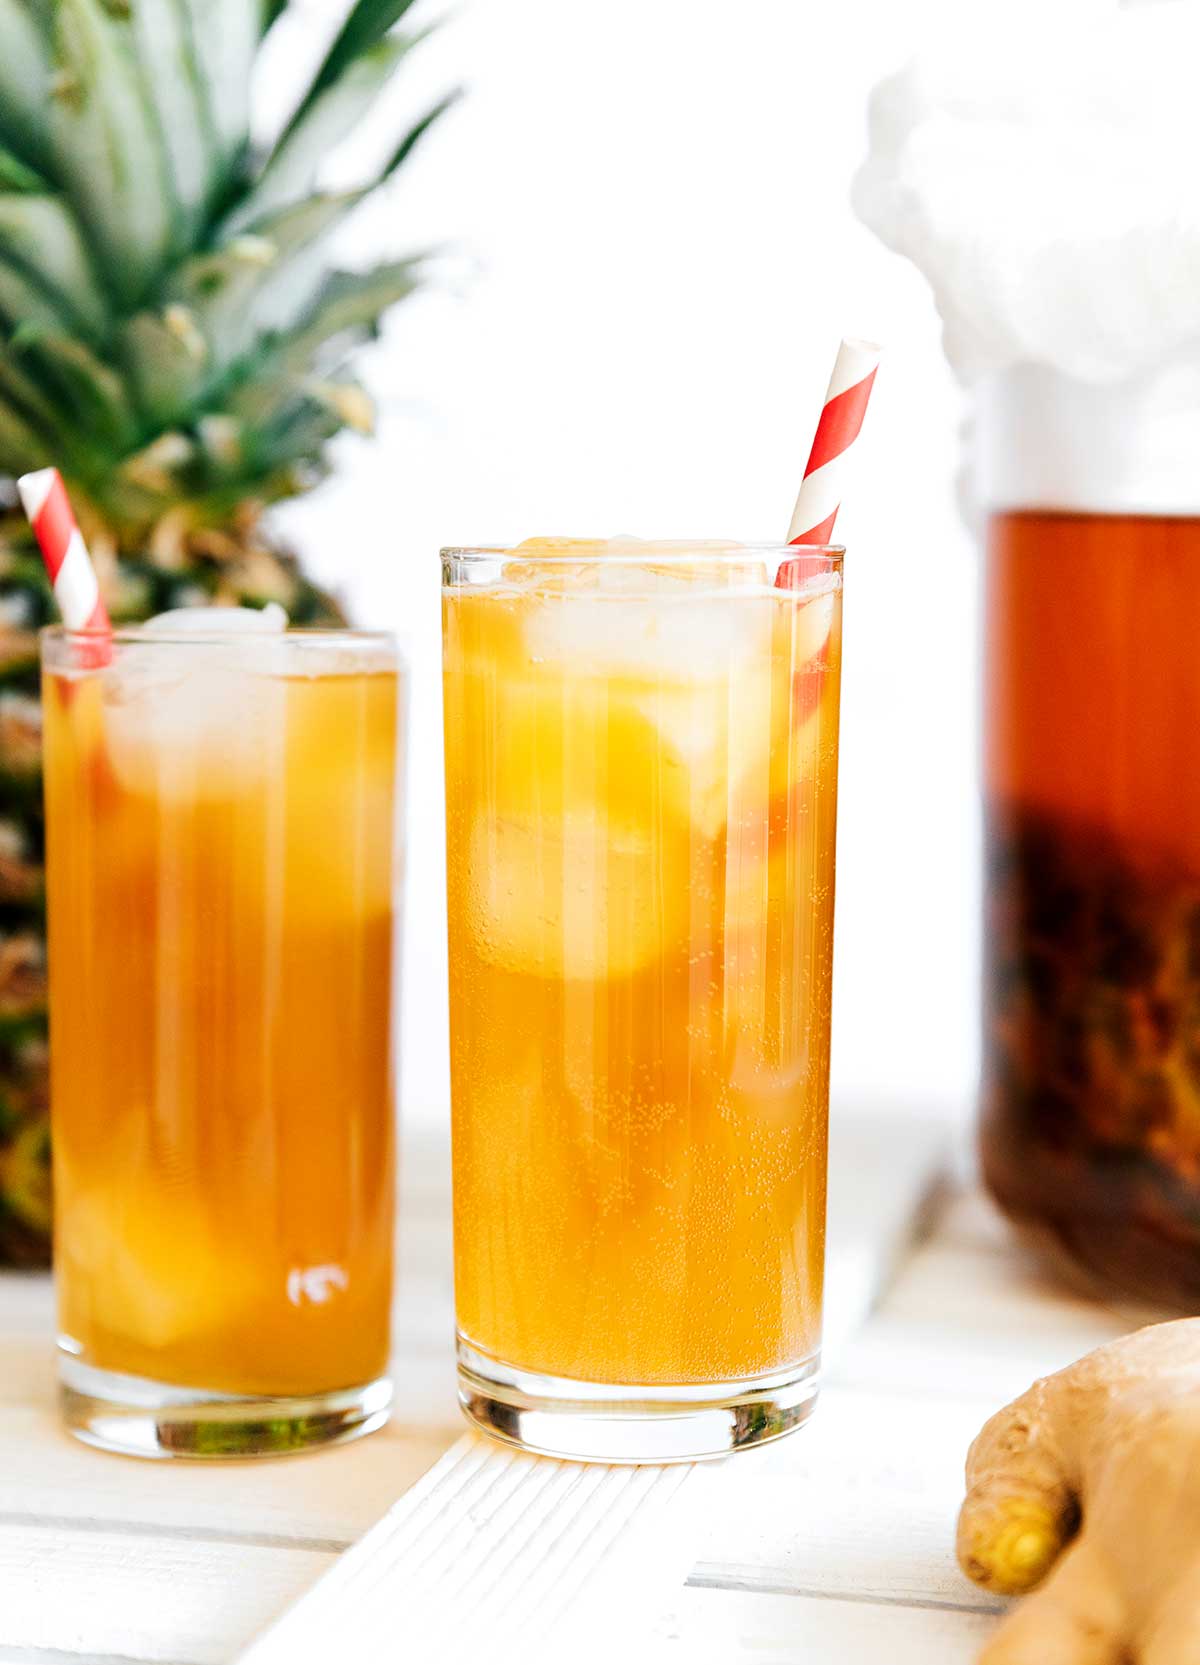
Simply feed it what it loves (sugar) to create both flavor and carbonation. Once brewed, tepache ranges from cider-like and sweet to more yeasty-like. Basically, the result is a delicious fermented pineapple drink that falls somewhere between soda, kombucha, and beer.
Reader rating
Tepache Ingredients
Jump to the recipe card for all the measurements. This is just an overview!
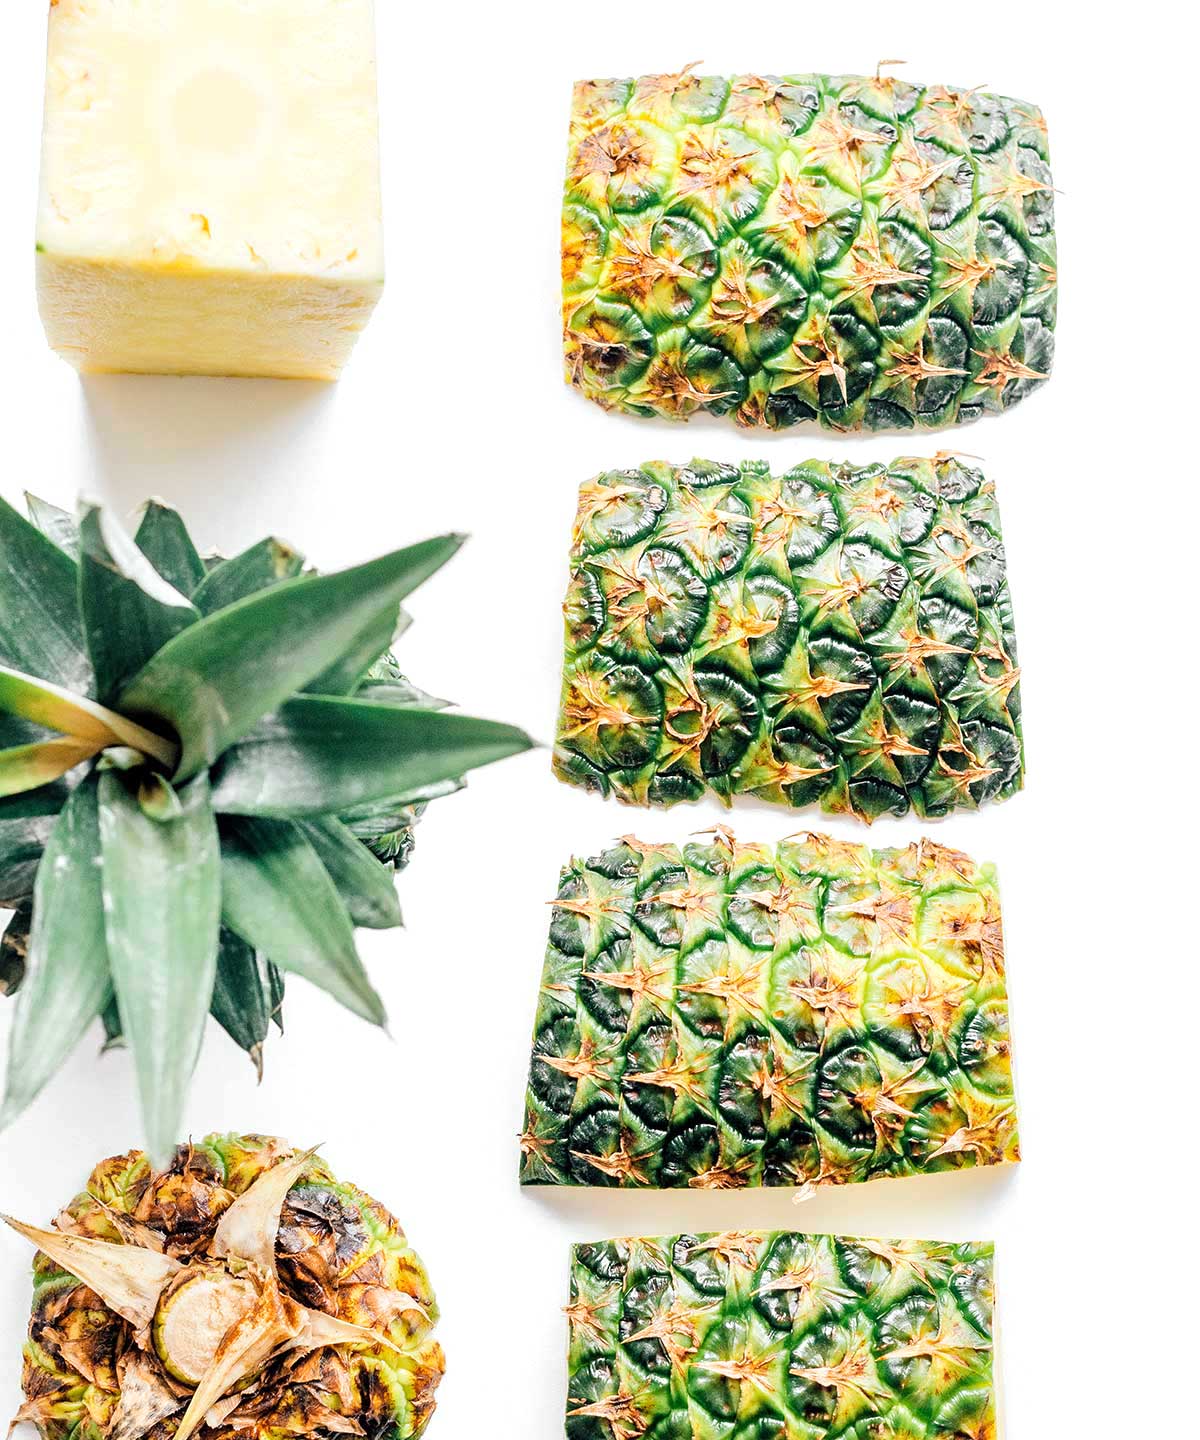
- Pineapple Peel: Since we’re using the peel, aim for an organic pineapple. Pineapples are a pesticide-intensive crop, and you don’t want that in your tepache!
- Sugar: Use either piloncillo (the traditional Mexican sugar) or light brown sugar.
- Water: No need to overcomplicate things – tap water is just fine here!
Tepache Contains Alcohol
Tepache has an alcohol content of about 2% ABV, though this can be less if you let it ferment for a shorter time or more if you let it go longer or are in a warmer climate.
Watch The Pressure
Please note that carbonating tepache does involve pressure buildup inside the bottles, which is why I recommend bottles specifically made for fermentation. As with any second fermentation, there is a risk of bottles exploding, so check on your bottles regularly and move them to the refrigerator when done.
Flavor Variations
Since pineapple tepache is so unbelievably versatile, you can make it your own by adding more flavors to the brew! Here are some ideas:
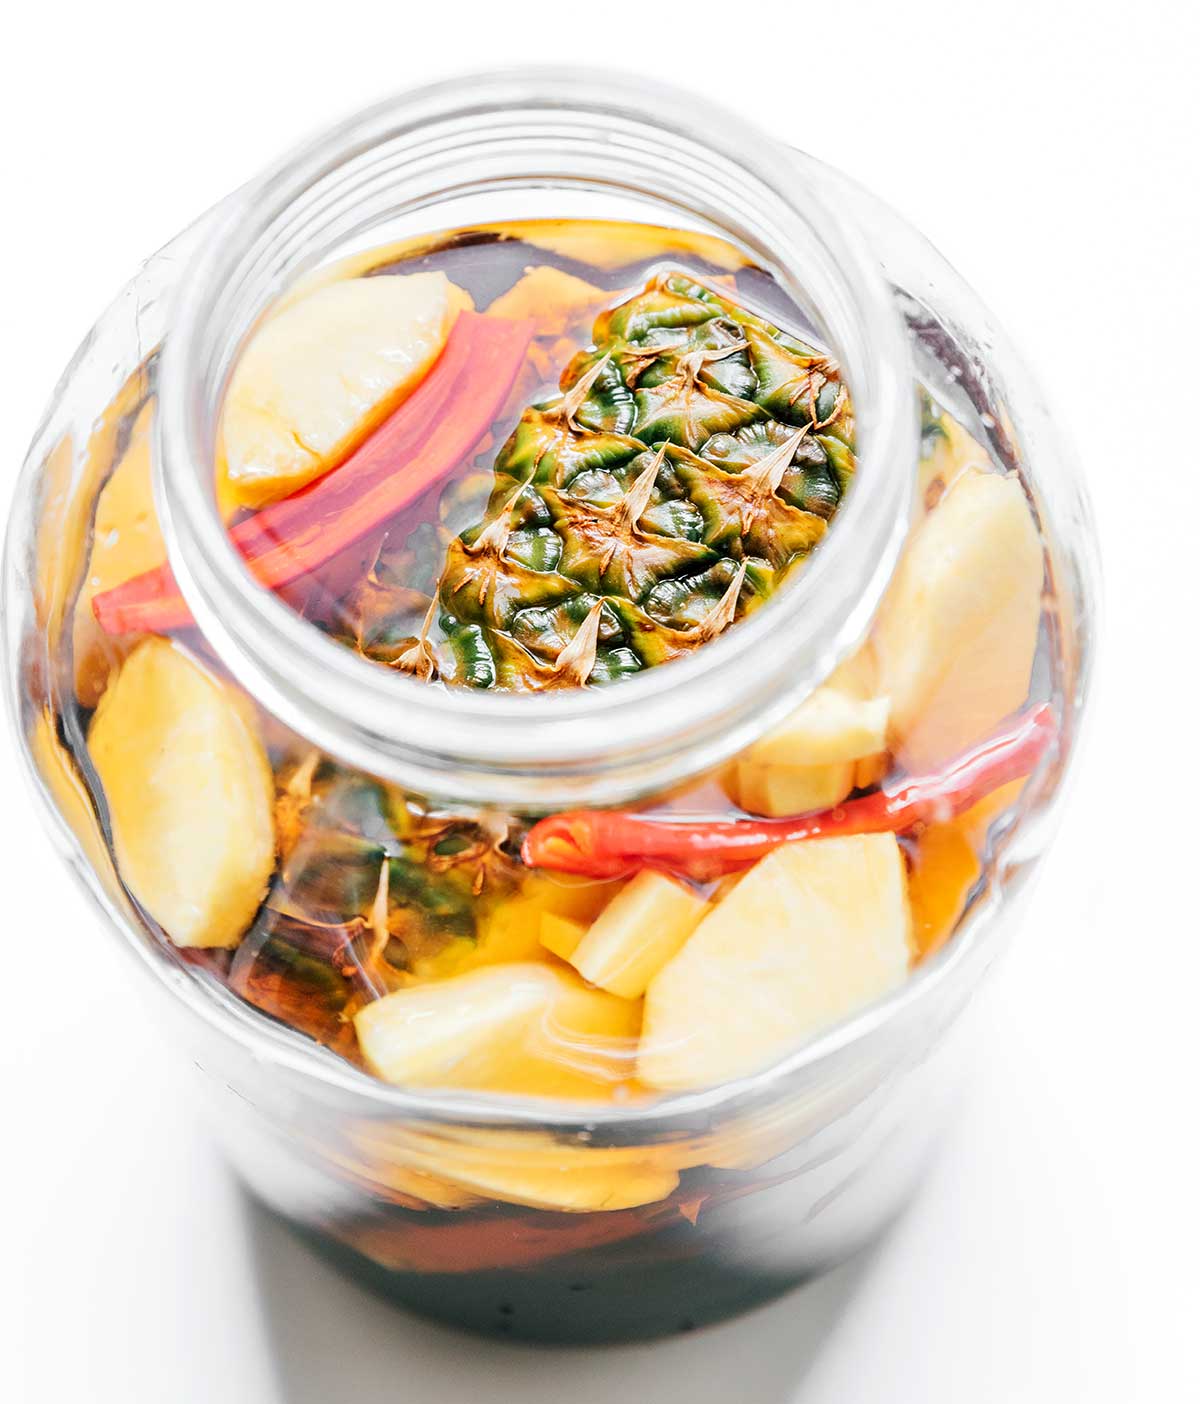
To the first fermentation, add 2 thumbs of fresh sliced ginger (highly recommend), whole cloves, cinnamon sticks, chilis, pineapple flesh, or even diced mango. Just be sure all ingredients are fully submerged to prevent mold.
To the second fermentation, you can add virtually any fruit juice or fruit puree. Get some ideas from our kombucha flavors!
Why isn’t my tepache bubbling?
If your tepache isn’t bubbly, it is likely because the yeast isn’t working well. This could be because you washed or submerged the pineapple in hot water (which would kill the yeast) or because your pineapple wasn’t ripe enough (meaning there wasn’t much yeast on it to begin with). If your tepache does not bubble in the first fermentation, consider starting over. If it did bubble in the first but not in the second fermentation, add a little sugar or juice to the bottles to give the yeast something to eat.

Foolproof Pineapple Tepache (Step-By-Step)
Ingredients
- 1 ripe pineapple
- 1 cup light brown sugar, 200 g, or 1 large cone piloncillo
- 8 cups water, 1.9 L
- Optional: 2 thumbs sliced fresh ginger, ½ red chili, 1 cinnamon stick, 3 whole cloves
Instructions
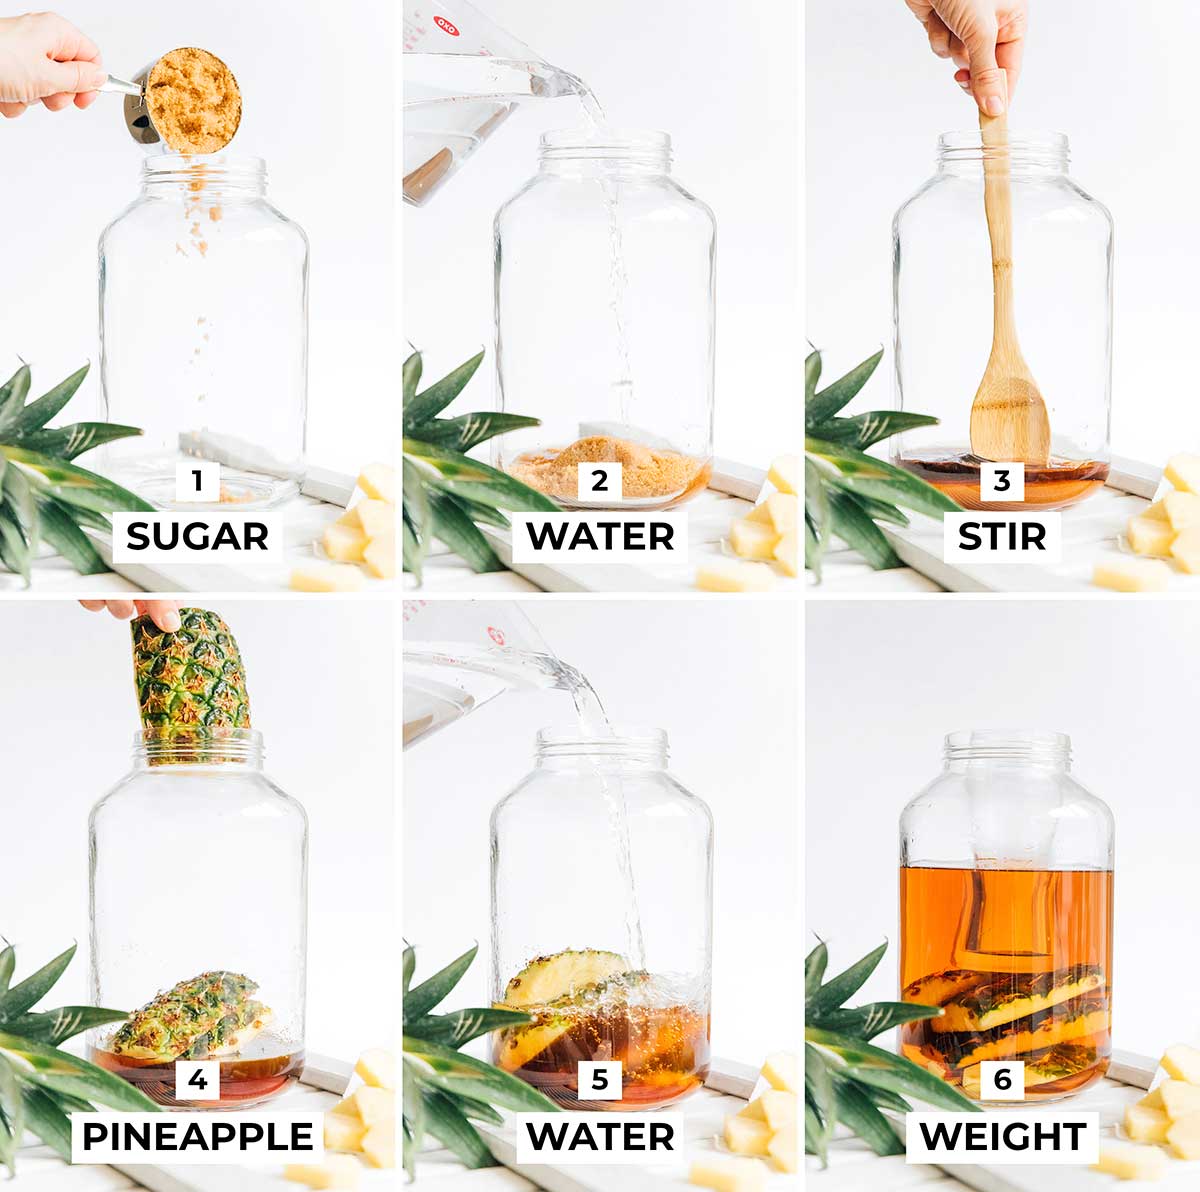
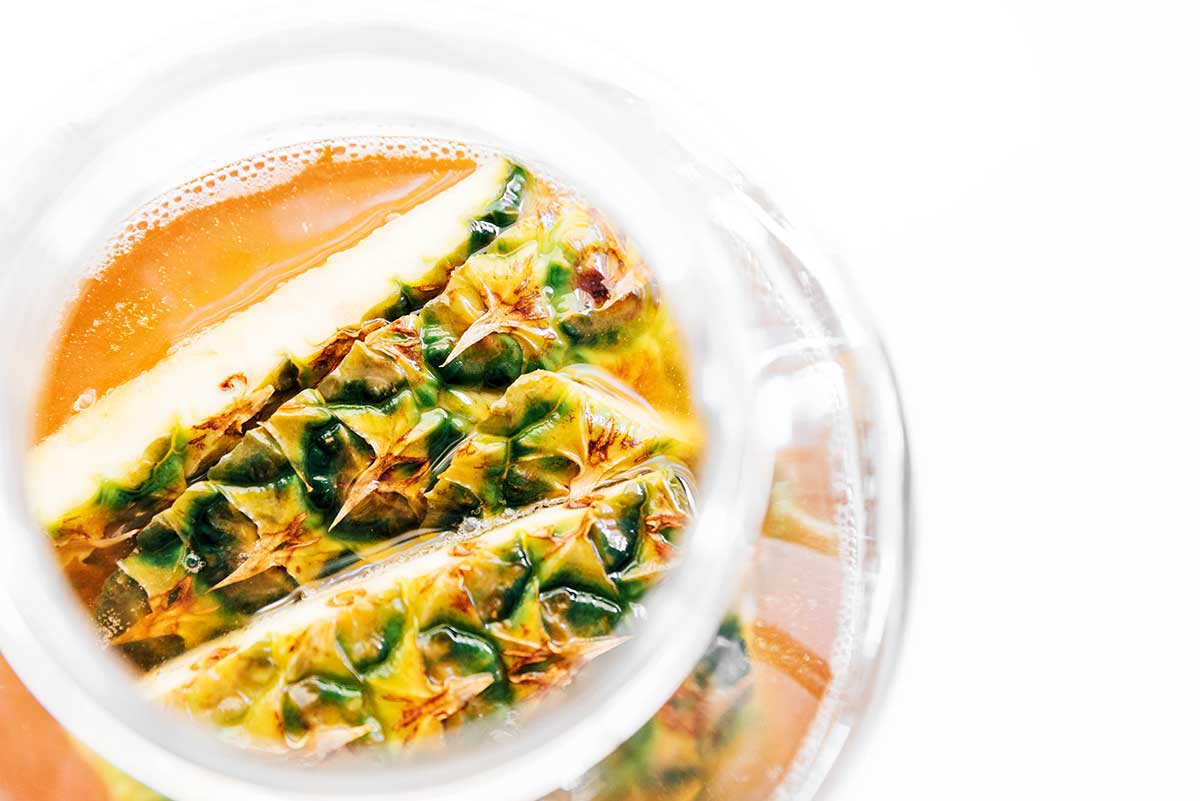
- Cut: Remove the crown and base of the pineapple, then rinse the body of the pineapple with cool tap water to remove potential pests or dirt. Cut the peel from the pineapple in big chunks, leaving about ½ inch of the pineapple flesh on the peel.

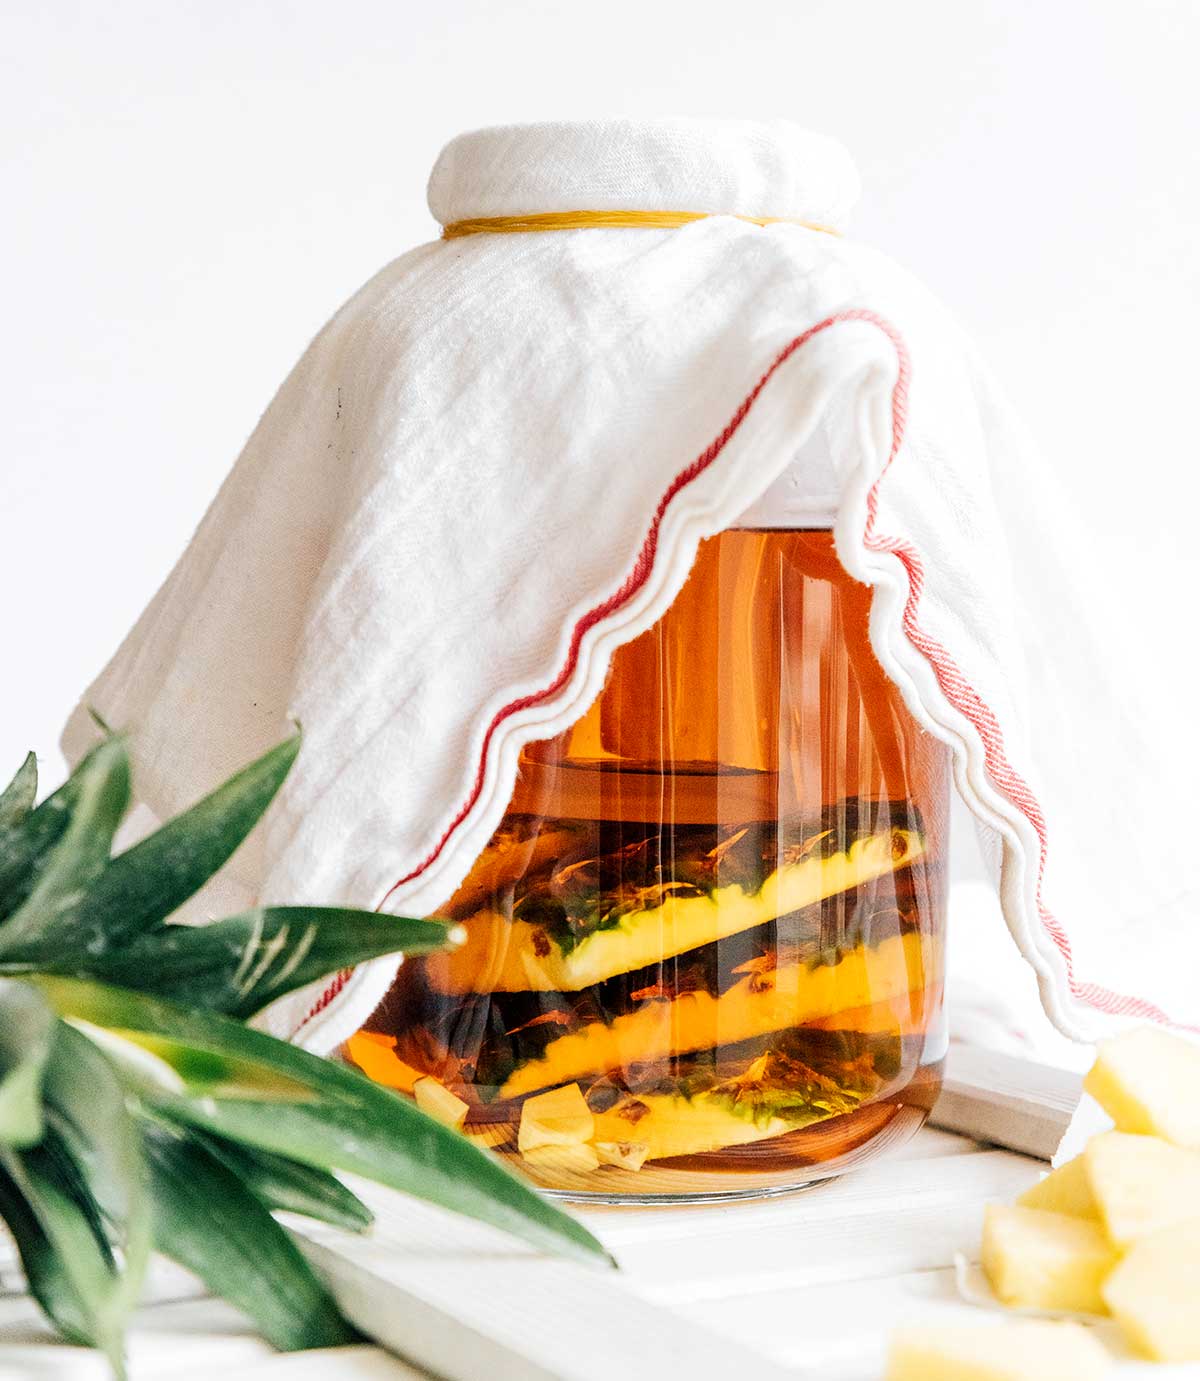
- Assemble: Add sugar (or piloncillo) and 1 cup of the water to a clean, large glass or ceramic jar, stirring well to dissolve sugar. Add optional flavors and cover with pineapple rinds, then add remaining water. Submerge all ingredients in the liquid to prevent mold by weighing it down using either a glass, ladle spoon, or fermentation weight.

- Ferment: Cover with a clean dish towel or a few layers of paper towels, then secure with a rubber band. Set somewhere dark and room temperature (ideally 75-80°F, 24-26°C), letting it ferment for 1 to 3 days.

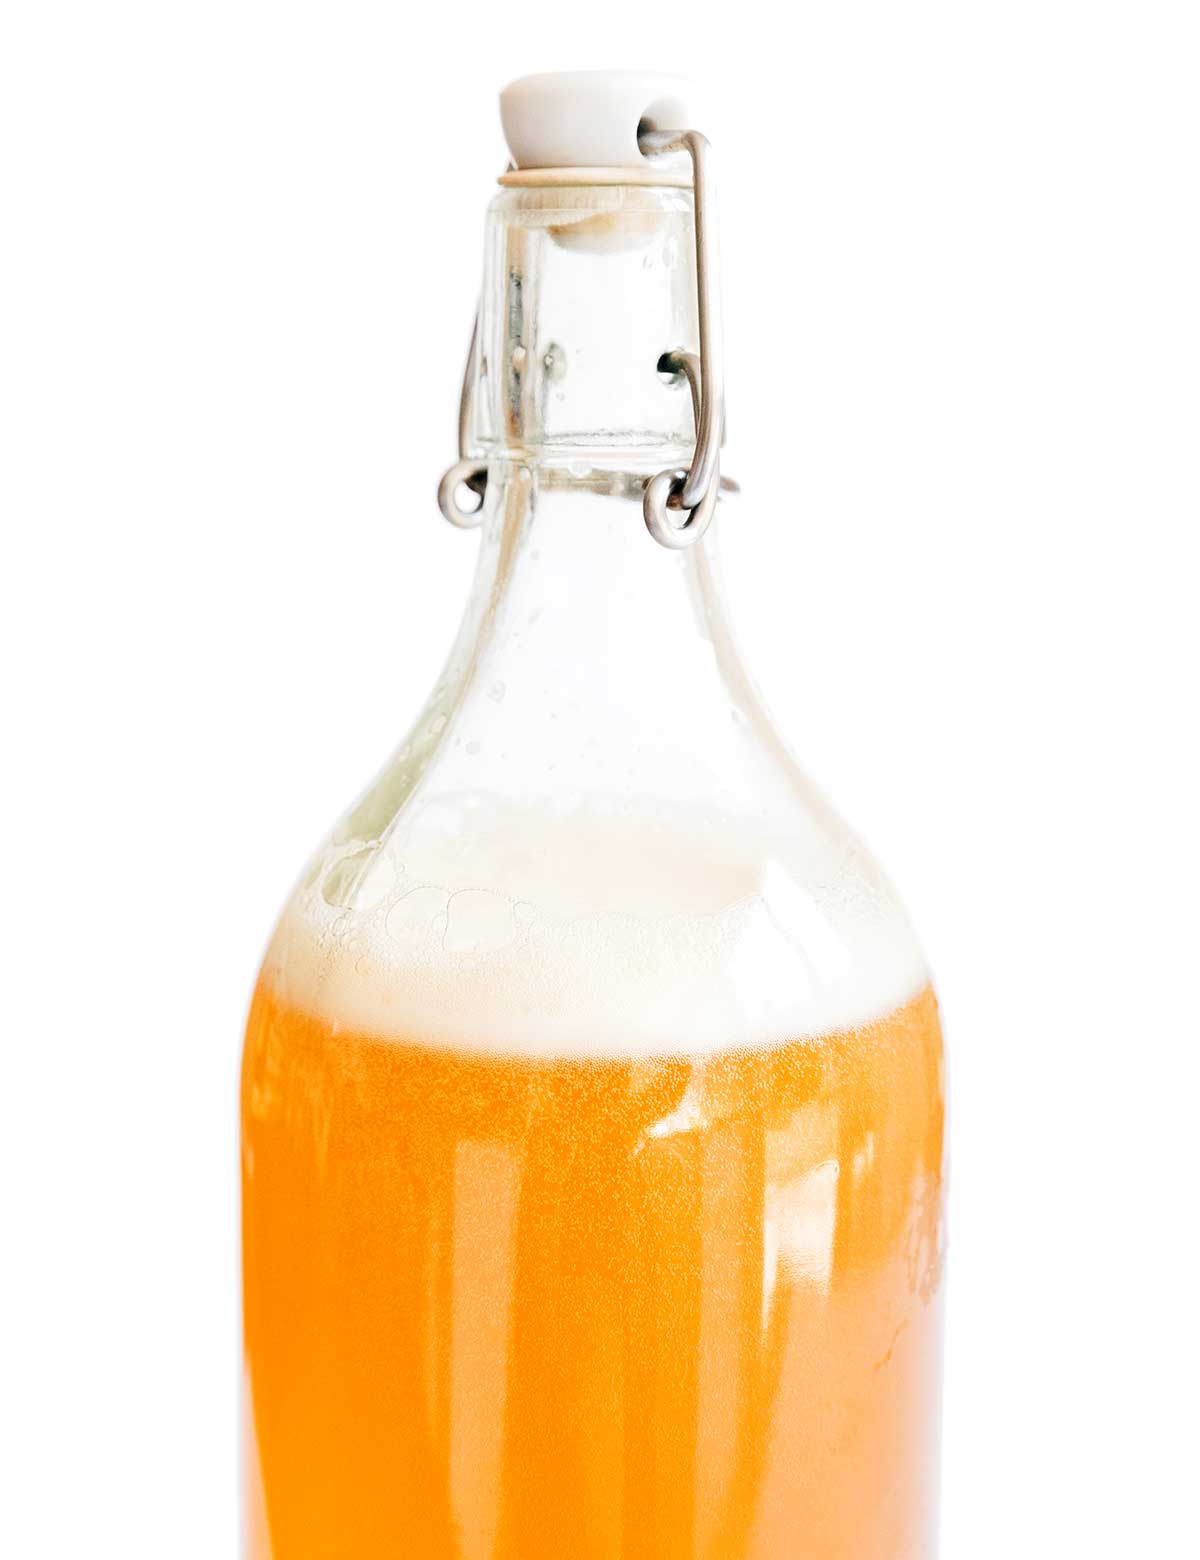
- Drink or Bottle: The tepache is finished when you see many small bubbles on top and it tastes how you want it to (test by drawing some out with a paper straw, using your finger to keep the tepache in the straw). Either refrigerate and drink the tepache as is, or carbonate it in the second fermentation.
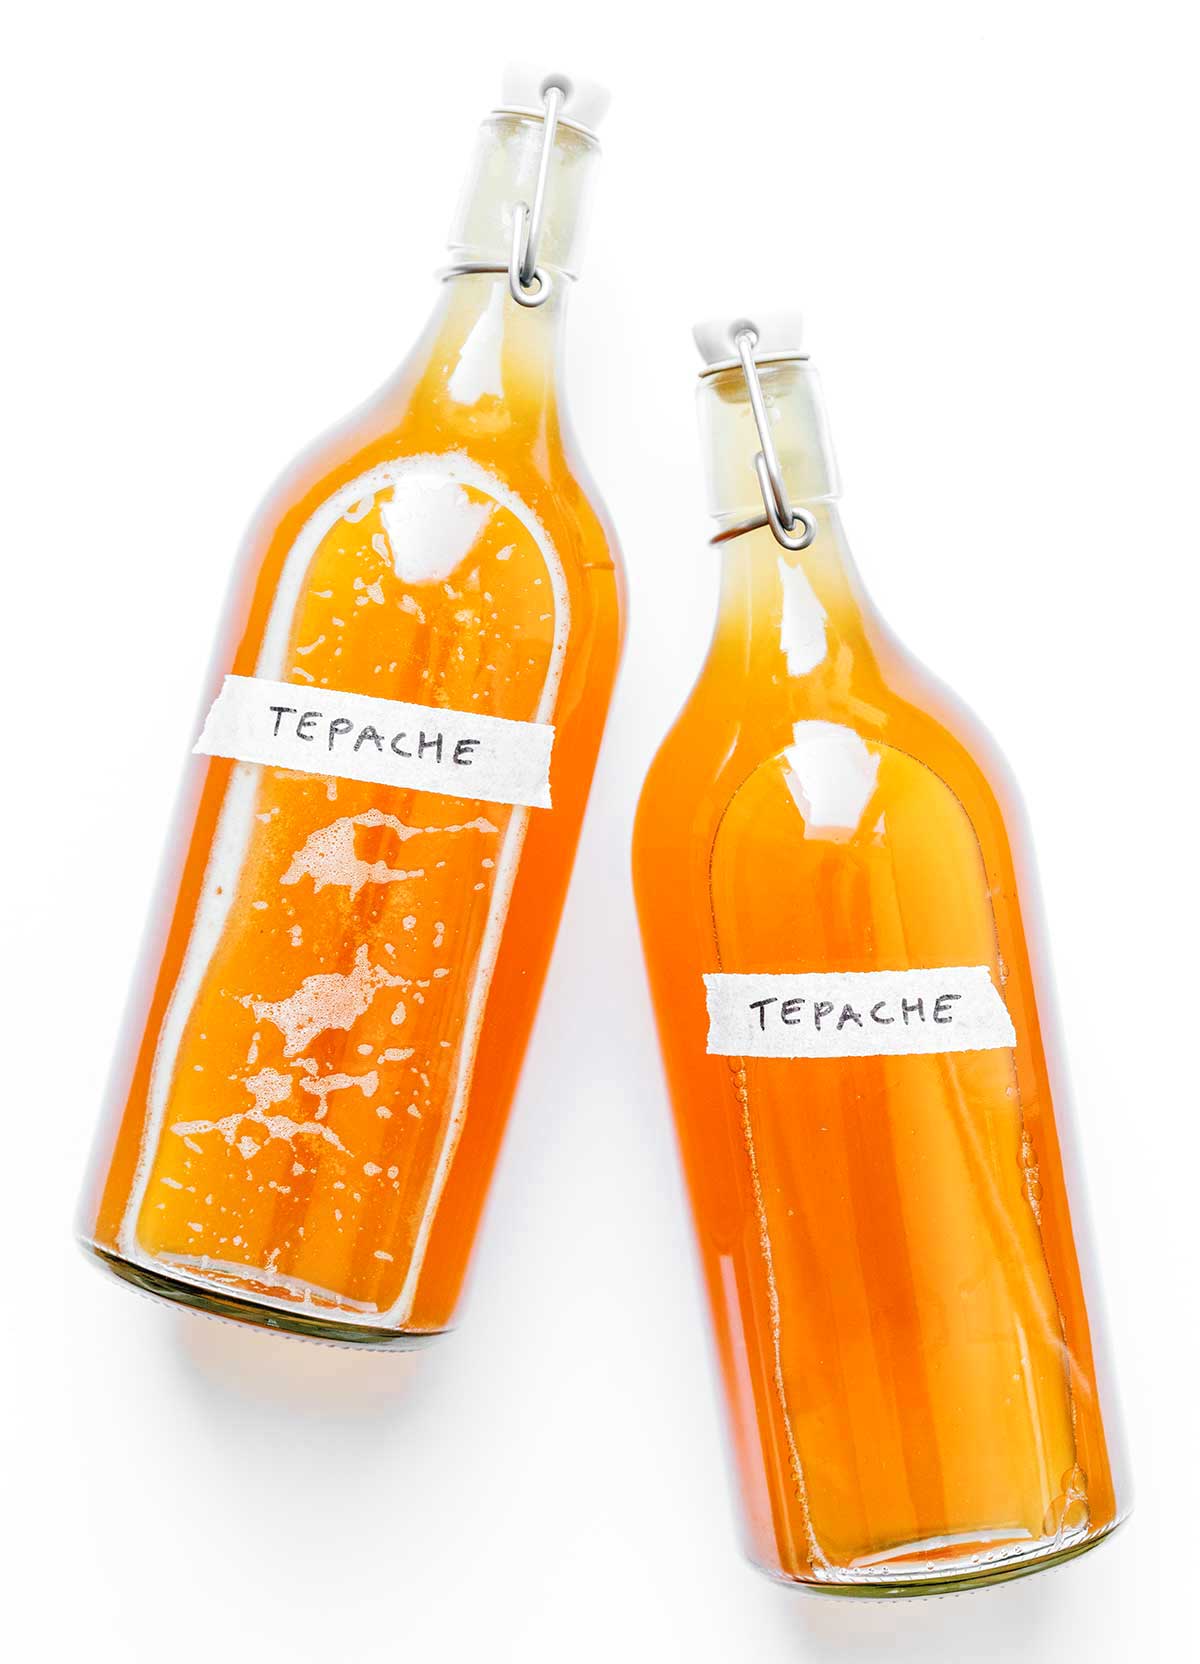
- Second Fermentation (Optional): Funnel the liquid into fermentation-grade bottles, leaving about 2 inches free at the top of each bottle. Set somewhere room temperature and dark, then allow it to ferment for another 1 to 3 days. After 24 hours, pop open a bottle to see how carbonated it has become and to gauge how much longer they will need. When the tepache has reached a carbonation level that you like, transfer the bottles to the refrigerator to stop the fermentation.

Notes
Nutrition
Nutrition information calculated by Sarah Bond, degreed nutritionist.


My first batch of tepache was so easy and so good! It’s summertime so I feel like fermentation works better now. I did the second fermentation for a couple more days and the carbonation was strong. I open bottles over a large plastic bowl, so when it bubbles over, I lose nothing. Love this !
Yay! I’m so happy to hear it, Cynthia! 😀
Reading on pineapple prep, rinse cold
I usually soak my fruits and veges in a mix of baking soda vinegar and h2o
does this ruin the yeast needed for fermentation.
Thanks
I would skip that for this recipe just to ensure the yeast don’t get hurt!
Love the recipe l would like to try it out
Just put my Tepache in for a second ferment with additional pineapple and a couple bottles with cherries. How do I reuse my pineapple rinds. I just cleaned my glass jar and I rinsed off each piece of pineapple and rind and letting them drain.
You can usually get one more fermentation out of them! Just restart as if they were new peels 🙂
I have piloncillo on hand that has potassium sorbate added to it. Will this still work or will that stop fermentation from happening? Thanks!
Hi Derek! Potassium sorbate inhibits yeast, so it can slow or stop a tepache ferment. If you want a foolproof fermentation, use preservative-free piloncillo or add yeast to give your wild microbes a better chance. You can still try it, though—sometimes the amount of sorbate is low enough that fermentation still happens.
I can around 30 pineapples a year, so I was thrilled to find a healthy way to use some of the cores and peel. I did the first step but never saw any bubbling. So, I waited another day, and another day, then forgot them for a couple days, still no bubbles. I went to throw them out and found all the bubbles when I took off the paper towel tops! I didn’t notice any mold, though getting close, so I strained the liquid into the bottles, and it is a little cloudy. I think I made booze. I only left them out a couple hours and decided to move them to the fridge. I’m not sure what to do with them now?? Are they safe to use, and use for what??
I put the extra cores and peels in the freezer so I could make more if I liked it.
That mild cloudiness and bubbles mean some fermentation (and likely a bit of alcohol) did happen! As long as it smells pleasantly fruity and not funky or rotten, it’s likely safe to drink. You can sip it chilled, use it as a cocktail mixer, or dilute it with sparkling water.
I am pleased with the results; this recipe is easy.
I did a second fermentation adding fresh pineapple; good choice. I think I will add ginger before drinking and next time I’ll add it in the beginning.
Thanks!!!
Thrilled you loved it, thanks for the review!
Hello. Your thoughts of inserting a strained F2 with a heated vented sugar/yeast after F1 to increase ABV? Curious if similar in ratio as hard kombucha with water/yeast/sugar in that F2. Thanks!
I haven’t tested that here, but I think it’s worth experimenting with! I would love to hear how it goes. Happy brewing!
I made tepache but not sure if it turned out OK. It has some whitish stuff on top. Doesn’t look or smell moldy. Isn’t blue or black. Looks kind of like a thin cheesey film. Is this normal and safe to drink.? I strained it and put in Mason jars in fridge.
Good news, that thin white film is totally normal! It’s kahm yeast, a harmless byproduct of wild fermentation. As long as it’s white or off-white, not fuzzy, and doesn’t smell off, you’re good to go. Sounds like your tepache turned out great!
Thank you!! I’ll have a glass today. It tasted good when I tried a sip. Will be doing more when I get pineapples. No waste, which is great.