
This post contains affiliate links.

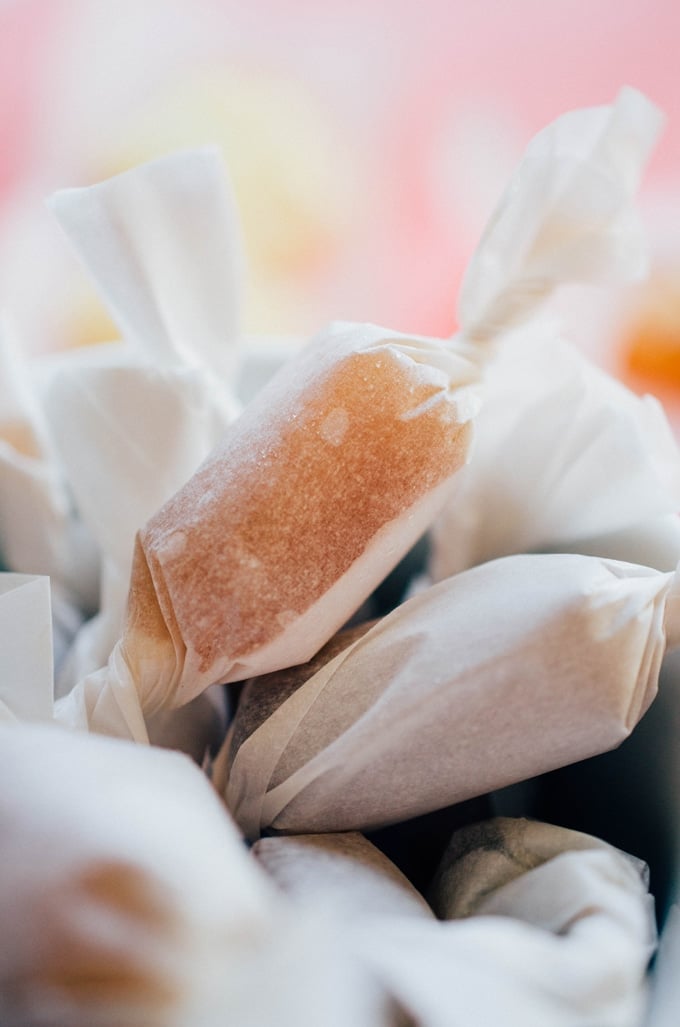
This caramelized kombucha SCOBY candy is a guaranteed hit for any kombucha lover! Its unique, chewy texture and caramelized flavor make for a surprisingly tasty, waste-free treat—perfect for using up those extra “mothers” and enjoying every last bit of your brew!
Your New Favorite Candy
Alright, stay with me for a second (I know that’s not the most comforting opener for a recipe, but open your mind for this one). For all my fellow sugar addicts, we’re diving into the deliciously weird world of kombucha SCOBY candy today (a.k.a. kombucha mothers, so… sugar mamas!).
If you’re already brewing your own homemade kombucha, chances are you’re probably open to trying unconventional eats. And honestly? These candies are worth it. They’re soft and chewy with just a hint of that kombucha tang and a perfect caramelized bite.
And while we wouldn’t call them “healthy” by any means (hello, sugar, and see ya later, probiotics!), they’re a fun, waste-free way to put that alien-like “mother” floating on top of your brew to good use.
Reader rating
“I made these, and they are so delicious! They taste just like gummy candies!” —Cait
You Only Need 3 Ingredients
You don’t need much to transform a SCOBY into some mouthwateringly delicious candies! This is just an overview—jump to the recipe card for exact measurements.
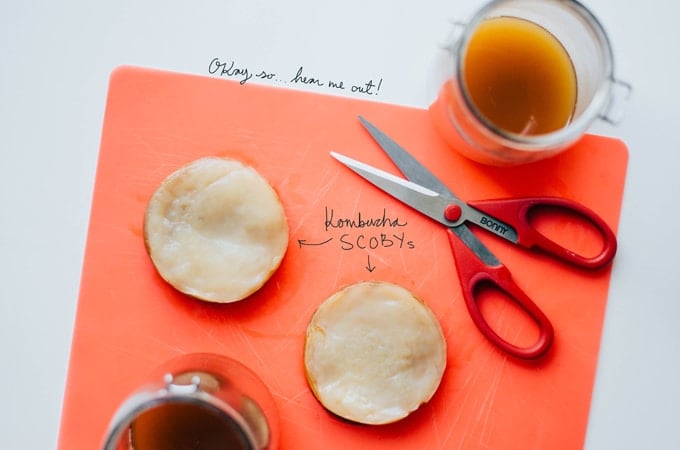
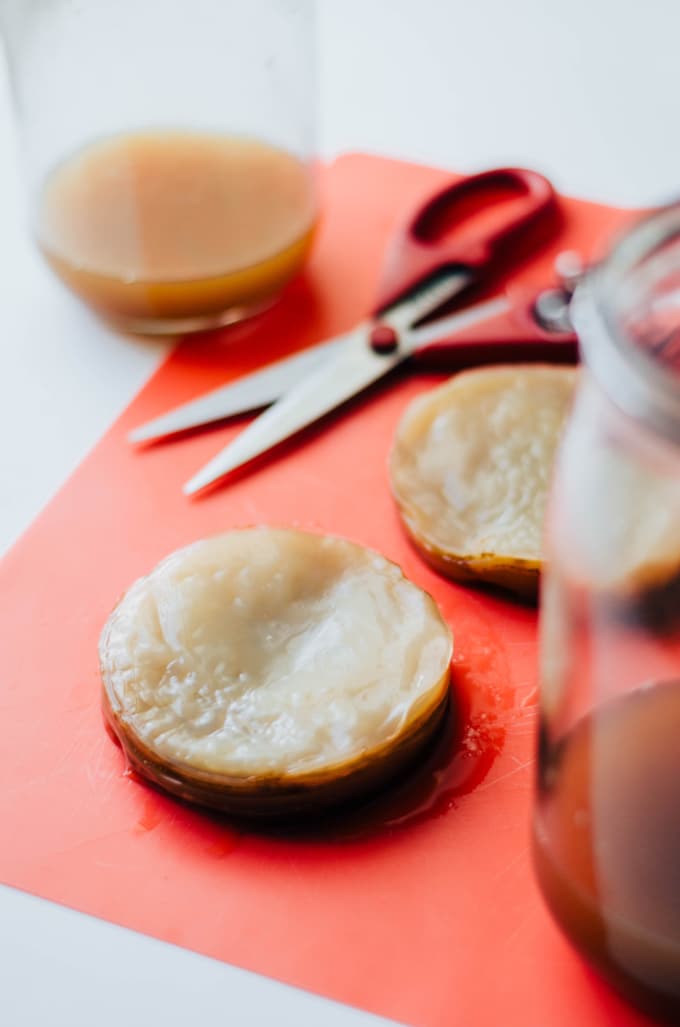
- Kombucha SCOBY: The SCOBY (Symbiotic Culture of Bacteria and Yeast) is the “mother” that ferments your kombucha. Here, it takes on a whole new life as a chewy, gummy candy! Use as many SCOBYs as you’d like.
- Sugar: The sugar accomplishes two things. First, it adds sweetness (of course). Second, it caramelizes during cooking, giving each piece that rich flavor you’d expect in a classic caramel-style candy.
- Lemon Juice: We’ll use lemon juice for a hint of brightness that balances the sugar. The acidity also helps cut any lingering vinegar notes from the kombucha. Fresh lemon juice is best here, but bottled will work in a pinch!
- Coating: A sprinkle of lemon zest mixed with sugar gives these candies a fresh, citrusy finish. It’s optional but highly recommended.
These Candies Are So Easy To Make
This kombucha SCOBY candy recipe is a breeze compared to your usual candy suspects. (Jump to the recipe card for the full printable instructions!)
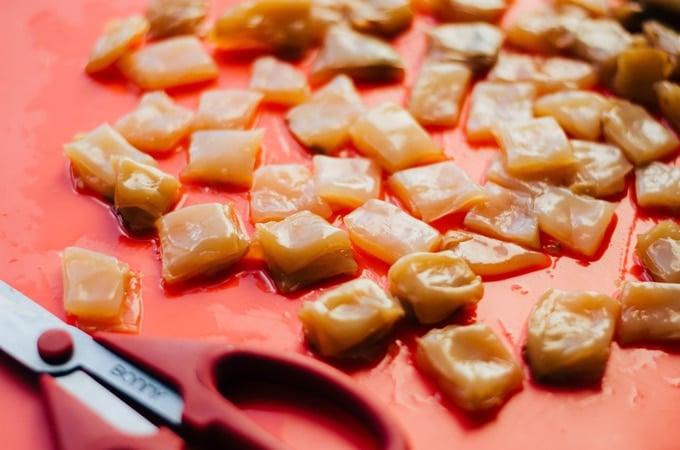
- Cut the SCOBY into squares.
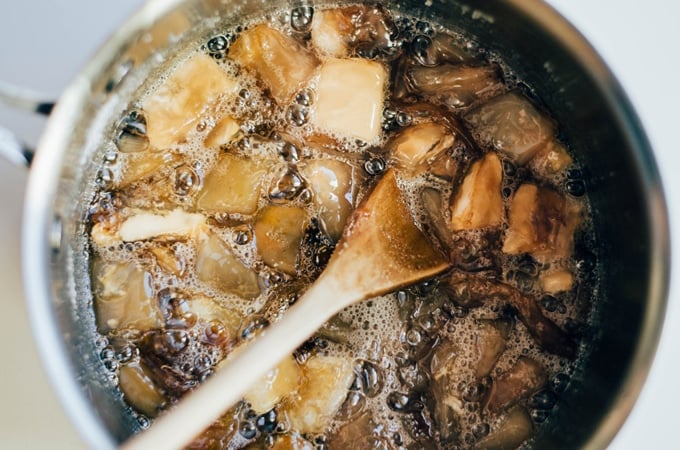
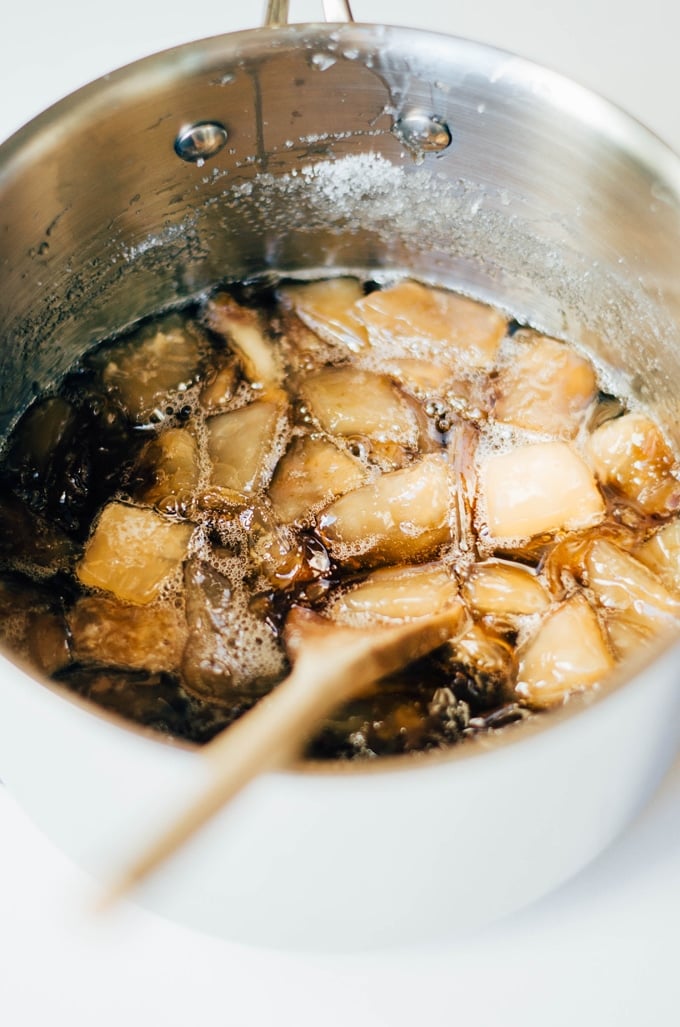
- Boil SCOBY squares, sugar, and a touch of lemon juice.
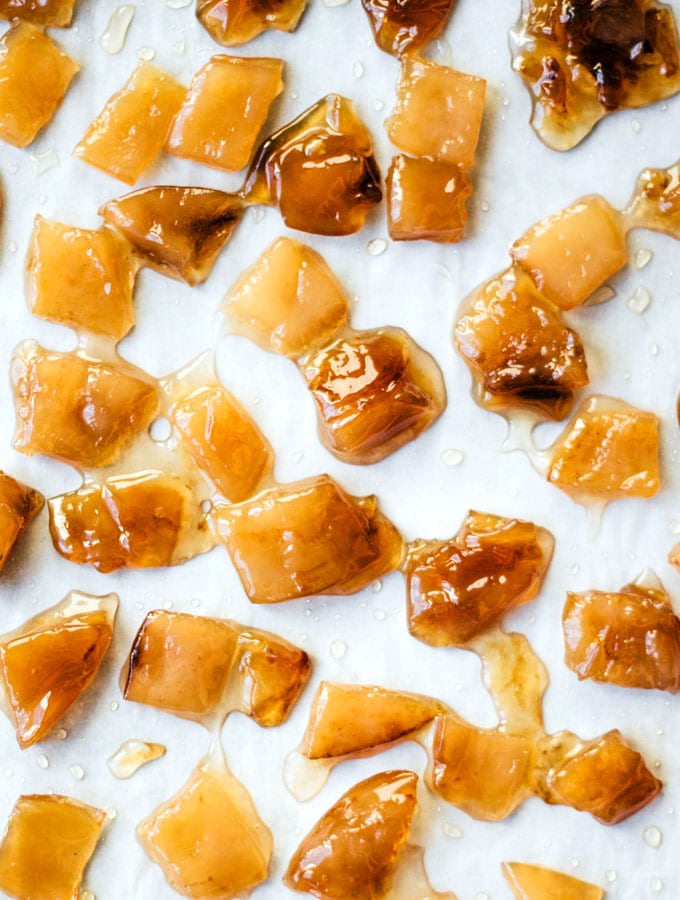
- Transfer them to a pan, then coat them with cooled, thickened syrup.
- Bake for 10 minutes, then sprinkle with lemon zest and sugar.
Recipe Tips
Sugar Proportion: Weigh your SCOBY pieces and use an equal weight in sugar to end up with the right balance of sweetness and caramelization.
Time the Caramelization: If you want a softer, chewier texture, cook the candies for a bit less time. For firmer candies, let them caramelize longer!
Work In Batches: If you have a lot of SCOBYs, cook them in smaller batches to ensure they caramelize evenly and don’t clump together.

Kombucha SCOBY Candy
Ingredients
- Kombucha SCOBY, however many you have or are willing to use
- Equal part sugar as SCOBY*, by weight
- A dash of lemon juice
- equal parts lemon zest and sugar, Optional
Instructions
- Cut: Rinse SCOBY to remove gunky stringy things, then dice with clean scissors or a very sharp knife.
- Boil: Gently combine SCOBY squares, sugar, and a tablespoon or so of lemon juice in a large saucepan. Bring to a boil over medium heat. Boil for 7 to 10 minutes (if you have a candy thermometer, aim for 250 degrees F, 120 C), stirring frequently.
- Coat: Remove the pot from the stove and, with a perforated spoon, remove the candies and place them on a parchment-lined baking sheet. Allow syrup to cool until slightly thickened, then pour over the candies.
- Bake: Bake at 350 degrees F (175 C) for about 10 minutes. Remove and allow candies to cool. Optionally, sprinkle with a mix of lemon zest and sugar.


I see no reason for the sugar and boiling. Chunks of scoby taste like gummy candies with a sour/kombucha taste and still retain the good stuff. After a period of consuming kefir (whey, curds and combo), kimchee, kombucha and anything fermented, most ‘normal’ foods taste too sweet. We hear you can feed scoby to dogs but I don’t have a dog.
Boiling it in sugar makes it sweet like candy! But you’re welcome to skip that step.
Hi Sarah, I love gummies so I tried your recipe. Cooked about 20min boil boil boil,,,,I do not have a candy thermometer, I stopped cooking when the syrup is thick. Spread out on oven tray and cooked 20min or so in low oven (120C). when cooled,,,,it is gummies, I like it! Its not a health food but at least I know what’s in this treat. No nasties. Thank you the inspiration I was wondering what to do with my scoby family that grown so much. Now I know what to do 🙂
I noticed that as it was nearing done boiled it started to turn transparent! Should the scobys be fully transparent you think by this stage or doesn’t matter? They turned out delicious!!! I tried to sugar coat them with powder but they keep absorbing… they’re super messy but taste amazing ! Thanks for this recipe
Oh strange! It shouldn’t matter though. Enjoy!
I had super fat scobies living in hotel that I didn’t know what to do with. It took a while to separate them. Tried the apple cinnamon version. Fantastic! thank you for sharing your recipes <3
Pretty sure boiling it destroys its benefits. Sorry.
Correct, I mention that in the 3rd paragraph 🙂 Still tasty though! And a good alternative to gelatin.
Honestly, read a post before sharing your (utterly unhelpful and unnecessary) ‘thoughts’.
It tastes really good! Mine burned a little bit in the oven, but they were tasty! I had one small problem though… My scoby flew up out of the pot and burned my hand. How do I prevent this from happening?
Oh strange! I wonder if the heat may have been too high?
Actually this happened to me too! Sticking to the correct heat, my scoby candies startet popping like popcorn in the oven. Also they aren’t see-through anymore, but look like cooked chicken. Rather interesting, I wonder how they’ll taste…
Gummy candy called buck naked bears Cherry kombucha is in it . Can you give the information as to good for you
I’m so happy to have found this recipe! I don’t have any idea of how many scobys I have thrown away over the years.
Yay! I’m happy you found it too! Enjoy 😀
Hi Sarah. I have a problem with my batches, as they tend to get very very sticky. I have tried coating them in sugar, cornstarch and powdered suger, but that doesnt help as it just gets absorbed by the pieces. The coating of the pieces also just melts (when in the oven) and lays in the bottom, turning hard and blends with the scoby, making them both cheewy and crunchy :/ I hope you have some tips on how i can avoid these issues.
Best regards.
Hi Sean! Hey there! It sounds like your syrup might be cooking too long or too hot, which can make it harden too quickly and melt off in the oven. Try boiling the mixture just until it hits 250°F (firm-ball stage) and no further—going hotter can cause over-caramelization that turns sticky or brittle. Also, after coating the SCOBY pieces in syrup, let them sit and cool a bit before baking so the sugar has a chance to set slightly instead of pooling and melting. Hope that helps!
Someone gave me a scoby and a 1/4 cup of starter tea. Can I scale down the recipe to a quart size and then use tea from that batch to make a gallon next go round? Or could I use ginger-flavored Kombucha and add it to the 1/4 cup of starter and make a gallon? I can’t find plain kombucha anywhere, unfortunately it’s all flavored.
Yep, you can definitely scale down the recipe as you’re getting started until you build up to having more starter kombucha. I would avoid using flavored kombucha to start though.