
This post contains affiliate links.
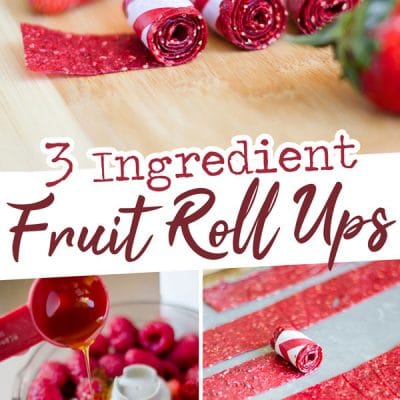
With well over one hundred 5-star reviews, these healthy homemade fruit roll ups have been made and loved in so many of our reader’s kitchens. They only take 3 ingredients and you can mix and match fruits to make your favorite flavor. Your next masterpiece in the making!
If you have kids, then you are familiar with the plea for those infamous rolled fruit snacks. What if I told you that homemade fruit roll-ups are so easy to make at home without a dehydrator or added processed sugar?
The best part is you can get the kids involved to make fun and funky flavors. And anyone with kids knows they eat best when they make it themselves. We love those independent little humans.
Reader rating
“Made this today! Turned out soooo yummy. I used frozen mixed berries (thawed out) it took about 6 hrs at 170°. My son loves them. My husband loves them. I love them! Thank for such a tasty and easy recipe!” —Samantha
yes, just 3 ingredients
Since this recipe is so simple, with just fruit, honey, and lemon juice needed, I want to focus more on flavor ideas! I love using fresh berries, like strawberries or blueberries, but you could also do:
- Razzle and Dazzle: A play on a razzleberry pie, this is a combination of raspberries, blackberries, and strawberries.
- Tropical: Make tropical fruit roll ups by using pineapple and mango.
- Forest Fruits: Try a blend of cherries, blueberries, and raspberries for a gorgeous color.
- Single Ingredient: Or go all in on a fruit, like strawberry or blueberries! You’ll need about 3 cups total.
- Spices: You can also add more flavor with spices or herbs like cinnamon, cloves, and basil.

Let’s make them!
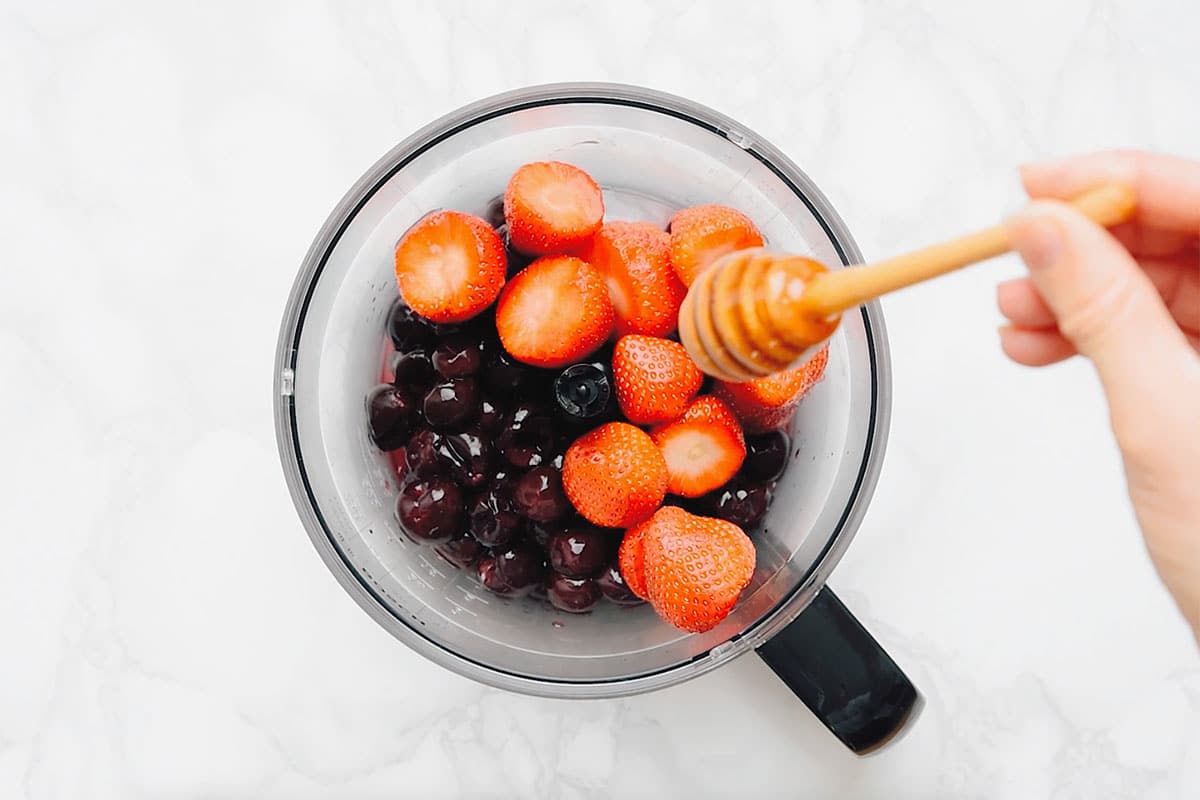
Step 1: Blend The Fruit
Blend all the ingredients in a food processor or blender until they’re as smooth as can be.
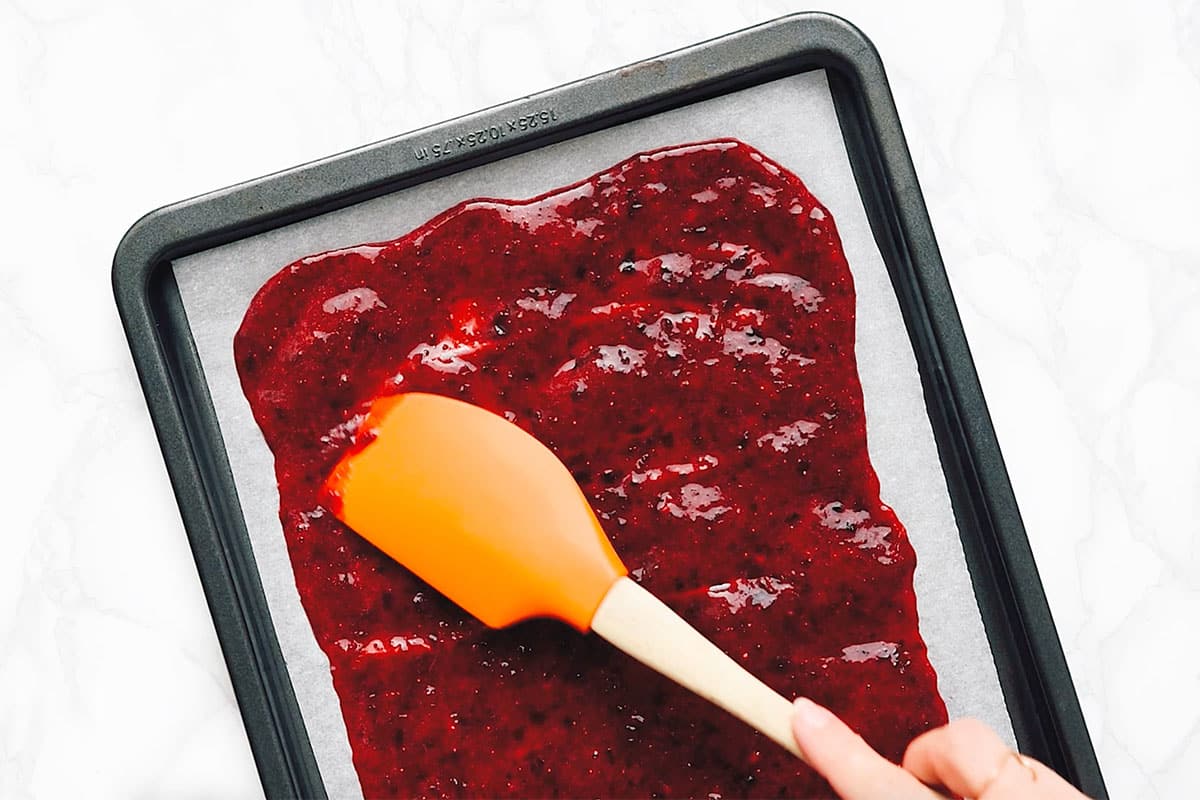
Step 2: Spread The Blended Fruit
Next, line a baking pan or sheet with parchment paper. Pour the blended fruit mixture onto the lined pan, then spread it out with a spoon or spatula.
Step 3: Dehydrate
Dehydrate in your oven at the lowest temperature possible (140 to 170°F) for 4 to 6 hours, or until the middle is no longer tacky. If the center is still tacky, it could be because the mixture is spread too thick.

Step 4: Cool
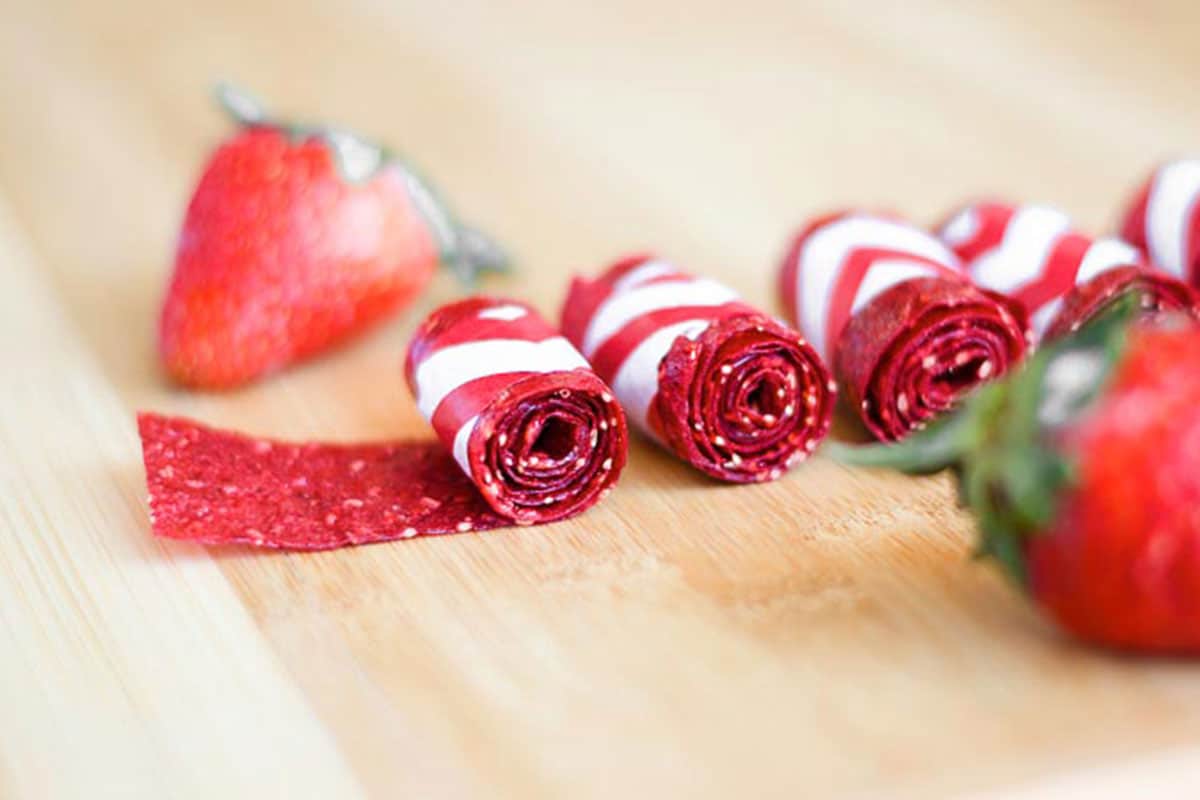
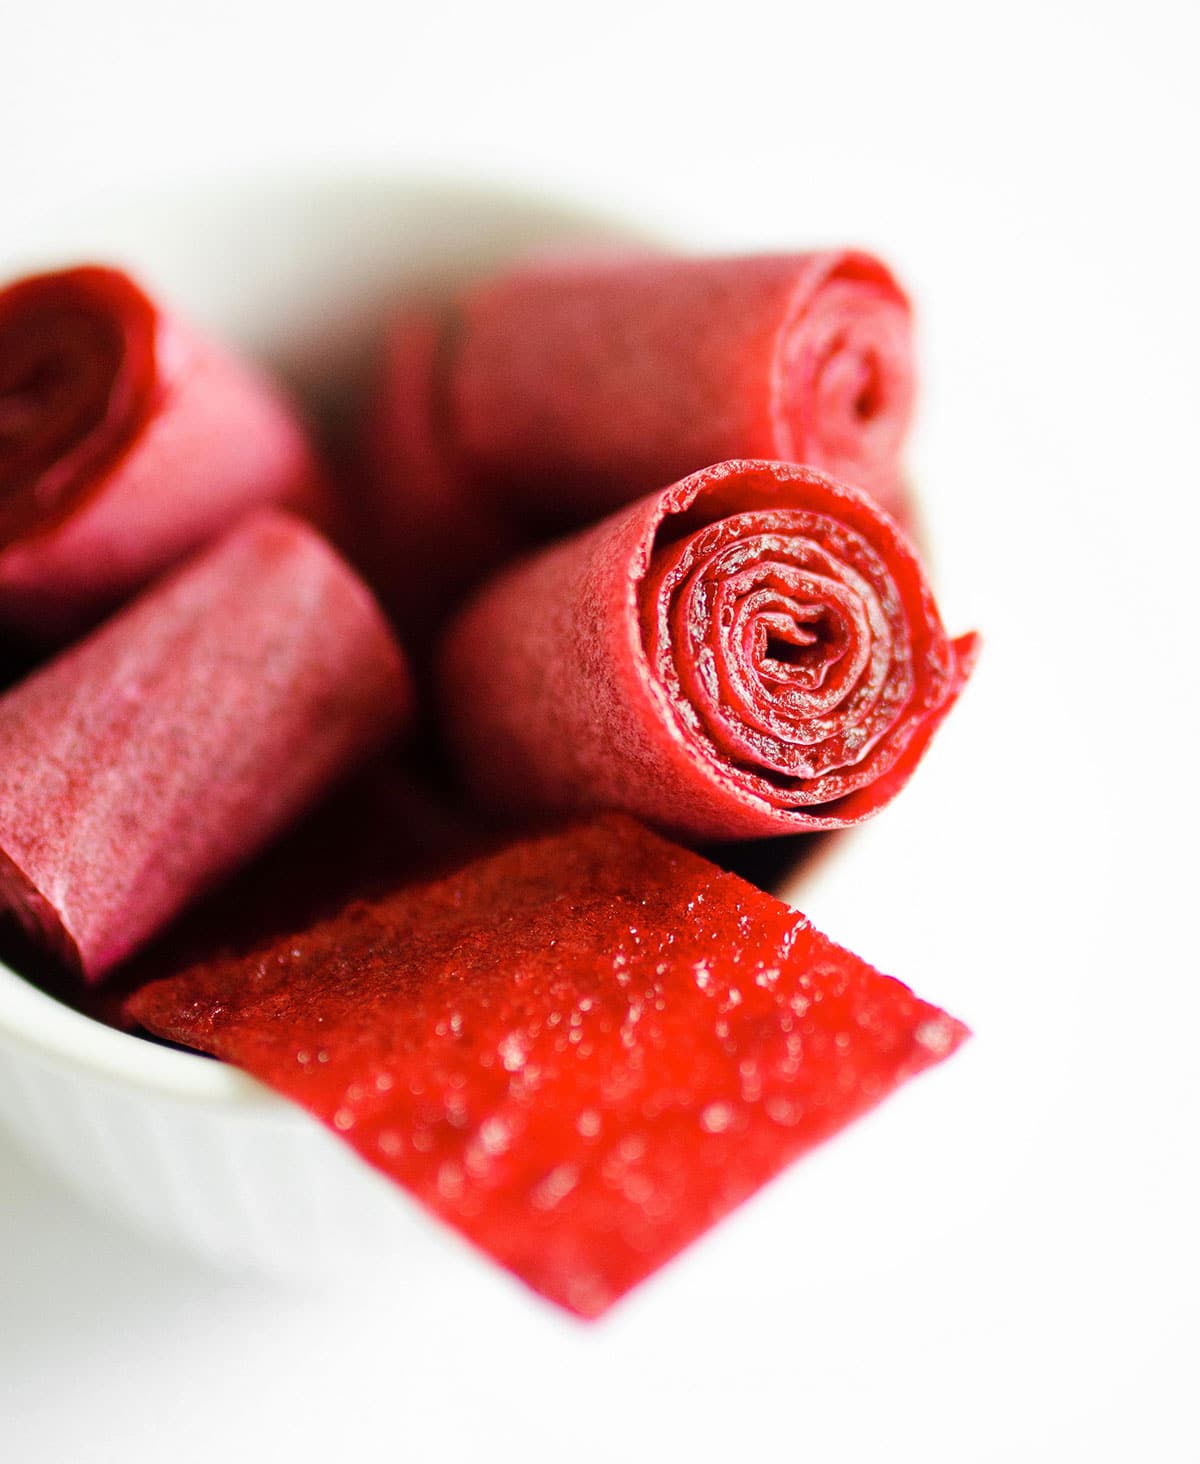
Allow the fruit leather to cool, then use clean scissors to trim off edges and cut into 1 inch wide strips. Roll each strip into a roll-up and enjoy!


Sarah’s Tip
I like to use fresh fruit puree, which preserves more of the vitamins in the fruit (but that’s just my nutrition brain talking). To make fruit roll-ups that look a bit more uniform, you can cook the fruit mixture on the stove, uncovered, until it becomes thick, strain through a fine mesh sieve, then proceed with this recipe!
more fruity kid-friendly recipes


Healthy Homemade Fruit Roll Ups (Plus Flavor Options!)
Ingredients
- 2-3 cups fruit, 300 to 350 g
- 2-3 Tbsp honey, can sub sugar or sugar-substitute
- 2 Tbsp lemon juice, 30 mL
Instructions
- Blend: Blend together all ingredients in food processor or blender until smooth. Taste and adjust sweetness as needed.
- Spread: Pour into a pan lined with parchment paper then spread out ⅛ to ¼ inch thick.
- Dehydrate: Dehydrate in oven at 140 to 170°F (or as low as oven will go) for 4 to 6 hours, or until the middle is not longer tacky. It must be totally set in order to peel off the parchment paper, so if it needs more time to cook, keep cooking until the center is not tacky (this largely depends on the thickness).
- Cool: Allow to cool, then use clean scissors to trim off edges and cut into 1 inch wide strips. Roll each strip into a roll-up and enjoy!
Notes
Nutrition
Nutrition information calculated by Sarah Bond, degreed nutritionist.


You can put the plastic wrap in the oven? Would it be alright if I used parchment?
You know, I was pretty surprised by this too. But I think the combination of a good quality plastic wrap and a low heat prevent it from melting. It held up just fine! But the parchment paper is actually a great idea! You could just leave the fruit leather on the parchment paper and cut it into strips with the paper on. Saves time and materials! Great thinking, thanks for the input!
Is it Fahrenheit or celcious. 170 degrees c seems quite high for a six hour cook
Oh goodness yes, Fahrenheit! Thanks for pointing that out, I’ll clarify it in the recipe. It should be about 60 to 75 degrees C.
Thankyou I know its a pain having to think of those in countries that use the metric system 😛 sweet I’m well up for making these thanks for getting back to me.
tried to vote . don’t where to fine ul# or what number
Hi Shirley! Do you mean you tried to vote for the Saveur Blog Awards?
Would you have to oil the parchment paper?
Ps-I tried to give it 5 stars, but it wouldn’t let me. These are awesome!
Hi Trynna! Nope! You could just bake them on the paper then cut it into strips right on the paper. Once cooked, they won’t be sticky or tacky and will peel right off 🙂 Thanks so much for the attempted 5 stars! Glad you like em!
Good question
I was wondering the same thing
These sound like so much fun and the possibilites of adapting really are endless! It’s a pity the season for fresh strawberries is already over. And I had to laugh at this one: “how you’re now installing a second oven for the sole purpose of churning out fruit roll-ups every waking hour”
Yes, you can really take these anywhere! I’m thinking of trying some tropical rolls, maybe mango + passion fruit! 🙂
I made strawberry raspberry, strawberry kiwi, strawberry mango, cinnamon apple. I really want to try watermelon but was told it wouldn’t work.. lol. I just got a fancy 9 tray dehydrator and it hasn’t stopped since I got it.
Just wondering how you store your fruit roll-ups?
Hey Lindsey! I just store them in an airtight container/bag at room temperature. They should stay good for quite a while because they are so low in moisture.
could i use frozen fruit?
Hi Shelly! While I haven’t tried this with frozen fruit, I think it would work. Be sure to thaw and squeeze as much excess moisture from the fruit as you can prior to pureeing it. To get the moisture out I would either let it drain in a mesh colander or wrap it all in a paper towel or cheesecloth and squeeze. Happy cooking! 🙂
WoW!!!!! Iam so happy I stumbled across this. When I was a little girl I spent most of my weekends with y grandmother. When I wasn’t playing with her piano I was outside playing in the yard. Almost every weekend she would make these for me and bring them outside to me. I LOVED THEM!!!! I often think about them and wonder how she did it. I will now be making these for my little girl. I hope one day it brings her sweet memories like it for me. So thank you for sharing
Aw I’m so happy to hear I could help you find something to bring back those happy memories! Enjoy and I hope your little girls loves them 🙂
Made these today & my picky three year old son approves. Used 1 cup strawberries & 1 cup blueberries. Tart & sweet. Only minor issue was 6 hours wasn’t long enough for the middle. Wanted to leave them for another hour but hubby wanted the oven to make deer jerjky. No problem…the piece in the middle just rolled it up into a big sticky bite. Can’t wait to experiment with different fruits!
Happy to hear, Cindy! And yes, sometimes the moisture content in the fruit can vary, which has a big impact on dehydration time. Have fun experimenting with other flavors! I’m looking to try mango next 🙂
This looks fabulous! Do you store them in the refrigerator, or at room temperature? I’m sure they’ll go quickly in my house – but how long do they stay good for?
Thanks, Kristin! I store them in an airtight container at room temperature. They stay good for about a week, though they never last that long 😉
What a great recipe! I’m including a link to it in my latest post about simple recipes kids can make. It’ll be posted tomorrow. Thanks for the inspiration!
Thanks so much for including me in your roundup! I’ll be sure to check it out 🙂
hi 🙂 should these be stored in the fridge? freezer? countertop? how long do they last, or should I just try it out? also, do you have a privacy policy when subscribing? I’ve been receiving a lot more spam since I started subscribing to cooking sites
Hi Nicola! You can store these on the countertop just fine (about a week), or the fridge if you want them to last a bit longer. But honestly they go so fast it never matters much how I store ’em. And here is my Privacy Policy. I understand that your email inbox is a bit of a sacred place so I never share your email with anybody, and I only send you 1 email each week with a roundup of the new recipes on the blog (+the free smoothie!) Thanks so much for stopping by and I hope your fruit roll ups turn out amazing! 🙂
Love your ideas and posts and looking forward to experimenting