
This post contains affiliate links.

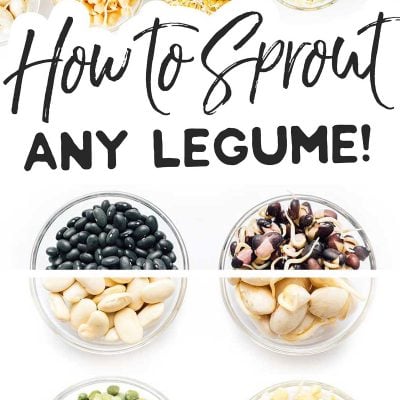
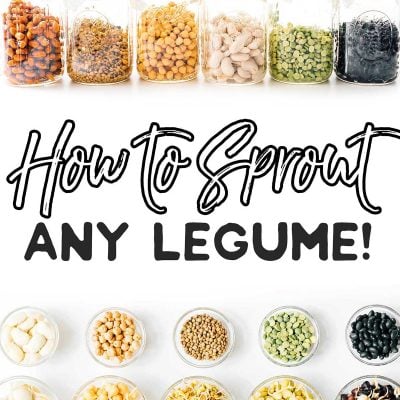
If you’ve ever considered growing your own food, start with learning how to sprout beans using this helpful guide! It’s an affordable way to pack in delicious plant-based protein and nutrients while also making the legumes more digestible (and delicious). Here’s our quick start guide to sprouting virtually any legume – verified by over 20 5-star reviews!

I’ve always been obsessed with sprouts. But it wasn’t until I got my degree in nutrition that I realized just how much of a nutrition powerhouse sprouts are. Or that you can sprout many things – like legumes!
These sprouted beans and legumes are the supercharged versions of themselves. They’re easy to grow, don’t require any special gear, and transform the humble bean into a nutrition powerhouse. Let’s sprout!
Reader rating
“I’m an old country girl so I’ve always known about beans sprouting but only recently have started sprouting for nutritional value. I have mung beans, alfalfa and red azuki beans sprouting at the moment… Thank you for your awesome article on sprouting!” —Dell
Benefits of sprouting
Nutrition: The process of sprouting transforms a lot of the starch in legumes into a more nutrient-rich food, increasing the amount of folate, iron, vitamin C, zinc, magnesium, and protein. It also breaks down phytate, which is a compound that prevents nutrient absorption.
Digestible: During this transformation, the starchy endosperm is also broken down, meaning sprouted beans may be easier to digest for some people.
Affordable: While you can buy sprouts at your grocery store or farmer’s market, they’re often expensive and can be made for a fraction of the cost at home!

What can you sprout?
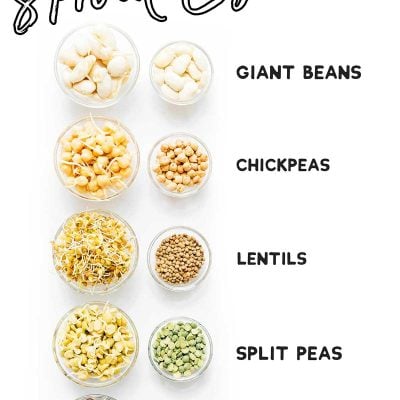
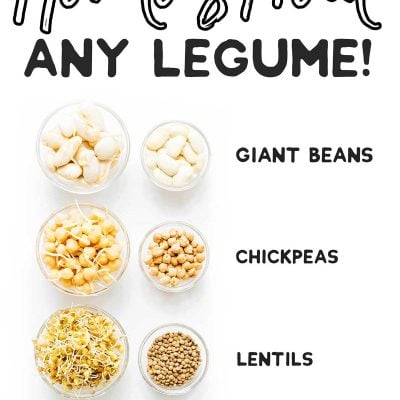
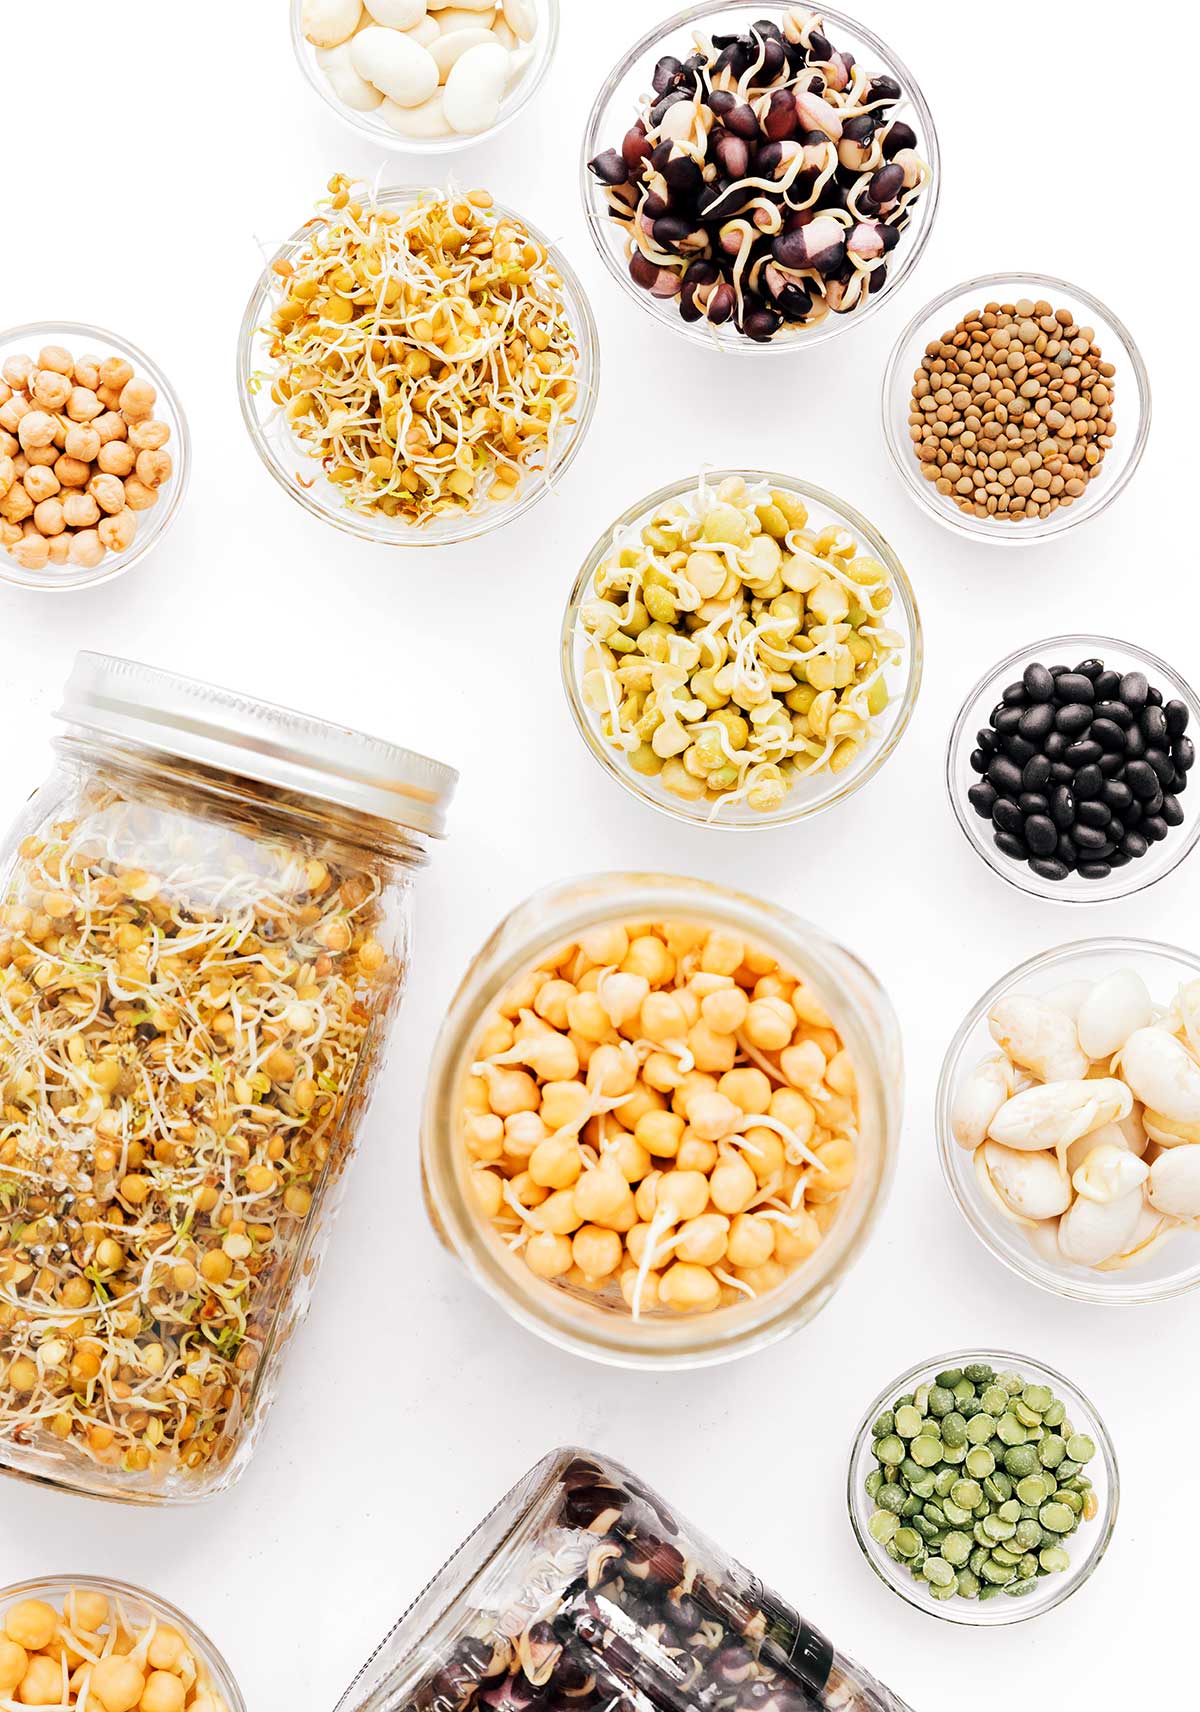
You can sprout many things, such as legumes, seeds, nuts, and grains. Today, we’re focusing on one of the most common ingredients to sprout – legumes! This includes chickpeas, lentils, green peas, black beans…really any type of bean!
As a note, we are not sprouting any kind of kidney beans, which can contain potentially toxic compounds that require you to cook them before consuming.
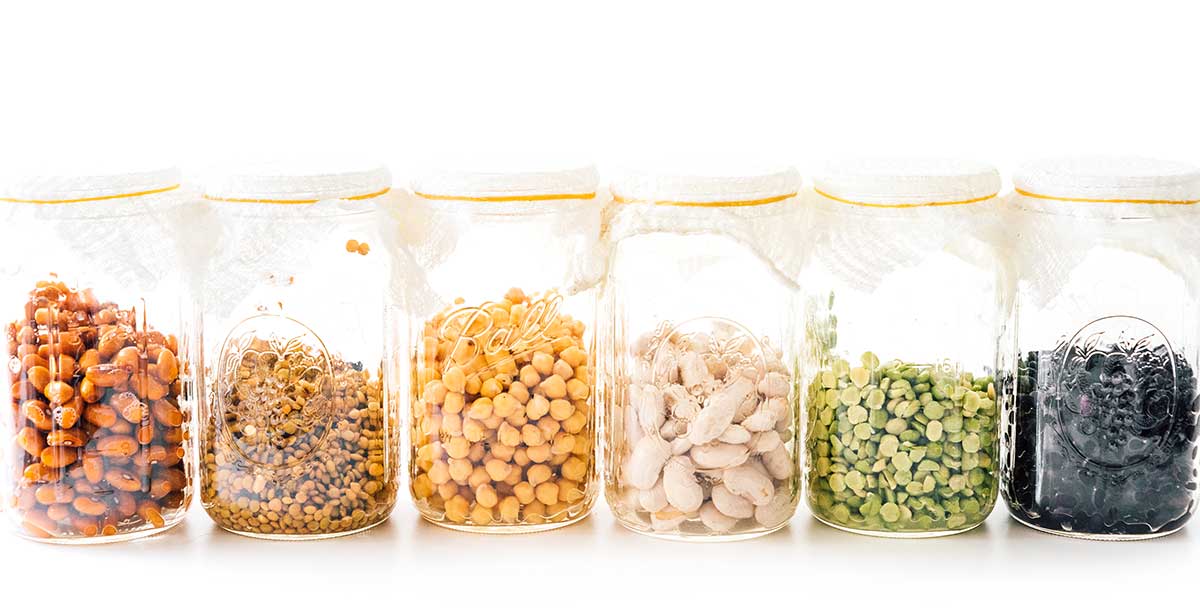
sprouting beans: you’ve got options!
When it comes to sprouting beans at home, you have two options: sprouting seeds or regular.
Sprouting seeds are specifically meant for sprouting, so they have been treated and cleaned to make them more suitable. These are most likely to sprout and are less likely to carry nasty pathogens—like E. coli and salmonella—which can grow in the warm humidity of your sprouting environment
Regular “seeds” are basically just store-bought dried legumes! These could be dried beans, chickpeas, lentils, etc. Because the manufacturers expect that you will cook the beans before consuming them, they may not be cleaned sufficiently for sprouting. This is what we use to occasionally make sprouts, but if you’re going to sprout more long-term, we recommend investing in good sprouting seeds.
you don’t need much!
Sprouting doesn’t require any special equipment.
- Breathable Container: A wide-mouth mason jar topped with a cheesecloth does the job perfectly.
- Legumes: Don’t forget the dried beans or legumes, of course.

How to sprout beans and legumes
Sprouting is a simple process. This is an overview of the recipe. Jump to the recipe card for the full printable recipe.
Step 1: Soak the Legumes
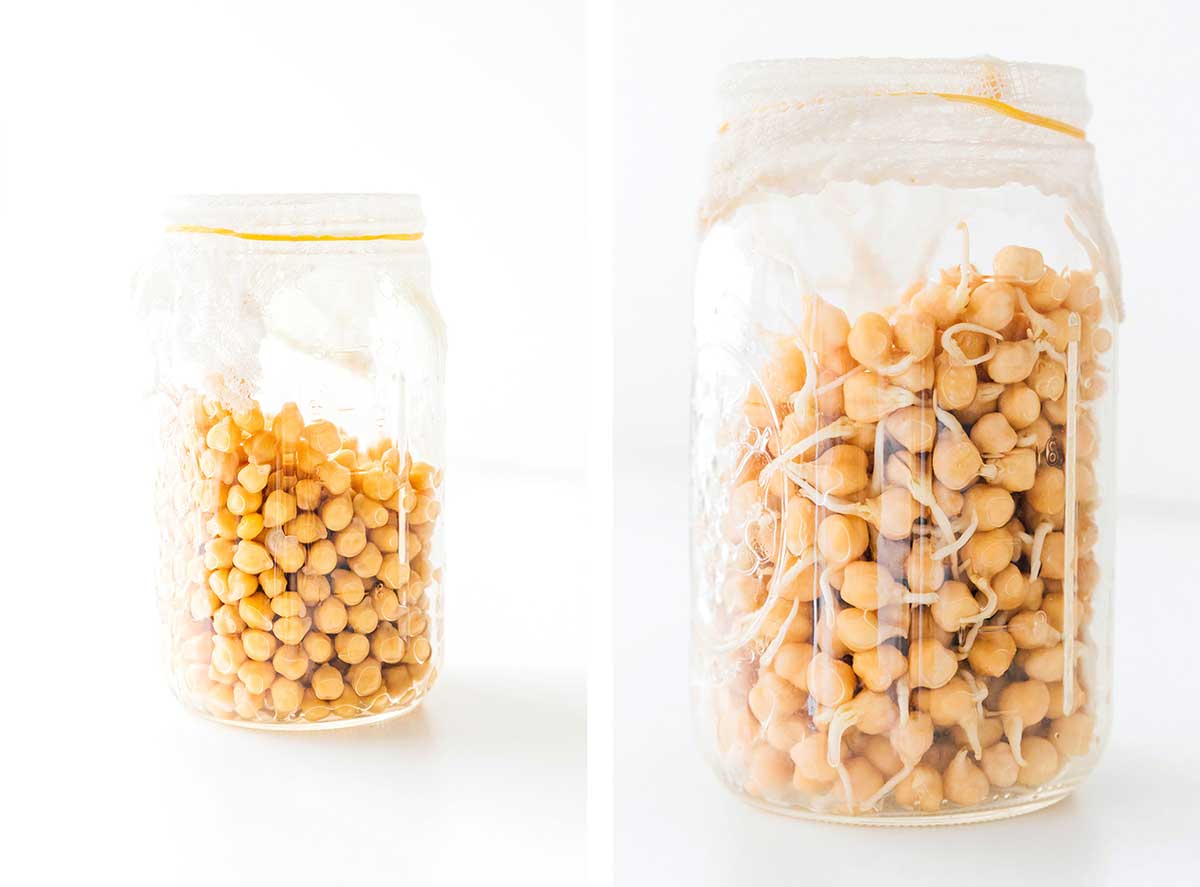
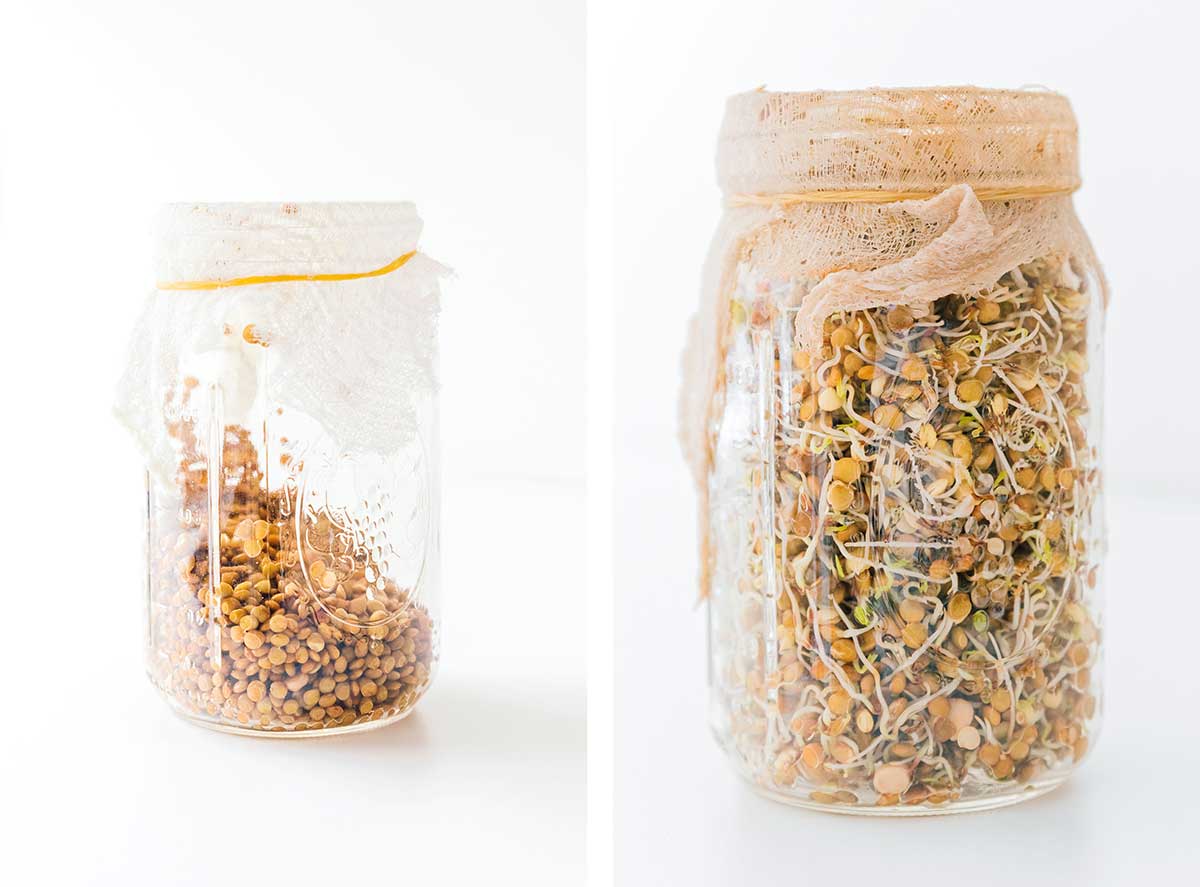
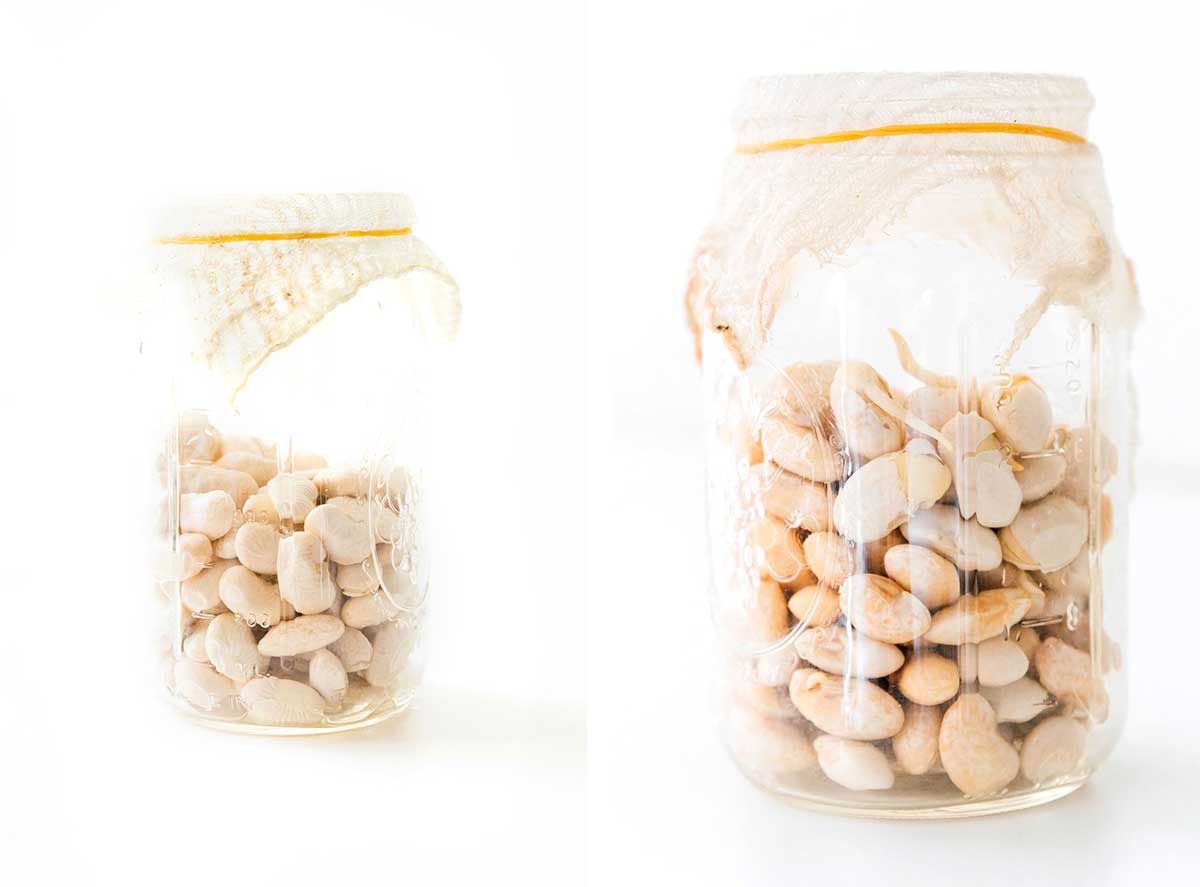
Add your chosen dried legume to a large bowl or jar and cover with cool water. The water should be a few inches above the dried legumes – they’re going to expand! Soak for 8 to 12 hours (or overnight).
Step 2: Rinse Well
Rinse the legumes well, then place them in your sprouting vessel (a wide-mouth mason jar works well).
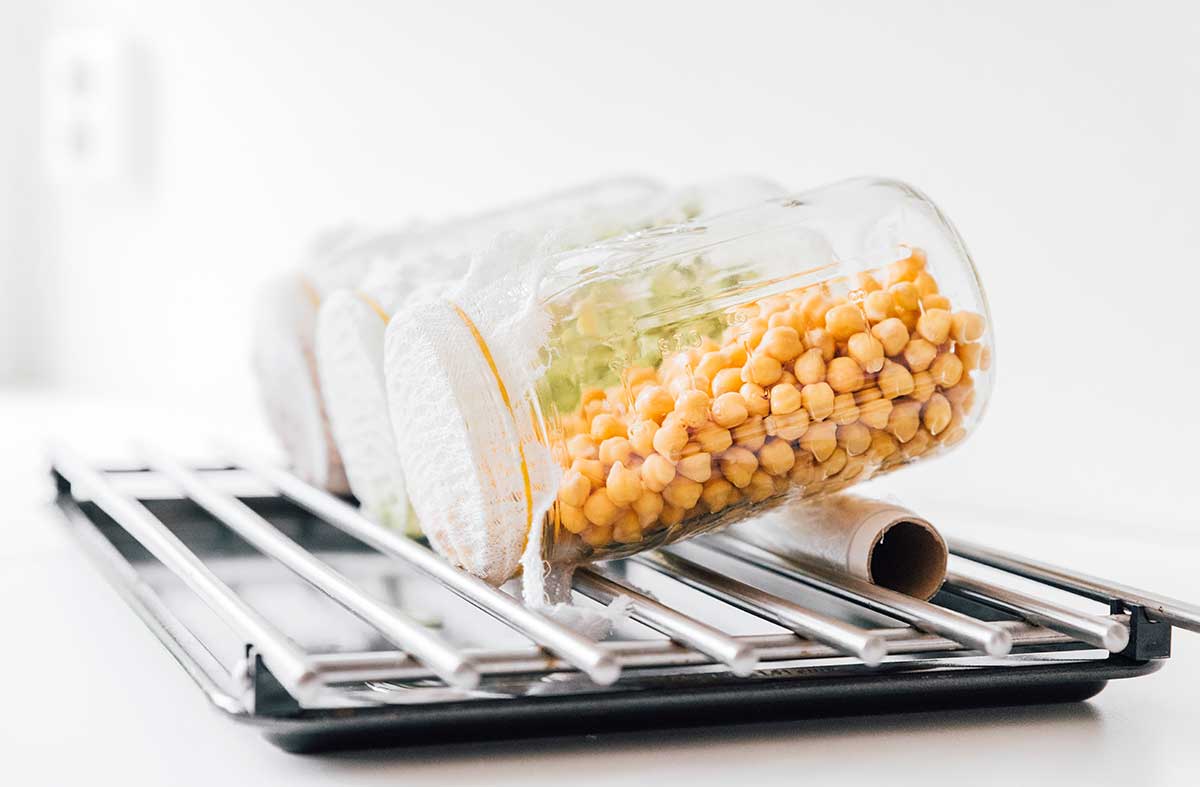
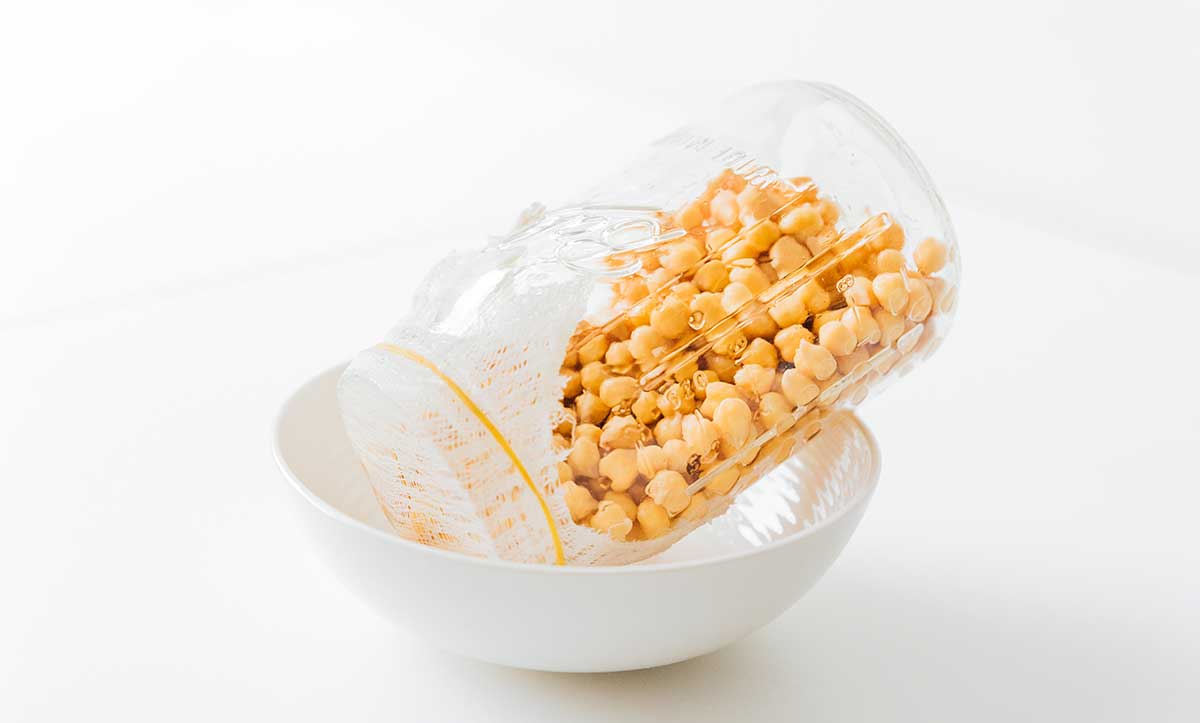
Step 3: Drain the Water
Pour out the water. Secure a clean cheesecloth (or sprouting lid) over the jar using rubber bands. Prop the jar upside down at an angle to allow excess water to drip out.
Step 4: Repeat
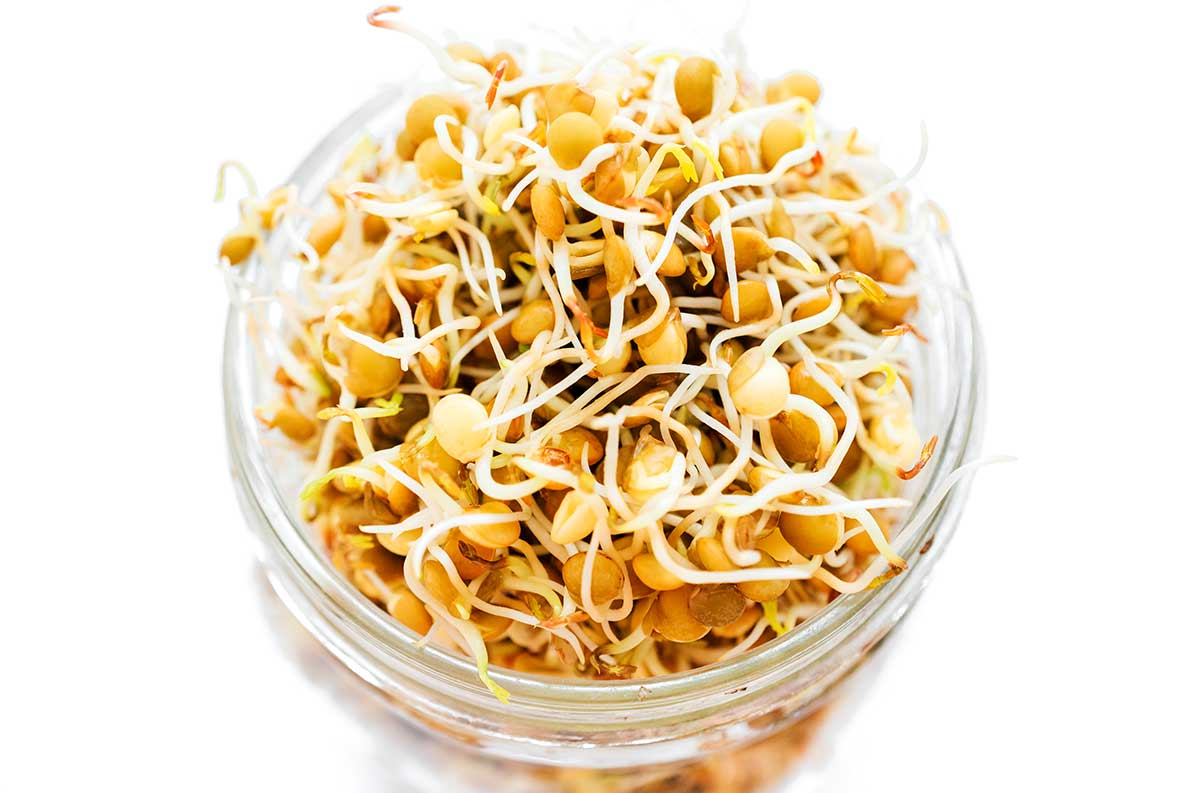
Rinse and drain the sprouting legumes 2 to 3 times per day (morning, noon, and night work well). Continue this for 2 to 3 days, or until the sprouts are 1 to 1½ inches long.
On the last day, you can expose them to sunlight if you want them to develop some green (chlorophyll).
Step 5: Store
Wrap sprouts in a clean cloth or paper towel and set them in a clean, airtight container. These won’t keep long, just 2 to 3 days in the fridge, so eat them while they’re fresh!
Sprouted Chickpeas
Sprouted chickpeas (or garbanzo beans) are a reliable legume to sprout that is easy to find in most stores! They have a creamy, nutty texture that works well on salads and in soups.

Sprouted Lentils
Lentils grow long sprouts and are almost foolproof, so they’re great for beginners! These are delicious on sandwiches and in wraps or cooked into a stir fry.

Sprouted Navy Beans
Bigger beans can be difficult to sprout and may have a longer germination time, but that doesn’t make them any less delicious! These sprouted navy beans (a.k.a. haricot, Boston, or white pea beans) have a firmer texture and are delicious sprinkled over salads.

Sprouted Black Beans
While sometimes finicky about sprouting, black beans can work well! You can use sprouted black beans almost anywhere you would use regular black beans, like in tacos, burritos, or southwest salads.


If you love diy-ing ingredients

How To Make Greek Yogurt (No Special Equipment)
6 hours 30 minutes


How To Make Milk Kefir
5 minutes
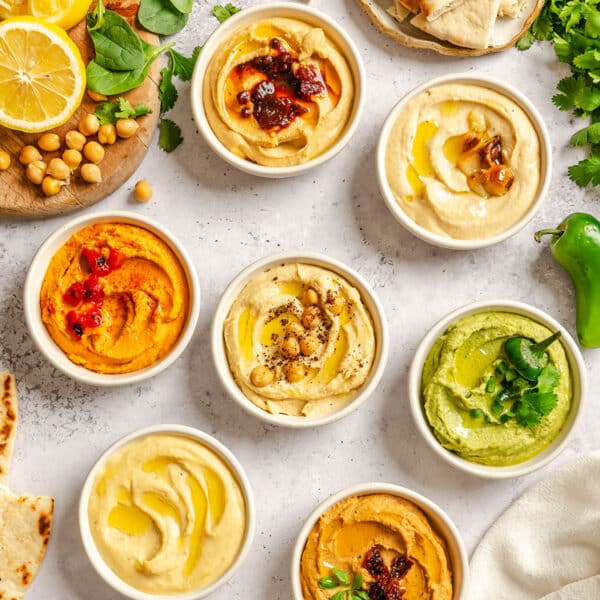
Flavored Hummus (8 Easy Options)
5 minutes

How to Sprout Beans and Legumes (Step-By-Step Guide)
Ingredients
- Dried legumes, like chickpeas lentils, black beans, navy beans, or green peas
Instructions
- Soak: Add your chosen dried legume to large bowl or jar and cover with cool water. The water should be a few inches above the legumes – they’re going to expand! Soak for 8 to 12 hours (or overnight).
- Rinse: Rinse well, then place legumes in your sprouting vessel (a wide mouth mason jar works well).
- Drain: Secure a clean cheesecloth (or sprouting lid) over the jar using rubber bands. Prop the jar upside down at an angle to allow water to drip out. A bowl, drying rack, or cooling rack works well.
- Repeat: Rinse and drain the sprouting legumes 2 to 3 times per day (morning, noon, and night works well). Continue this for 2 to 3 days, or until sprouts have reached 1 to 1½ inches long. On the last day, you can expose them to sunlight if you want them to develop a bit of green (chlorophyll).
- Store: Wrap sprouts in a clean cloth or paper towel and set in a clean, airtight container. These won’t keep long, just 2 to 3 days in the fridge, so eat them while they’re fresh!


Excellent!
Sprouting is the only way I can even eat beans, lentils, and black eye peas. Otherwise they cause such gastric upset that I am miserable afterward.
I remember telling people that I soak my beans until they sprout and smell pleasantly fermented and they would look at me like they were confused. Now, many people are catching on that you can sprout your beans before cooking them. I don’t eat them raw. I absolutely love refried beans made with sprouted pintos.
I’m going to try it with kidney, pinto & Great Northern. I know what you said about kidney beans, Sarah, but these beans will be dried again after sprouting & ground into flour.
Hi, if I’m worried about pathogens, is it ok to add a bit of apple cider vinegar to the soak and that should kill any nasty pathogens. The acidic water should actually help the sprouting process, maybe?
I haven’t tried this, but it seems like it would help prevent some nasty pathogens from sneaking in!
Last year we had a glut of runner beans and I took the advice of an Italian friend and froze the inner beans to use like borlotti beans. I still have some left in the freezer and wonder if it would be safe/possible to sprout them. If I use fresh inner runner beans how long would they need to be soaked, if at all?
I’m honestly not sure on this one! It’s worth a try!
I’m an old country girl so I’ve always known about beans sprouting but only recently have started sprouting for nutritional value. I have mung beans, alfalfa and red azuki beans sprouting at the moment. I put plastic screening and the cap of a pint mason jar to start with. But I’m going now to a tin foil baking pan that has a plastic lid. I’m poking holes and the plastic lid and turning it upside down into the full pan so the sprouts won’t rot from too much moisture. Thank you for your awesome article on sprouting!
I love the black shallow pan and rack you show with the mason jars – I always sprout about 3 jars at once, where can I find a set up like that? I know it’s probably not specifically for sprouting, but I love the size of it!
I believe this was just a rimmed baking sheet and a rack from IKEA! I can’t find the exact ones anymore.
Great article Sarah. Would split peas work like lentils do you think? Or do you think they might not sprout. We have been sprouting Broccoli, alfalfa, mung, etc and I have yet to try lentils and beans! So excited about your article as being vegan for a year now we eat them all the time. Can’t wait to try.
I think you can actually sprout split peas! I haven’t personally tried it, but I have heard of people doing it. I’d love to hear how it goes if you try it out!
Can sprouted beans be pressure canned?
Thank you!
I haven’t tried so I can’t say for sure!
Thank you for this. Started sprouting back in the late ’70s. At that time, 1 cup of pinto beans would create a very full half gallon of sprouts. Then they started messing with the beans and seeds and the same 1 cup would hardly produce a quart. I’m getting back into it and hoping for the best. For your readers, simply soaking the beans 12-18 hours and discarding that soak water will mostly eliminate the gas problem. I use them to make a vegetarian posole – so good.