
This post contains affiliate links.

Some things are just way too easy to make at home—like homemade pizza dough! With our detailed step-by-step photos, you’ll have a soft, pillowy crust in no time (and yes, you can even make it ahead for extra convenience!). Say goodbye to store-bought and hello to pizza night perfection.
Your Foolproof Pizza Dough Recipe
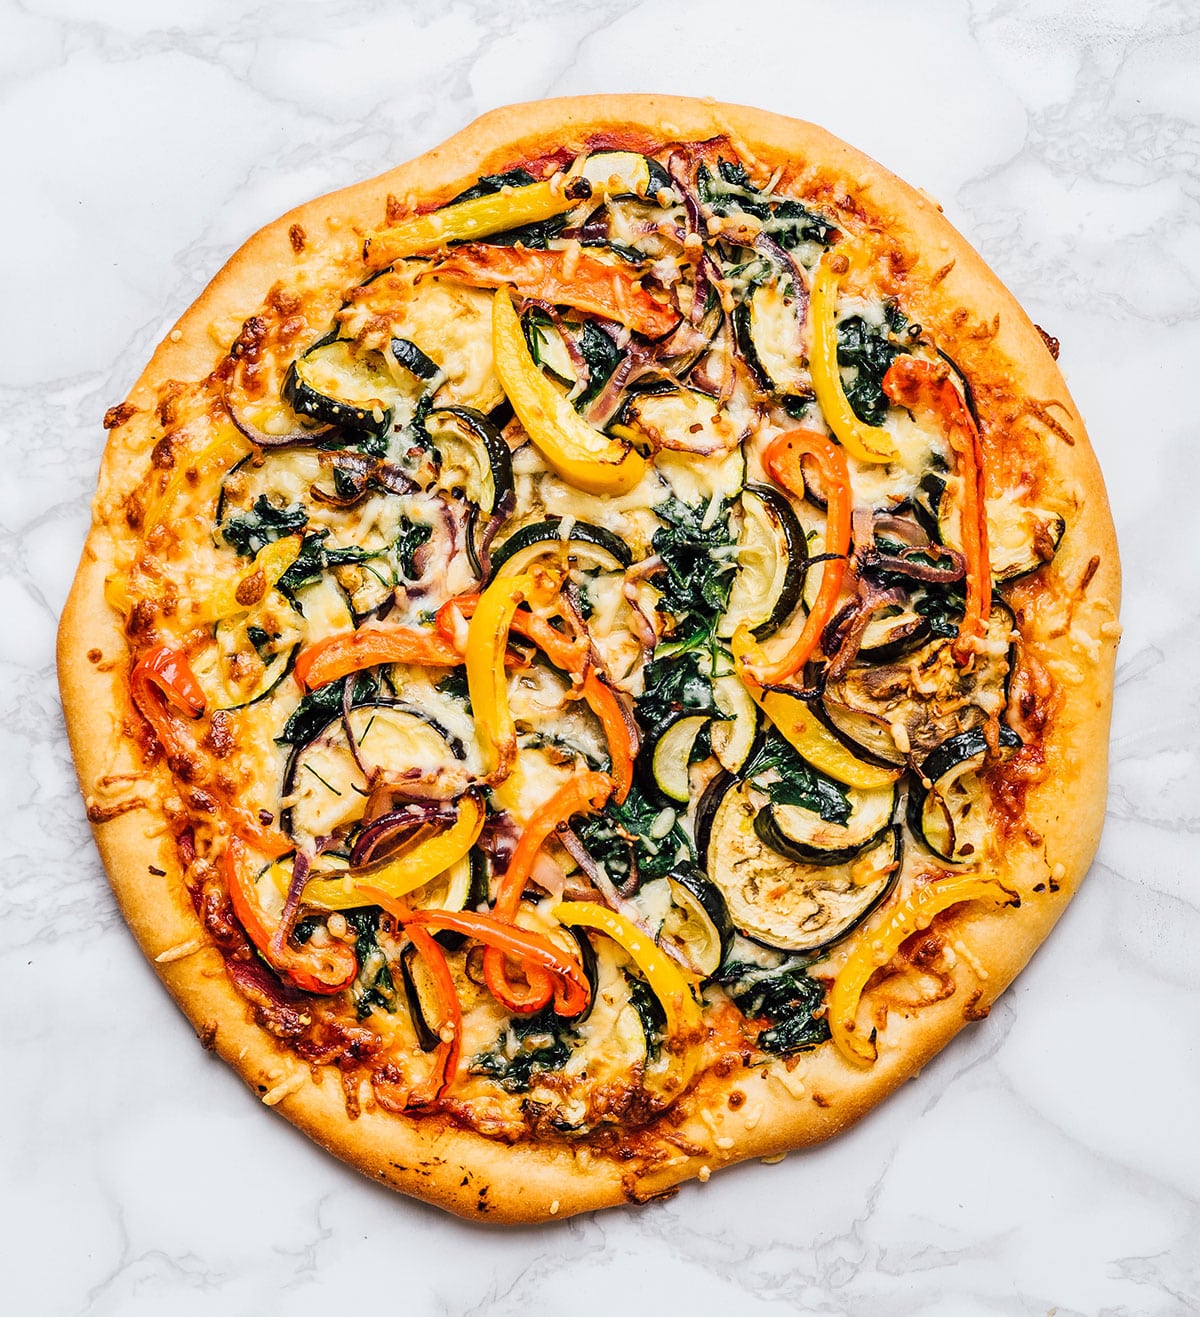
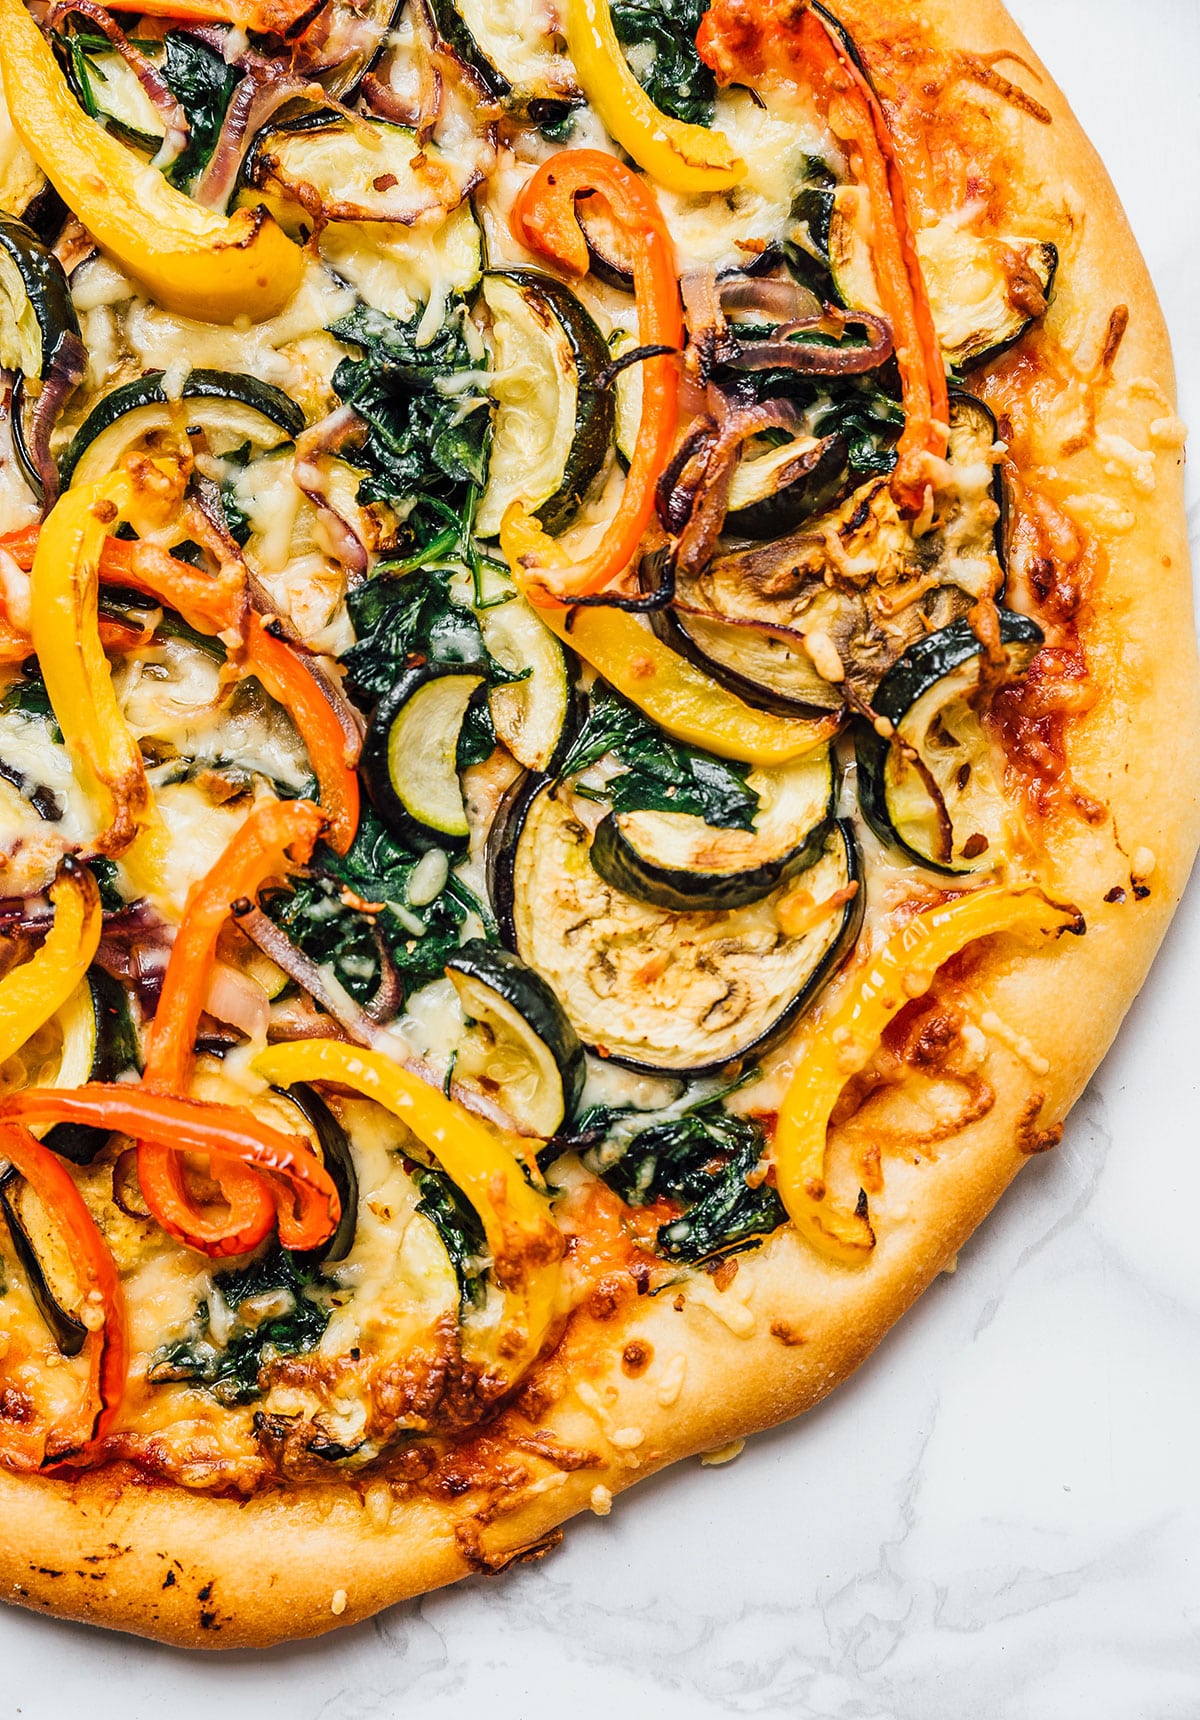
Let’s be real: the crust makes or breaks the entire pizza-eating experience. Think about it—this is the foundation of a truly great pie, from classic veggie pizza to gourmet truffle pizza and everything in between.
So today, I’m sharing the secret sauce for homemade pizza dough that turns out fluffy and tender with the perfect chew (oh, and it’s ridiculously easy to make). It’s the kind of crust that will have you ditching your go-to pizza delivery for good.
Reader rating
“Made this dough for a taco pizza and the family loved it. This will be my go-to recipe! Thanks so much.” —Nana Karen
You Only Need 5 Ingredients
Chances are, you’ve already got everything you need for homemade pizza dough in your pantry—like that bag of flour just hangin’ out. This is just an ingredient overview, so jump to the recipe card for exact measurements!
- Water: The secret to activating your yeast! Warm water (not hot) is crucial for waking the yeast cells up to work their dough-rising magic.
- Yeast: I tested both instant (rapid rise) and active dry yeast here. Instant yeast gave the best results, but active dry yeast is a solid backup if that’s all you have (it may just need a little more time to rise).
- Sugar And Salt: A touch of sugar activates the yeast. And a healthy spoonful adds essential flavor to the dough.
- Olive Oil: Olive oil will help tenderize and flavor the dough, but we’ll also brush it on top to create a golden crust.
- Flour: All-purpose flour is great for a soft crust, but you can use bread flour for a chewier bite or Caputo Tipo 00 for a thin, crispy pizza.
- Cornmeal: This is optional, but I like to dust the bottom of my dough with cornmeal to prevent sticking (and to add some flavor and crunch!).

Let’s Make Pizza Dough!
Our step-by-step photos will turn you into a pizza-making pro in no time! For the full printable instructions, jump to the recipe card.
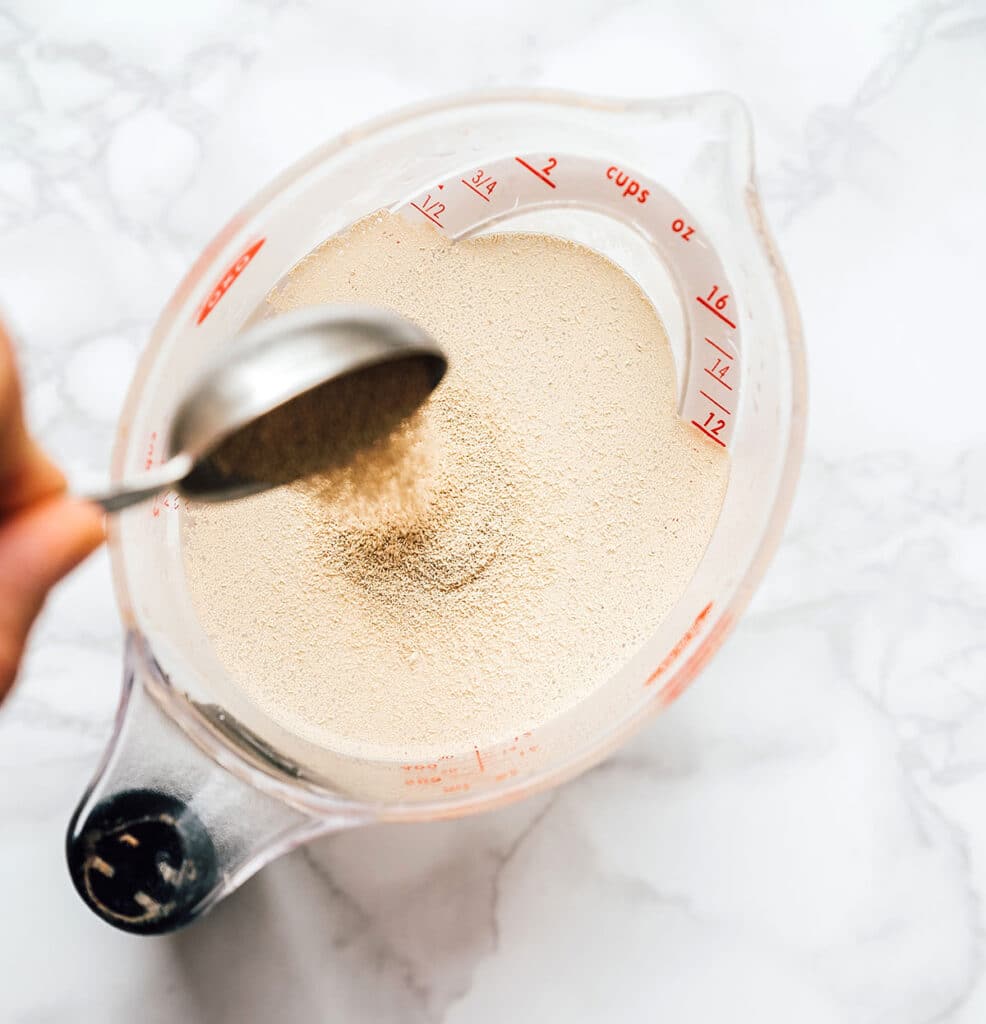
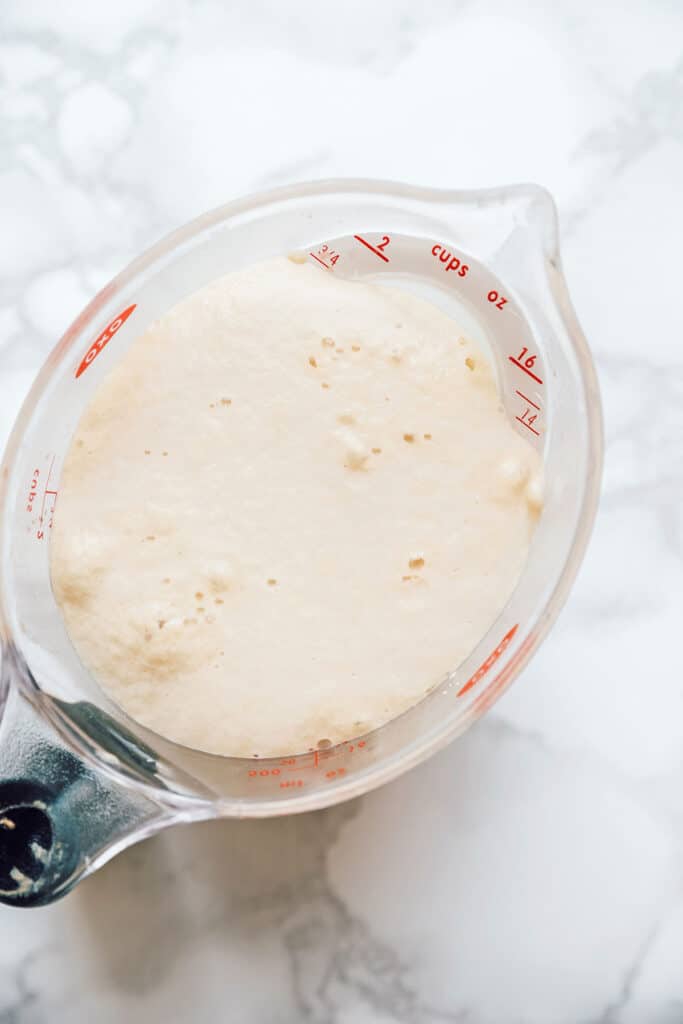
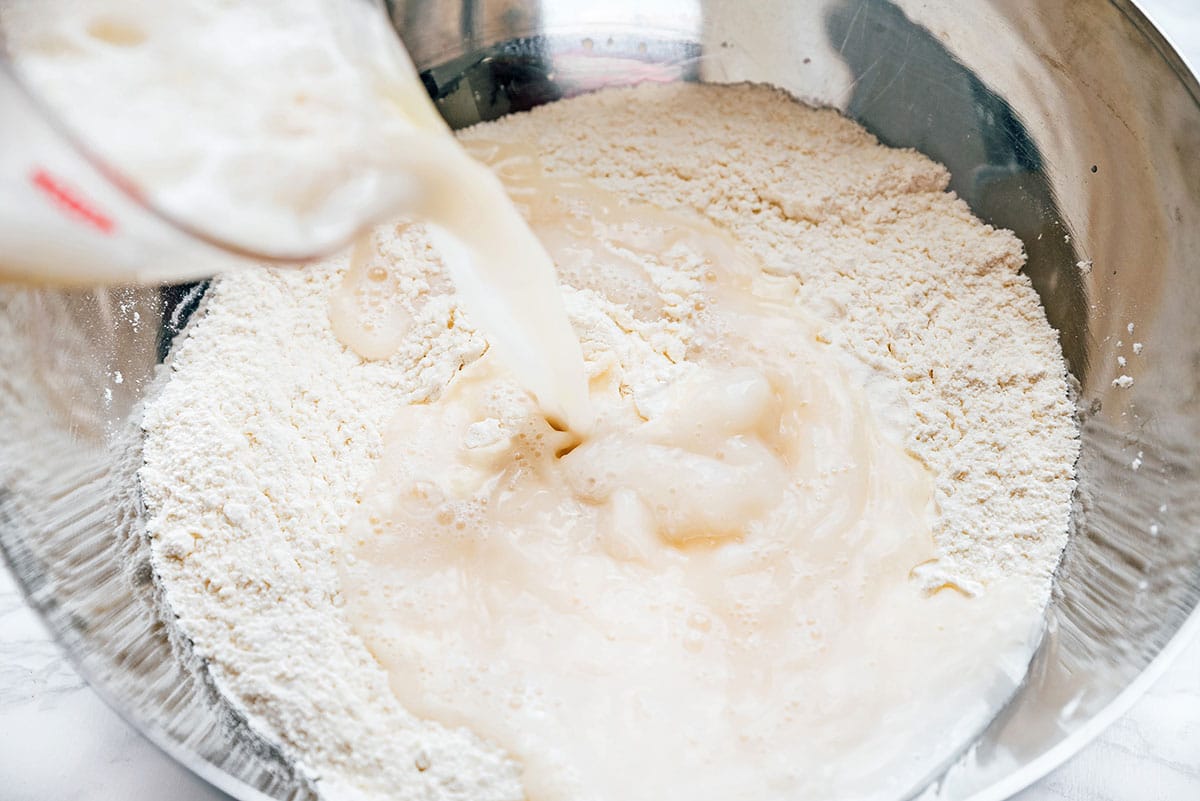
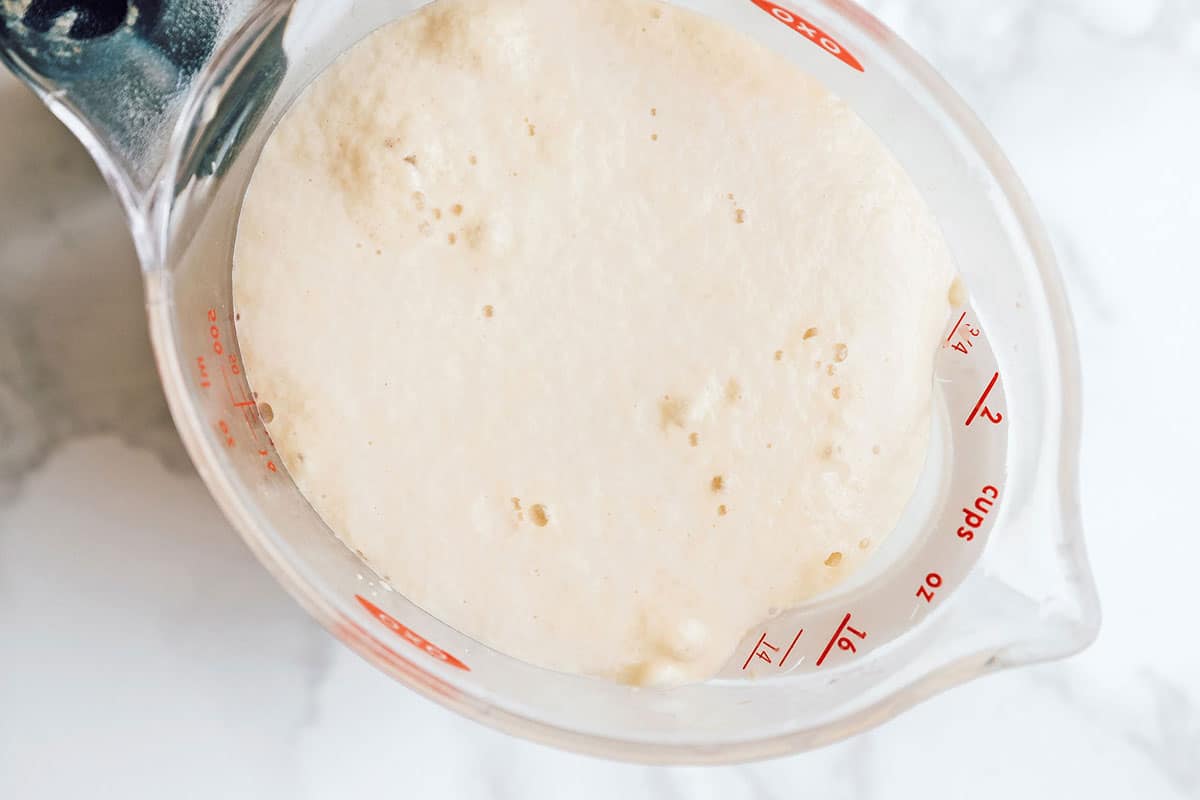
Step 1: Proof The Yeast
Combine warm water (about 105 degrees F) with yeast and sugar. After 5 to 10 minutes, the mixture should be frothy. Mix in the salt and olive oil.
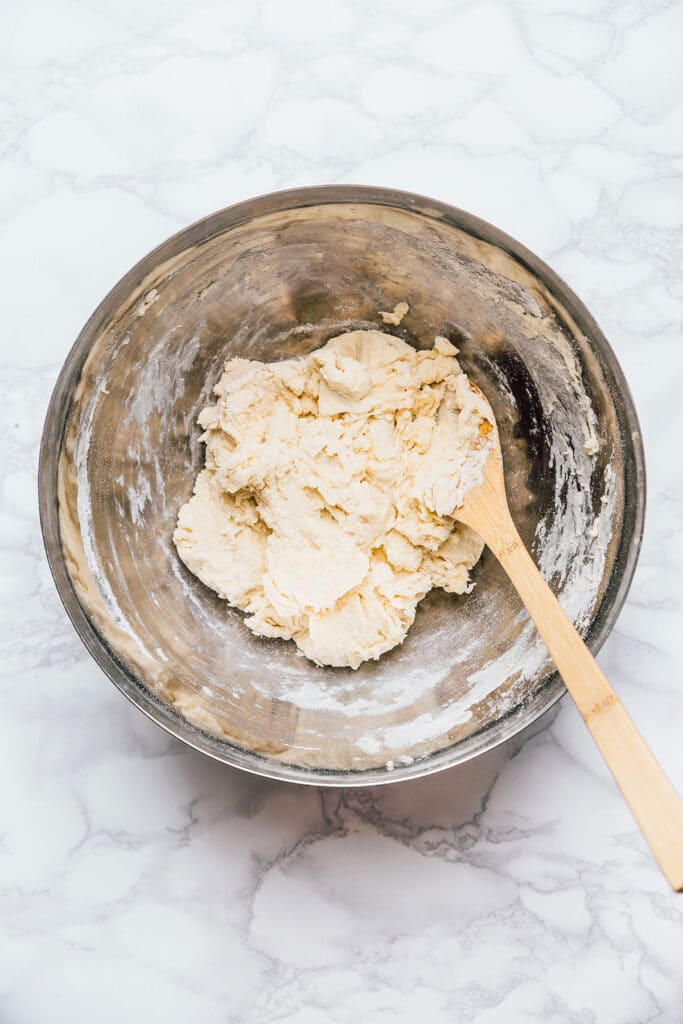
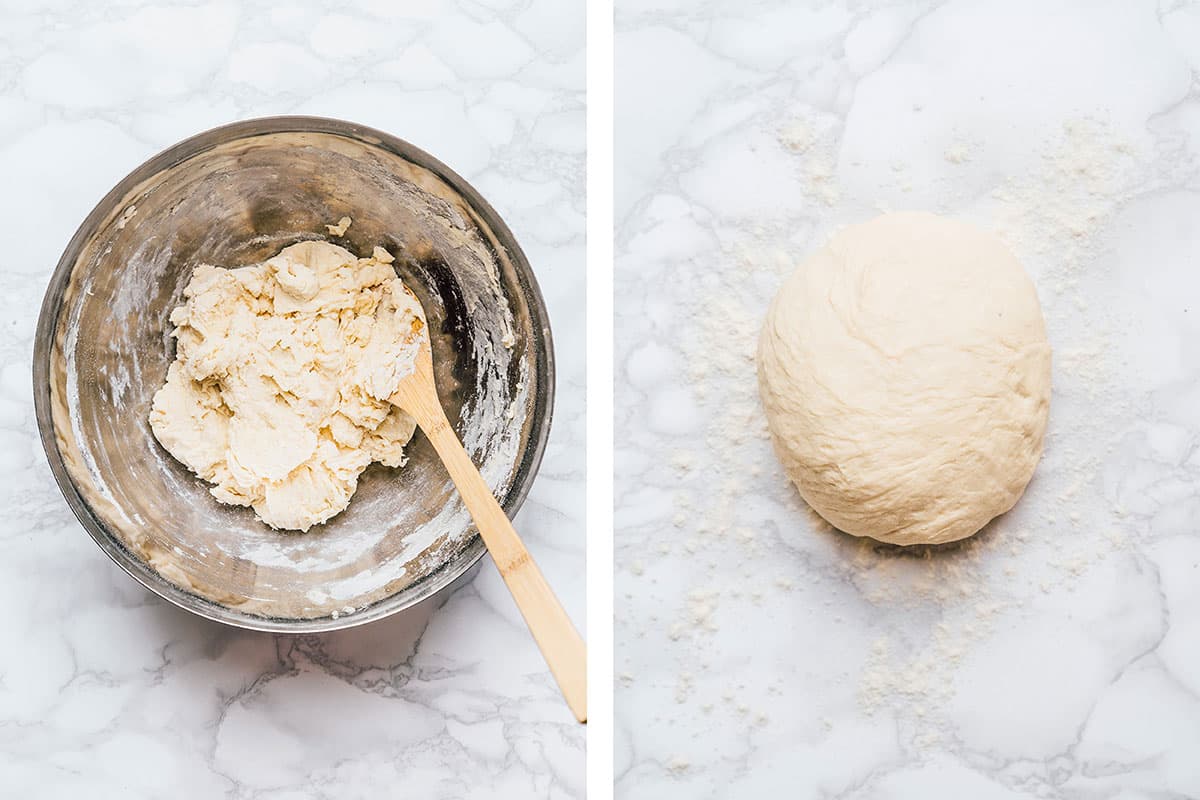
Step 2: Mix In The Flour
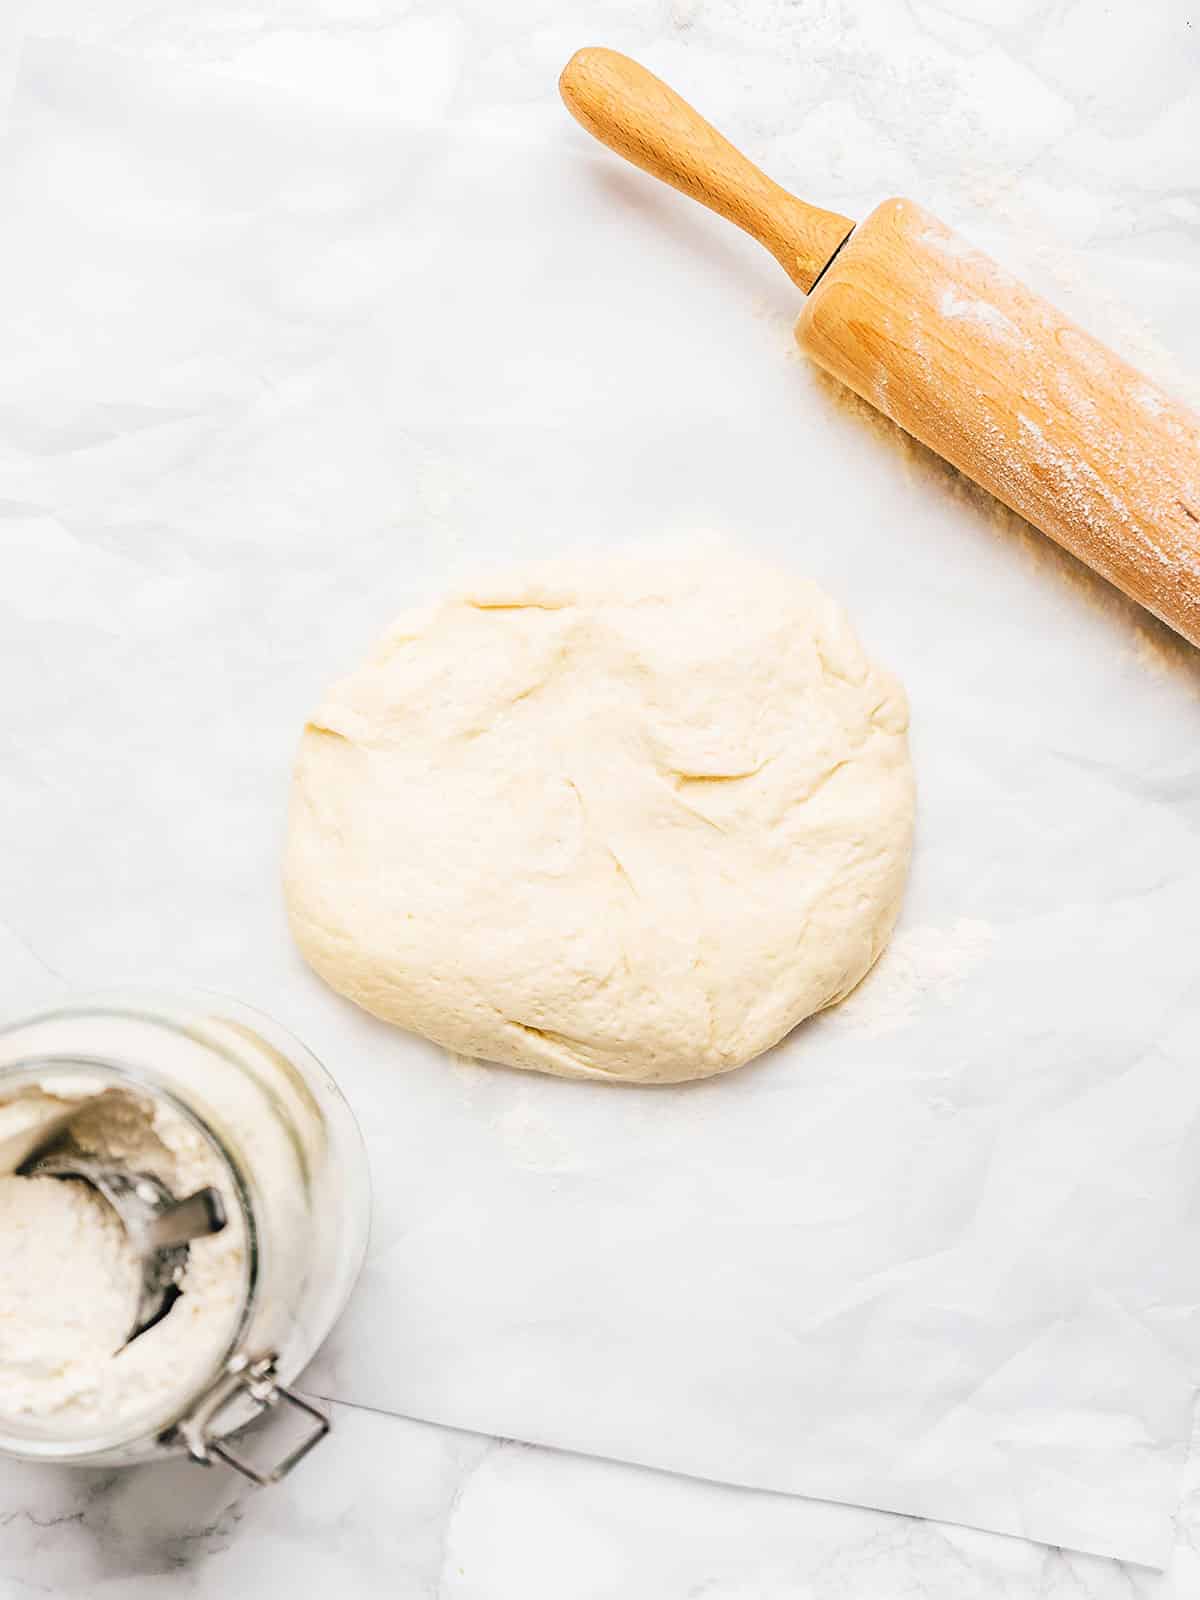
Time to get messy! Mix the wet mixture into the flour, then transfer the dough ball onto a lightly floured surface.
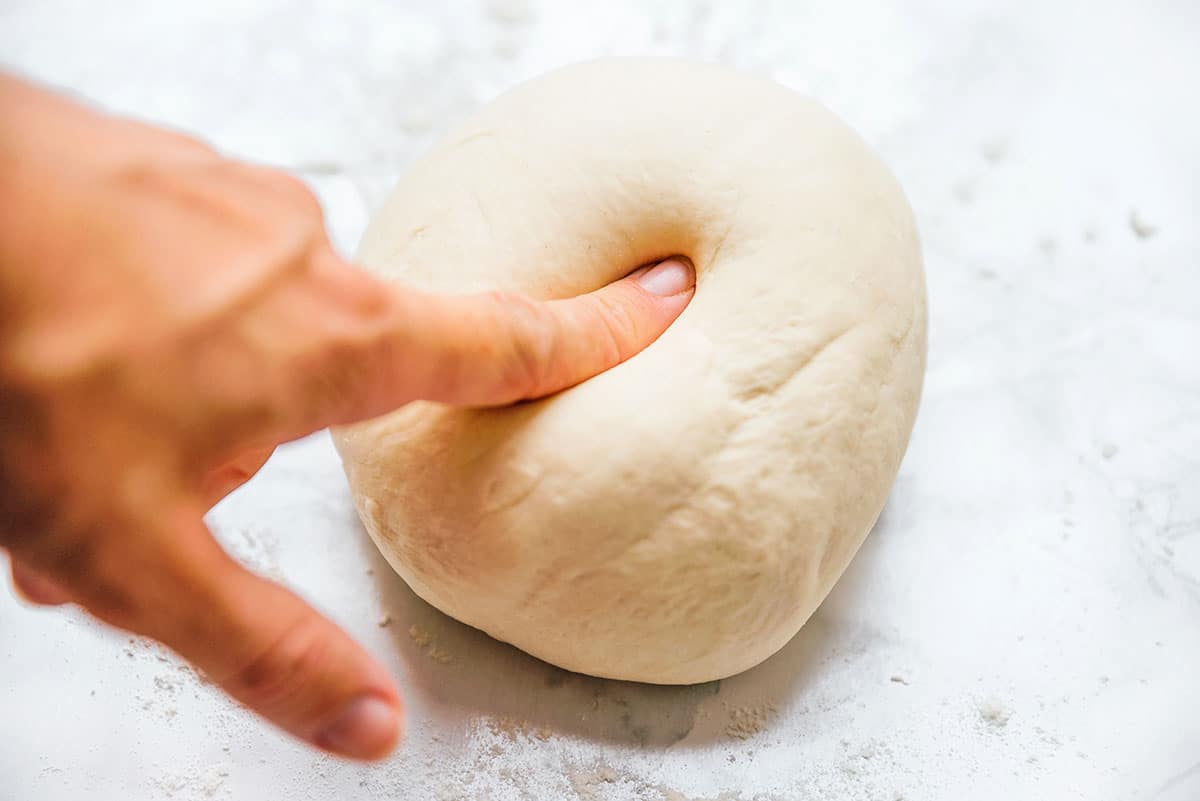
Step 3: Knead The Dough
Knead by hand or with the bread hook of a standing mixer, adding more flour (a tablespoon at a time) if the dough is sticking to the surface.
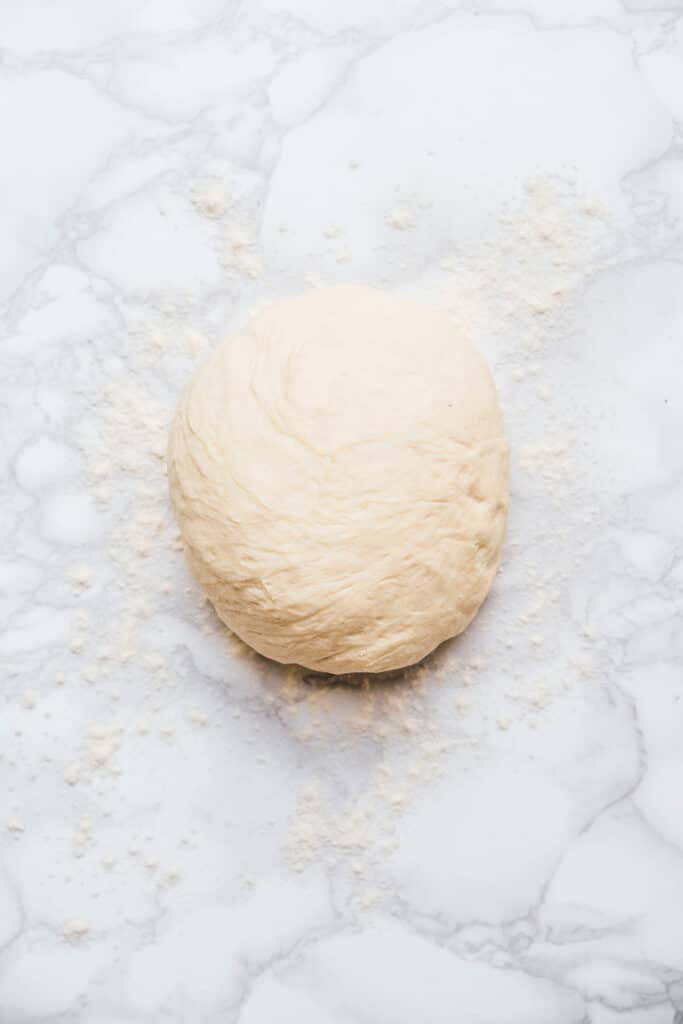

You Knead This Technique
Work the dough into a ball, then press down and slightly forward with the heels of your hands. Fold the dough in half, then repeat. Kneading should be rhythmic and quick (and result in a smooth dough ball).
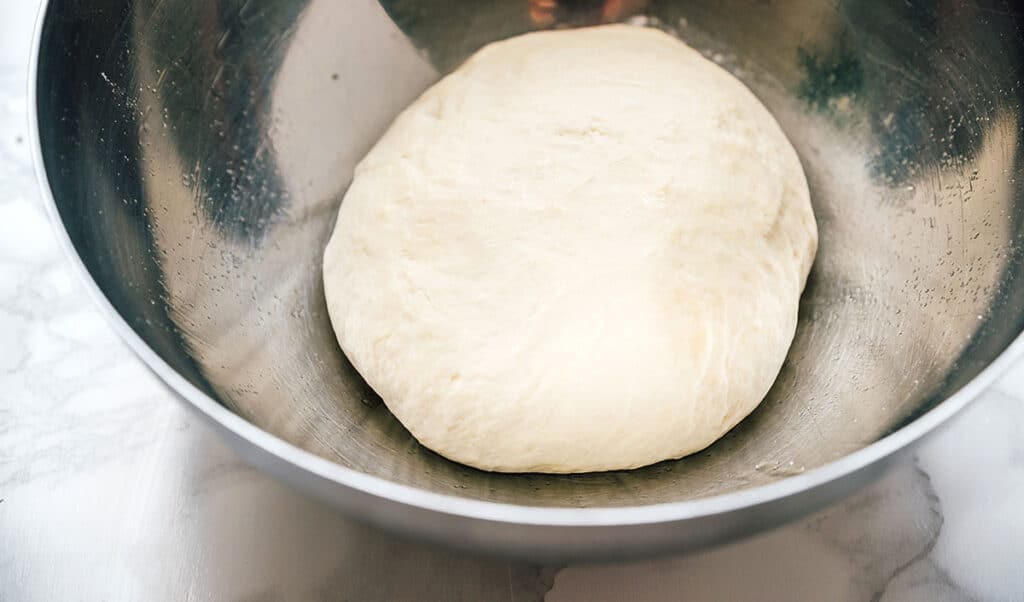
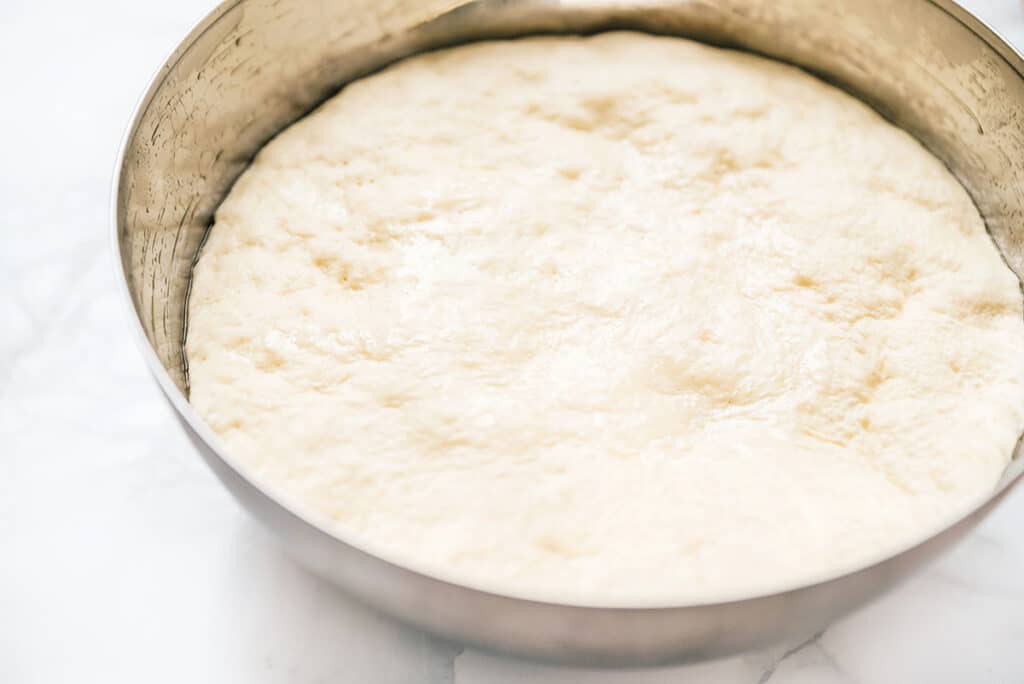
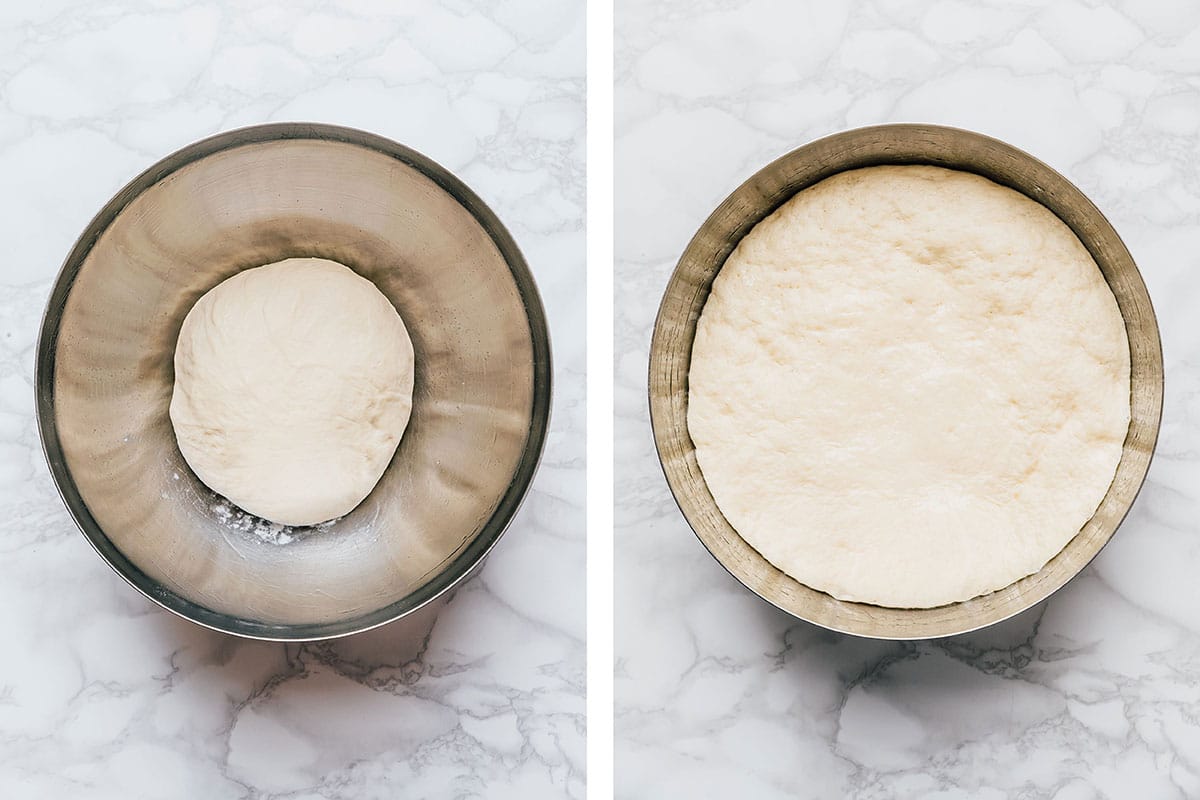
Step 4: Let It Rise
After you’ve kneaded the dough and your forearms are ready to fall off, let it rise in a warm place in a lightly greased bowl covered with plastic wrap.
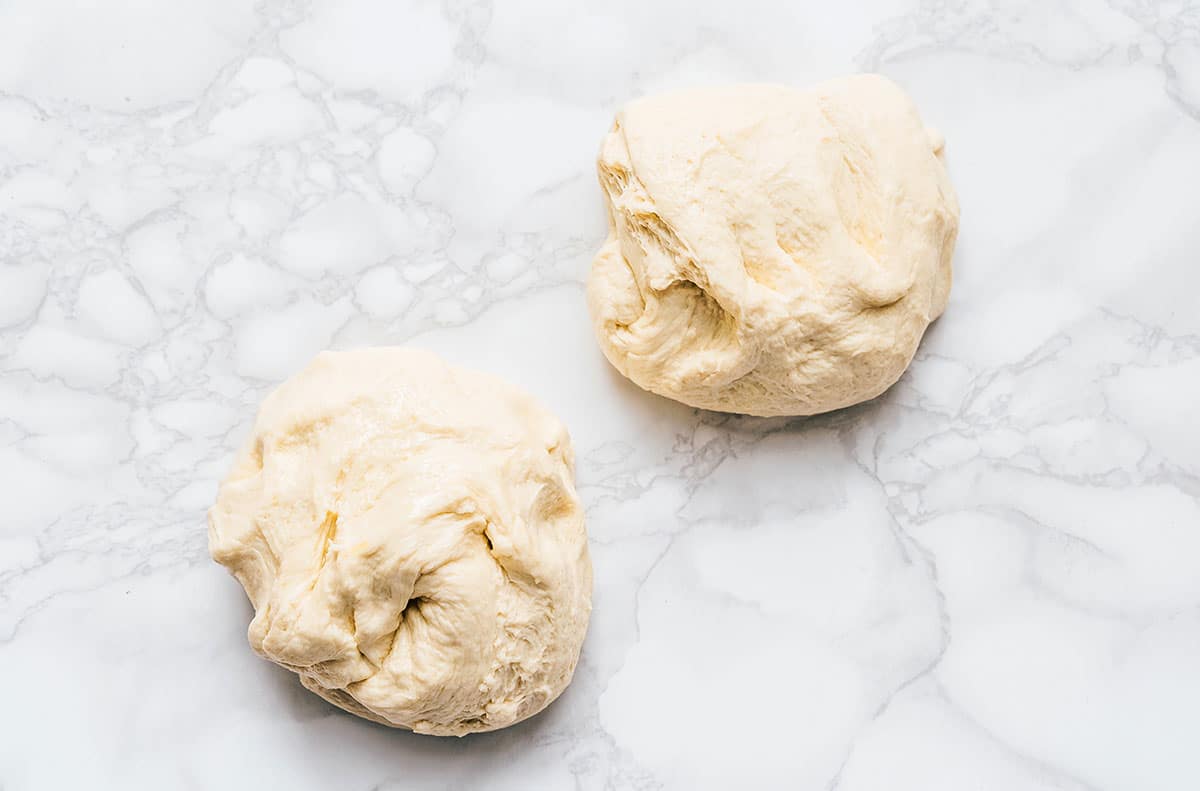
Step 5: Divide The Dough
Divide the dough into two equal balls, cover them with plastic wrap, and let them rest for 15 minutes.
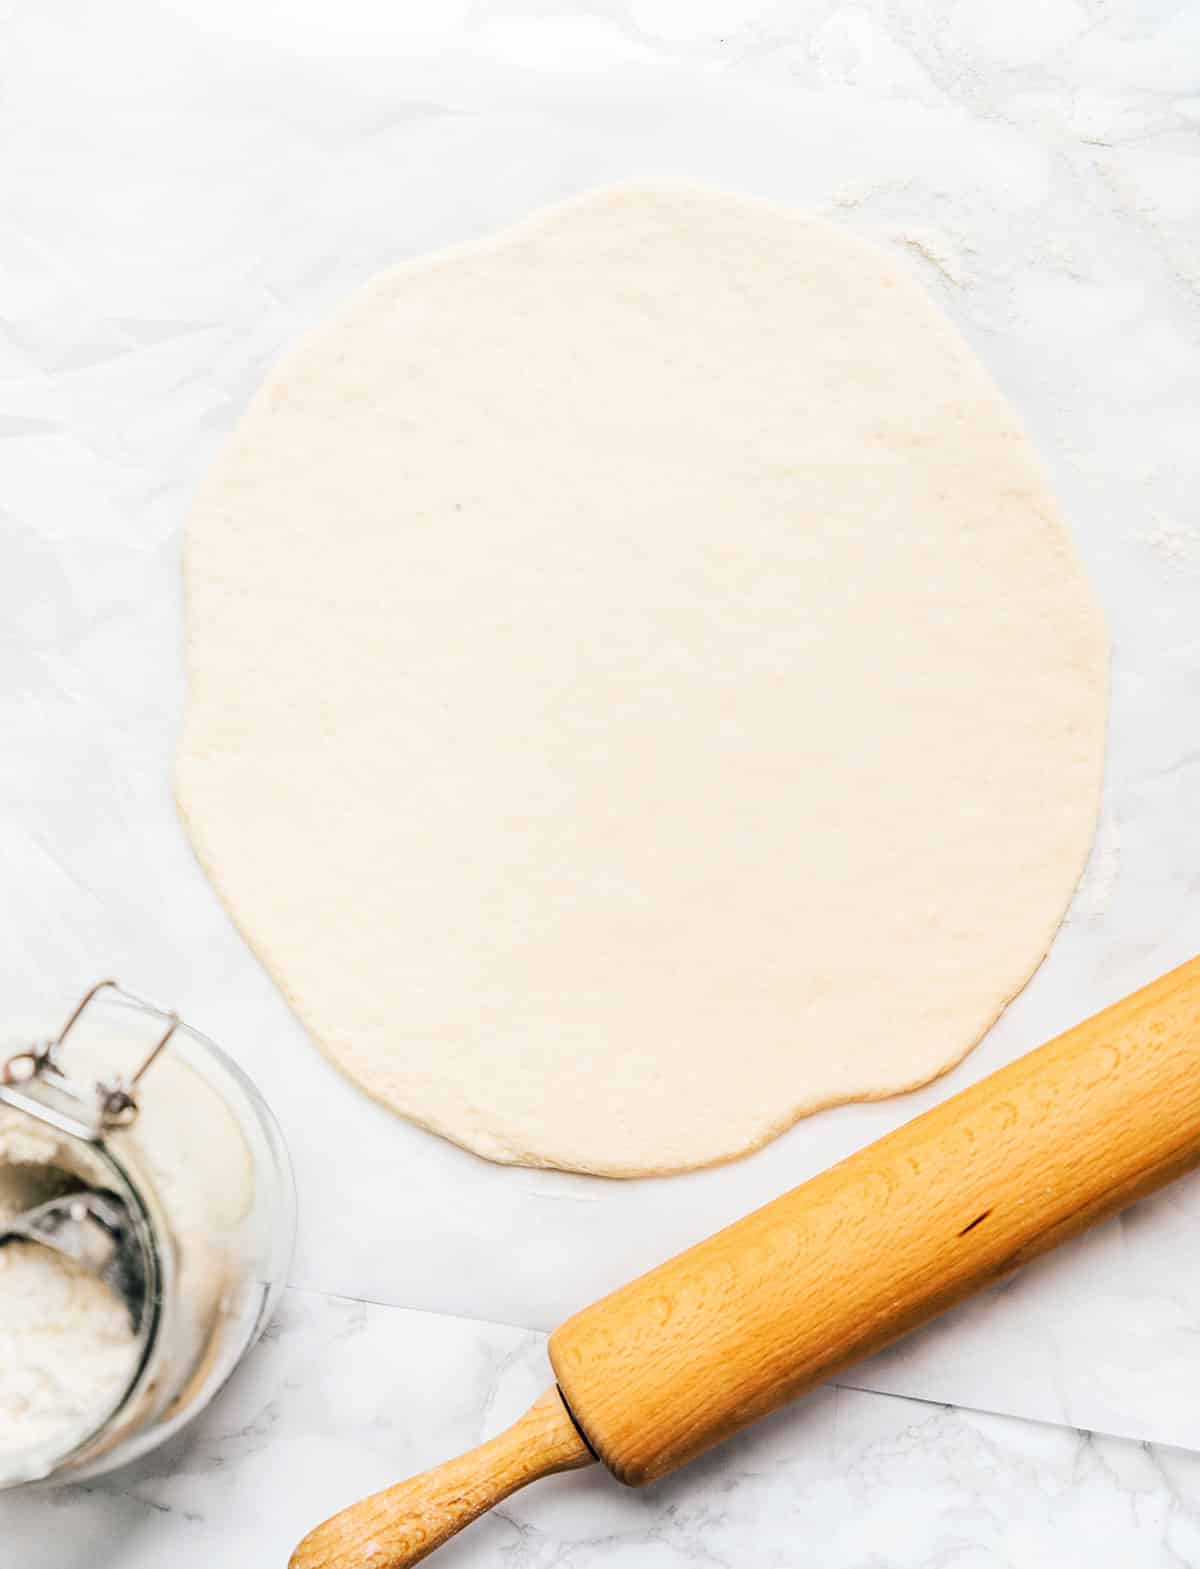
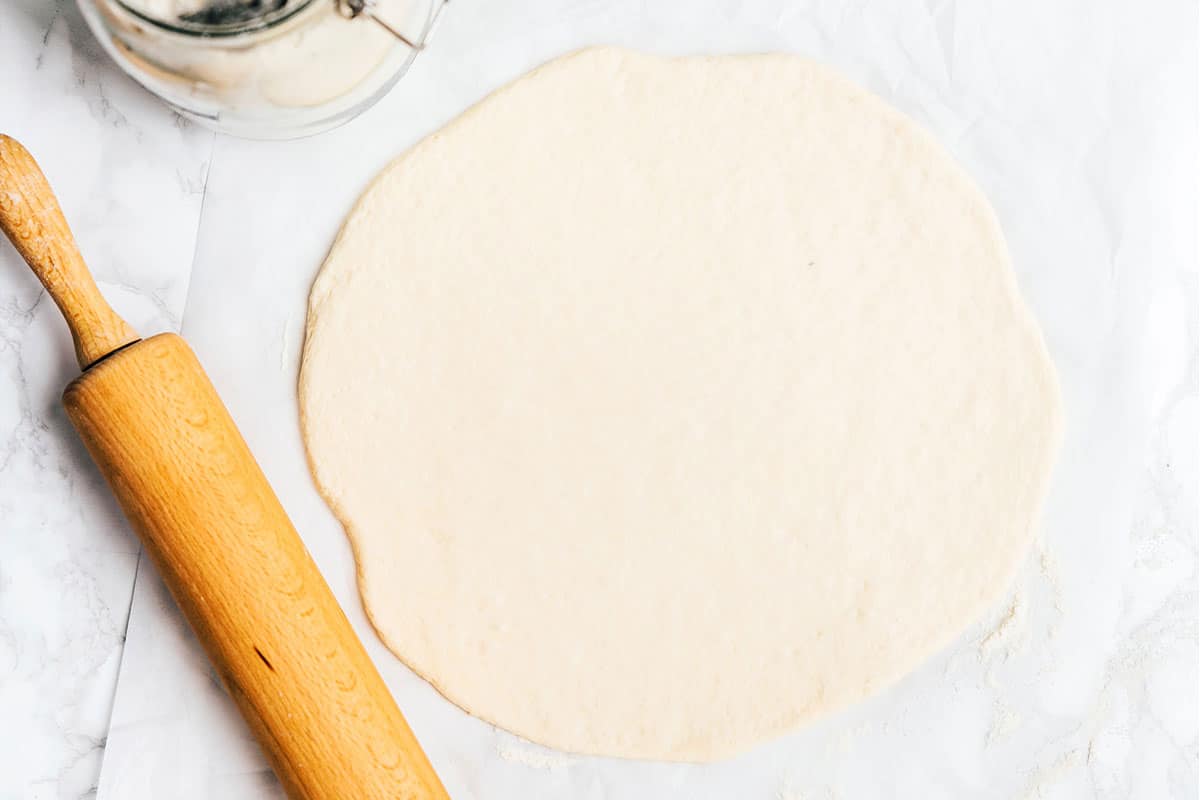
Step 6: Roll The Dough
Time to form that classic pizza circle! You can either roll it out on a floured surface with a rolling pin (easiest) or stretch it by hand (most likely to make your Italian grandmother proud).
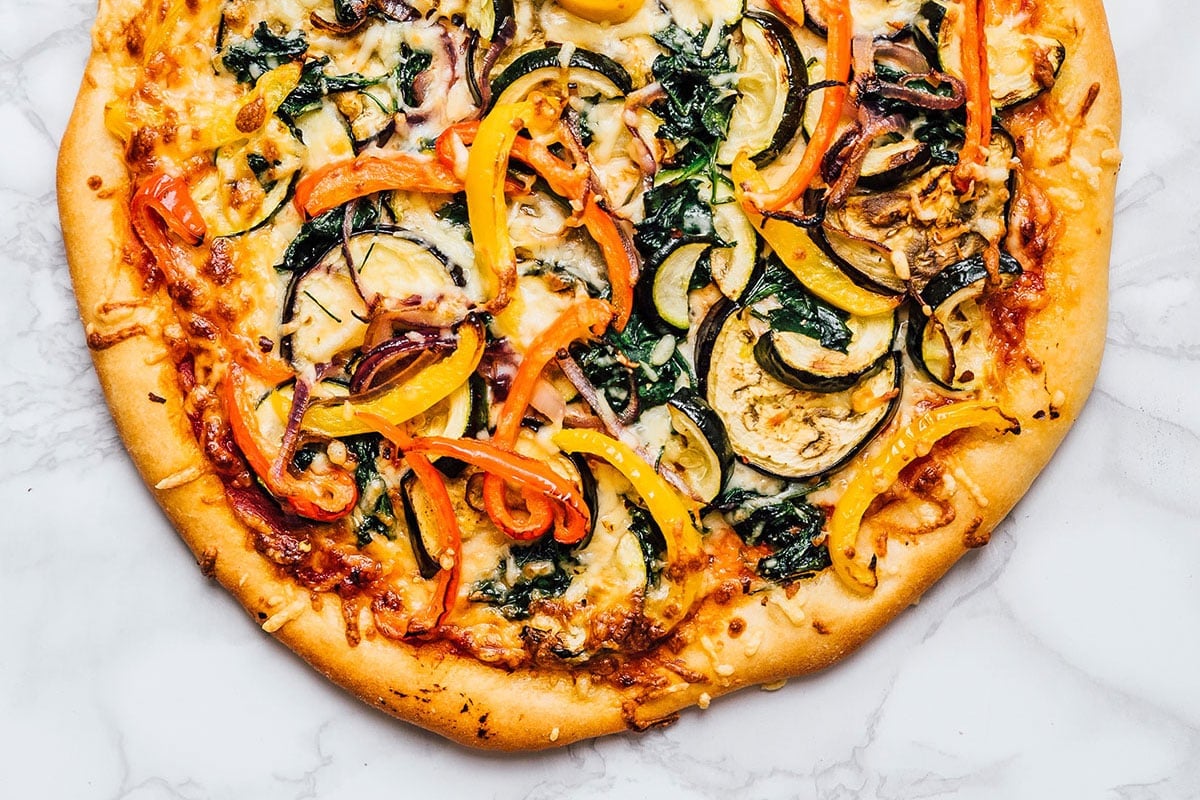
Step 7: Bake Your Pizza
Preheat your oven with the pan in it. If you rolled the dough on parchment paper, transfer the pizza and paper to the pan. Otherwise, dust the pan with cornmeal (or grease it). Brush the dough with oil, then add toppings! Bake it on a low rack first, then broil it for 2 minutes on the highest rack until golden.
Throwing A Pizza Party?


P.S. This pizza dough is also great for making my vegetarian Costco “chicken” bakes!

Foolproof Homemade Pizza Dough Recipe
Ingredients
- 1 ½ cups warm water, about 105°F/40°C, 360 mL
- 1 ¼-oz package instant yeast, 2 ¼ tsp, 7 g
- 1 Tbsp sugar, 15 g
- 1 tsp salt
- 1 Tbsp olive oil + some for greasing bowl/pan, 15 mL
- 3 ½ cups all-purpose flour, 450 g
Instructions
- Proof yeast: Combine warm water with yeast and sugar. After 5 to 10 minutes, the mixture should be frothy. Mix in the salt and olive oil.
- Mix in flour: In a large bowl, mix the wet mixture into the flour. The dough will start to get difficult to mix with a spoon and eventually form a loose ball. Transfer the dough ball onto a lightly floured surface.
- Knead: Knead by hand (8 minutes) or with the bread hook of a standing mixer (5 minutes), adding more flour a tablespoon at a time if the dough is sticking to the surface. Pizza dough has been kneaded enough when it is smooth and passes the finger poke test (when you poke it with your finger, the dough should slowly spring back).
- Rise: Place dough in a lightly greased bowl and cover with plastic wrap. Set in a warm place* and let rise for 1 to 2 hours, or until dough has doubled in size.
- Divide: Divide the dough into two balls, then cover with plastic wrap and let rest for 15 minutes. If you don’t plan on making 2 pizzas, you can freeze one of the balls now**.
- Roll: Roll pizza dough directly onto lightly flour- or cornmeal-dusted parchment paper (12 inches for traditional crust, 14 for thin crust). Brush dough with olive oil, then top with your favorite ingredients.
- Bake: Preheat oven to 475°F (250°C). Place your empty pizza pan in the oven while it preheats to make it hot (hot pan = crispy crust). Bake on the lowest rack for 10 to 12 minutes, then move to the upper rack and broil for 2 minutes.
Notes
Nutrition
Nutrition information calculated by Sarah Bond, degreed nutritionist.


It says one and a half. Is that 1 1/2cups?
Yes! 😀
This was easy and great! I live at almost 7000 feet so it rose a lot. I think I can cut it to make 3 decent size pizzas! My husband was impressed!
Yay, that’s so awesome to hear Christie! 😀
Hi! I’m going to try this because “ you know who” LOVES pizza! 😂😂
Hahah aww enjoy!! 😀
I was wondering if a person could use a gluten free all purpose flour with the same results??
Hi Barb! I haven’t tried GF flour with this recipe but my guess is that it would not work as well. GF dough will act differently than traditional dough and may need more ingredients to have a good texture. You might be interested in this recipe!
Hi, i did the slightly heated oven trick, because with 5 kids, it would’ve drove them crazy to wait for the dough to rise 2 hours, lol. Worked like a charm, kid tested n loved.
So happy to hear it, Charlene! 😀 Works miracles for any kind of risen dough!
Hi is the yeast measurement correct 14 g instant yeast I thought 1 packet is 7 g please clarify this thanks Iain
Thanks so much for pointing this out, Iain! Indeed, it should be 7g (1/4 oz package).
Thanks I was confused by this as well
IT IS MY FAVORITE I LOVE IT THANK U ❤️❤️❤️
YAY! Enjoy! 😀
Made this dough for a Taco pizza and the family loved it. Will be my go to recipe! Thanks so much.
So happy to hear it! Enjoy!! 😀
this is the way I been making pizza dough for several years
Holy Moly! I made this tonight for the first time and this is definitely our new pizza crust recipe! I regularly make bread and pizza crust, even making the 3 day fridge rise fermentations and sourdough crust from our starter, but have struggled to find one that gets and stays as thin as I like it. They have all seemed too elastic and won’t stretch easily and the end result has always been sub par texture-wise.
Not tonight! My whole family loved it. We made 3 pizzas out of the recipe. One was smaller for our 5 year old, but she was able to easily manipulate the dough to her liking, which made a thicker crust than the ones my husband and I made and they all turned out superbly! Thank you!!
I used 2&1/4 cups bread flour in the total flour because that’s what I had and finished the rest with AP. Preheated my oven and turned it off so it only had to rise for an hour. I preheated my baking steel and pizza stone on separate racks and switched pizzas halfway for even cooking. My husband and I agreed that the texture was better than our favorite local pizza restaurant!
We all had fun making our own pizzas and we’re looking forward to using this recipe over and over and over. Fantastic recipe!
I’m so happy to hear you all loved it, Chelsea! Thanks so much for dropping in to let everyone know how it went! 😀
Made this last night, I’m in college and this recipe was perfect. It made the perfect fluffy pizza crust for buffalo chicken ranch pizza. Thank you so much!!! Cheap and easy to make 🙂