
This post contains affiliate links.
Unlock the delicious possibilities of tofu in your favorite dishes by learning the simple art of pressing it! Say goodbye to soggy, watery textures and hello to firm, flavorful plant-based protein. Whether you have special tools or not, we’ve got you covered on how to press tofu!
Why press tofu?
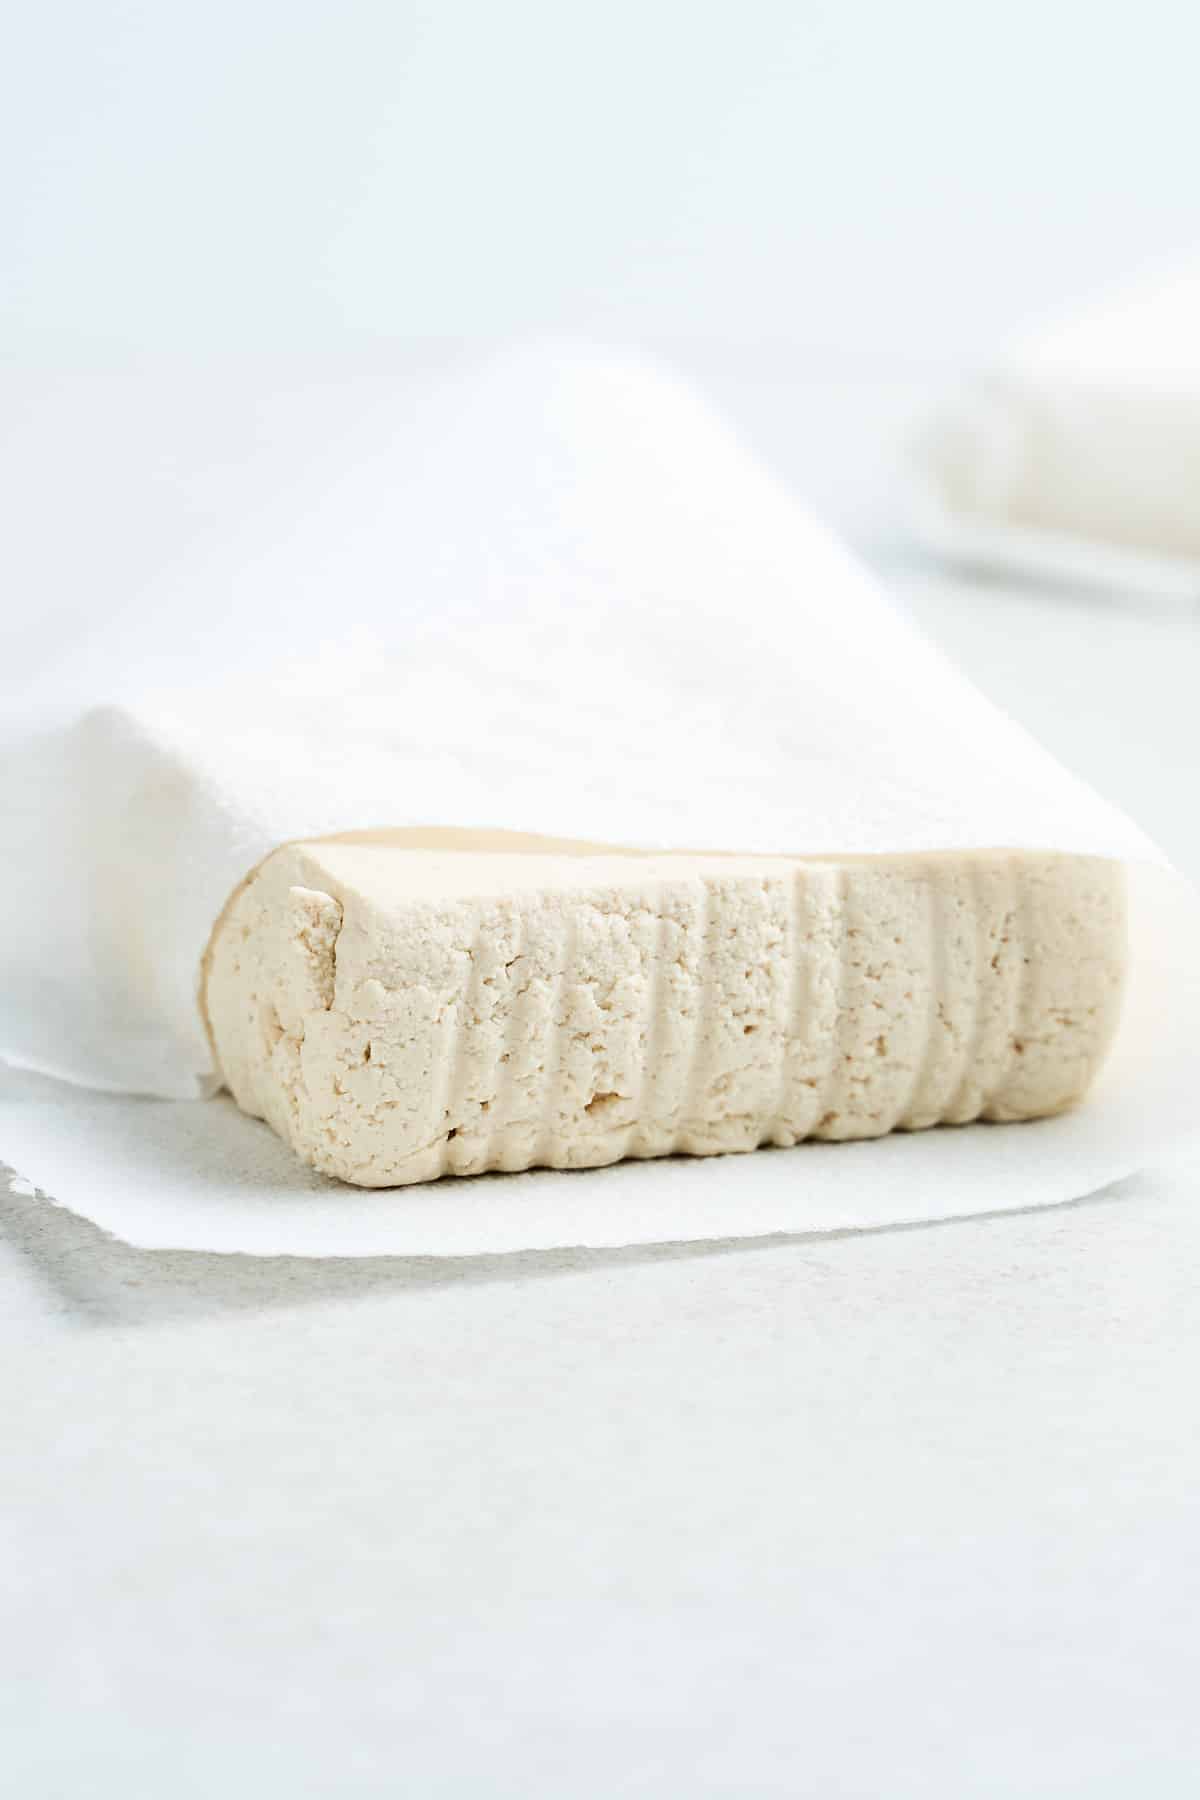
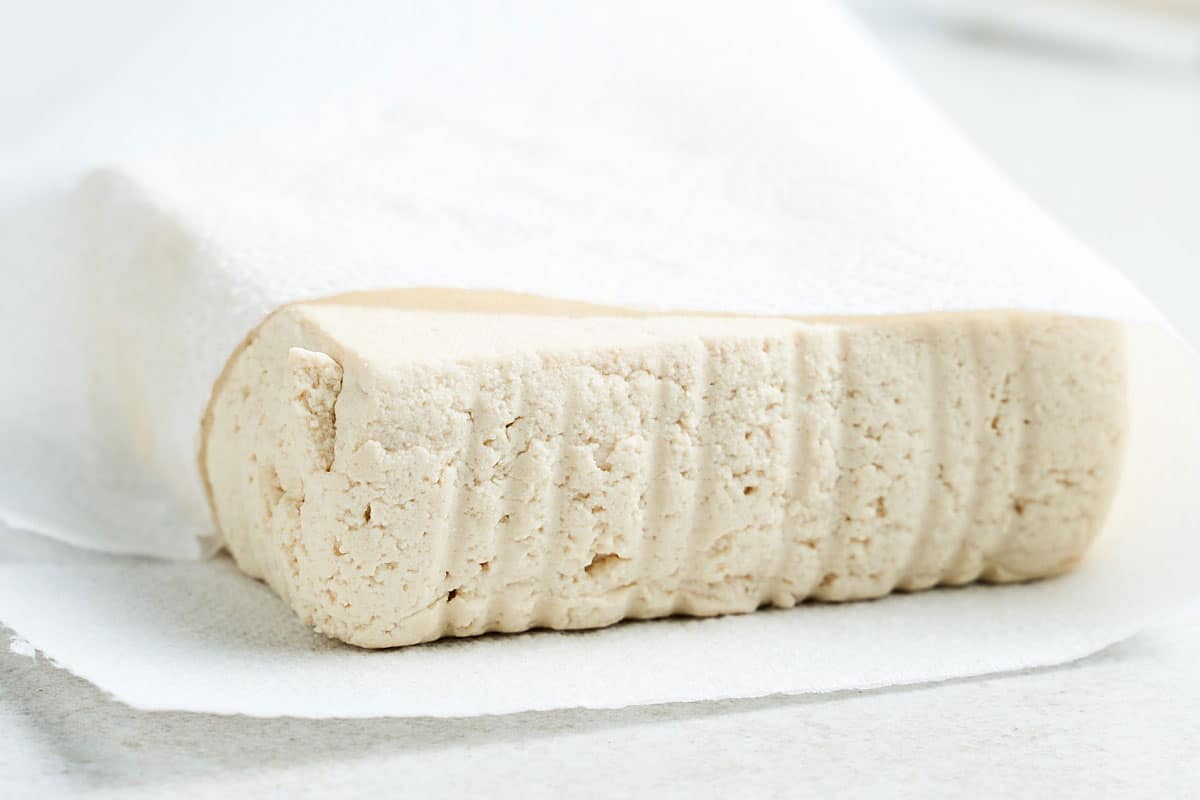
Tofu is made from coagulated soy milk, which forms a solid curd that is then pressed into blocks. This process removes a lot of the water content, but some moisture is left behind.
Pressing tofu removes most of the excess liquid, resulting in a firmer texture that acts like a sponge to absorb flavors from marinades and seasonings. Plus, pressed tofu is less likely to fall apart and becomes much crispier when fried or baked. This in turn helps it hold up better to sauces (like in this teriyaki tofu recipe).
Using a tofu press
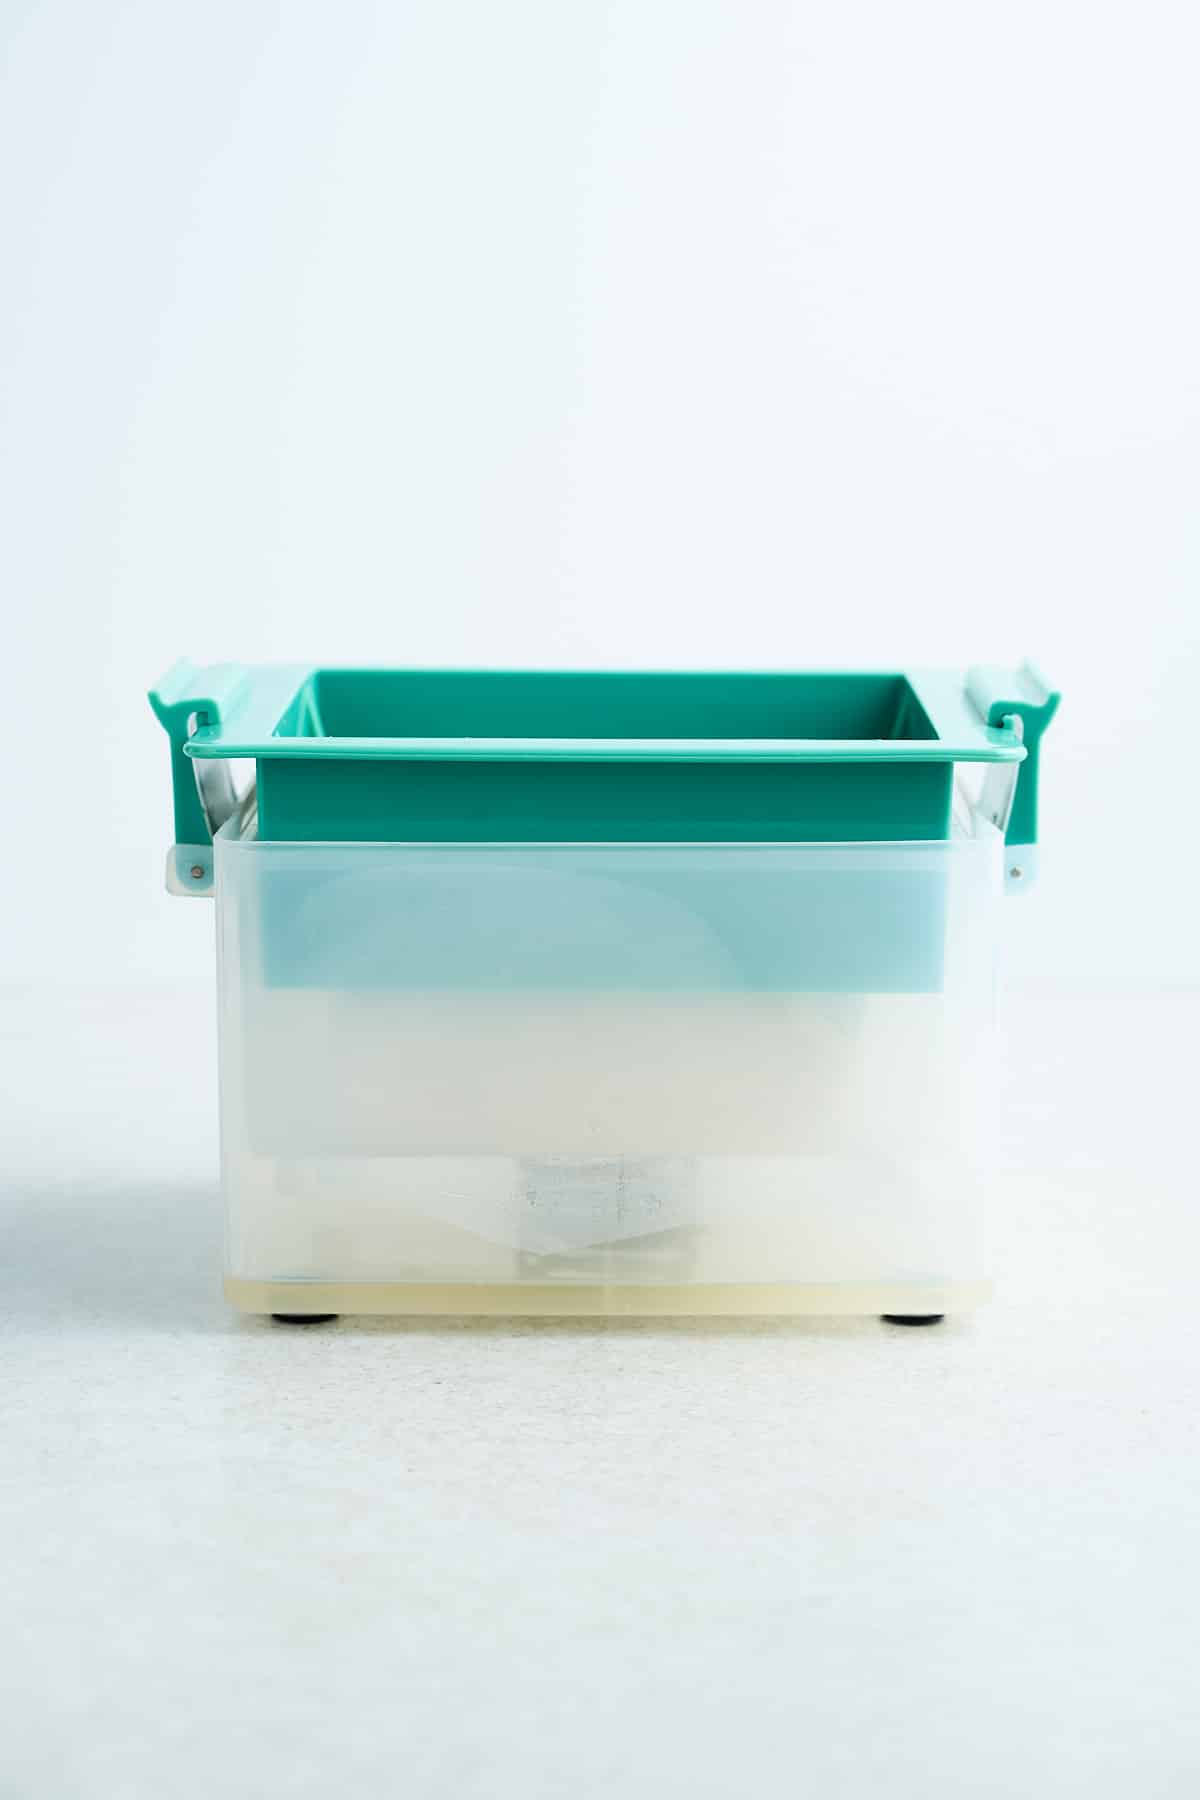
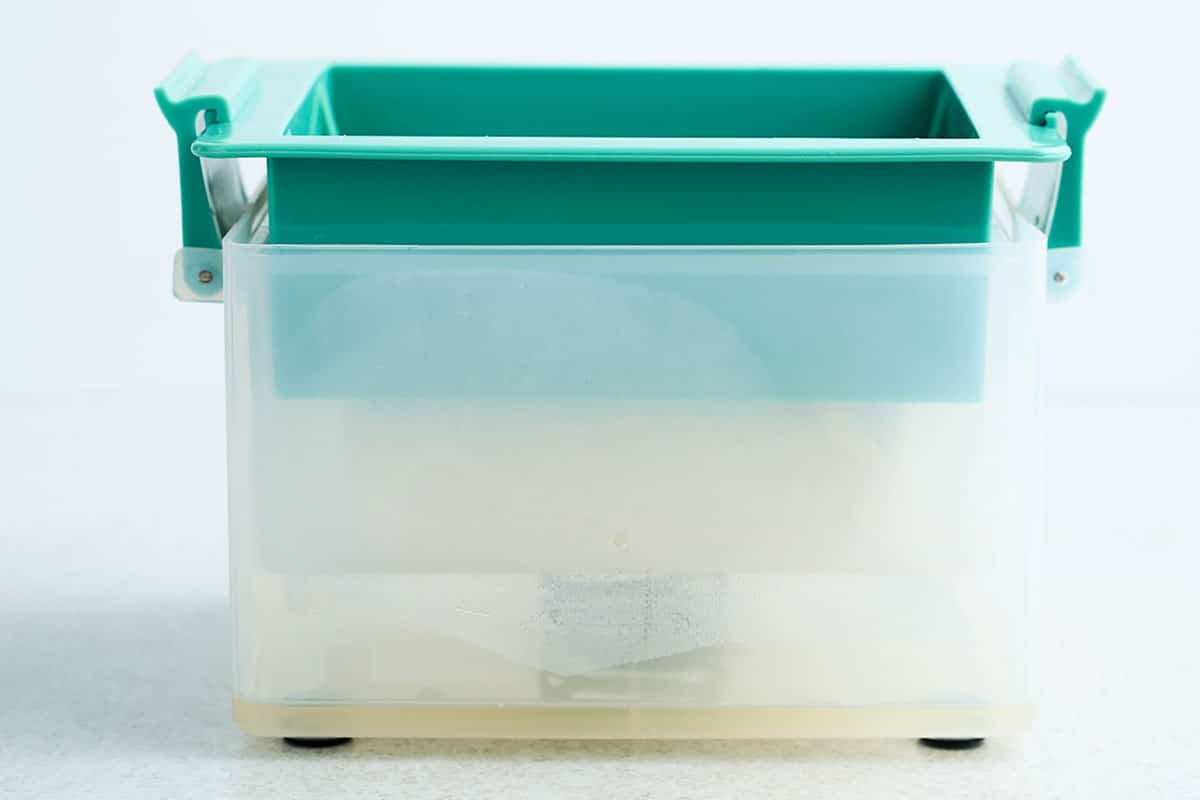
A tofu press is a special kitchen gadget designed solely for the purpose of (you guessed it) pressing tofu. It typically consists of two flat plates that can be adjusted to apply even pressure to the tofu block. To use a tofu press, follow these simple steps:
- Remove the tofu from its packaging and drain any excess liquid.
- Place the tofu block between the two plates of the tofu press.
- Adjust the press and lock it in place to apply gentle, even pressure. Be careful not to press too hard, as this can cause the tofu to crumble.
- Let the tofu press for a minimum of 15-30 minutes. The longer you press tofu, the firmer its texture will be.
- Once it has reached your preferred firmness, remove the tofu from the press and carry on with your recipe.
Pressing tofu without a press
If you don’t have a tofu press, don’t panic! You can still press tofu just as effectively using items you already have in your kitchen. Here’s how:
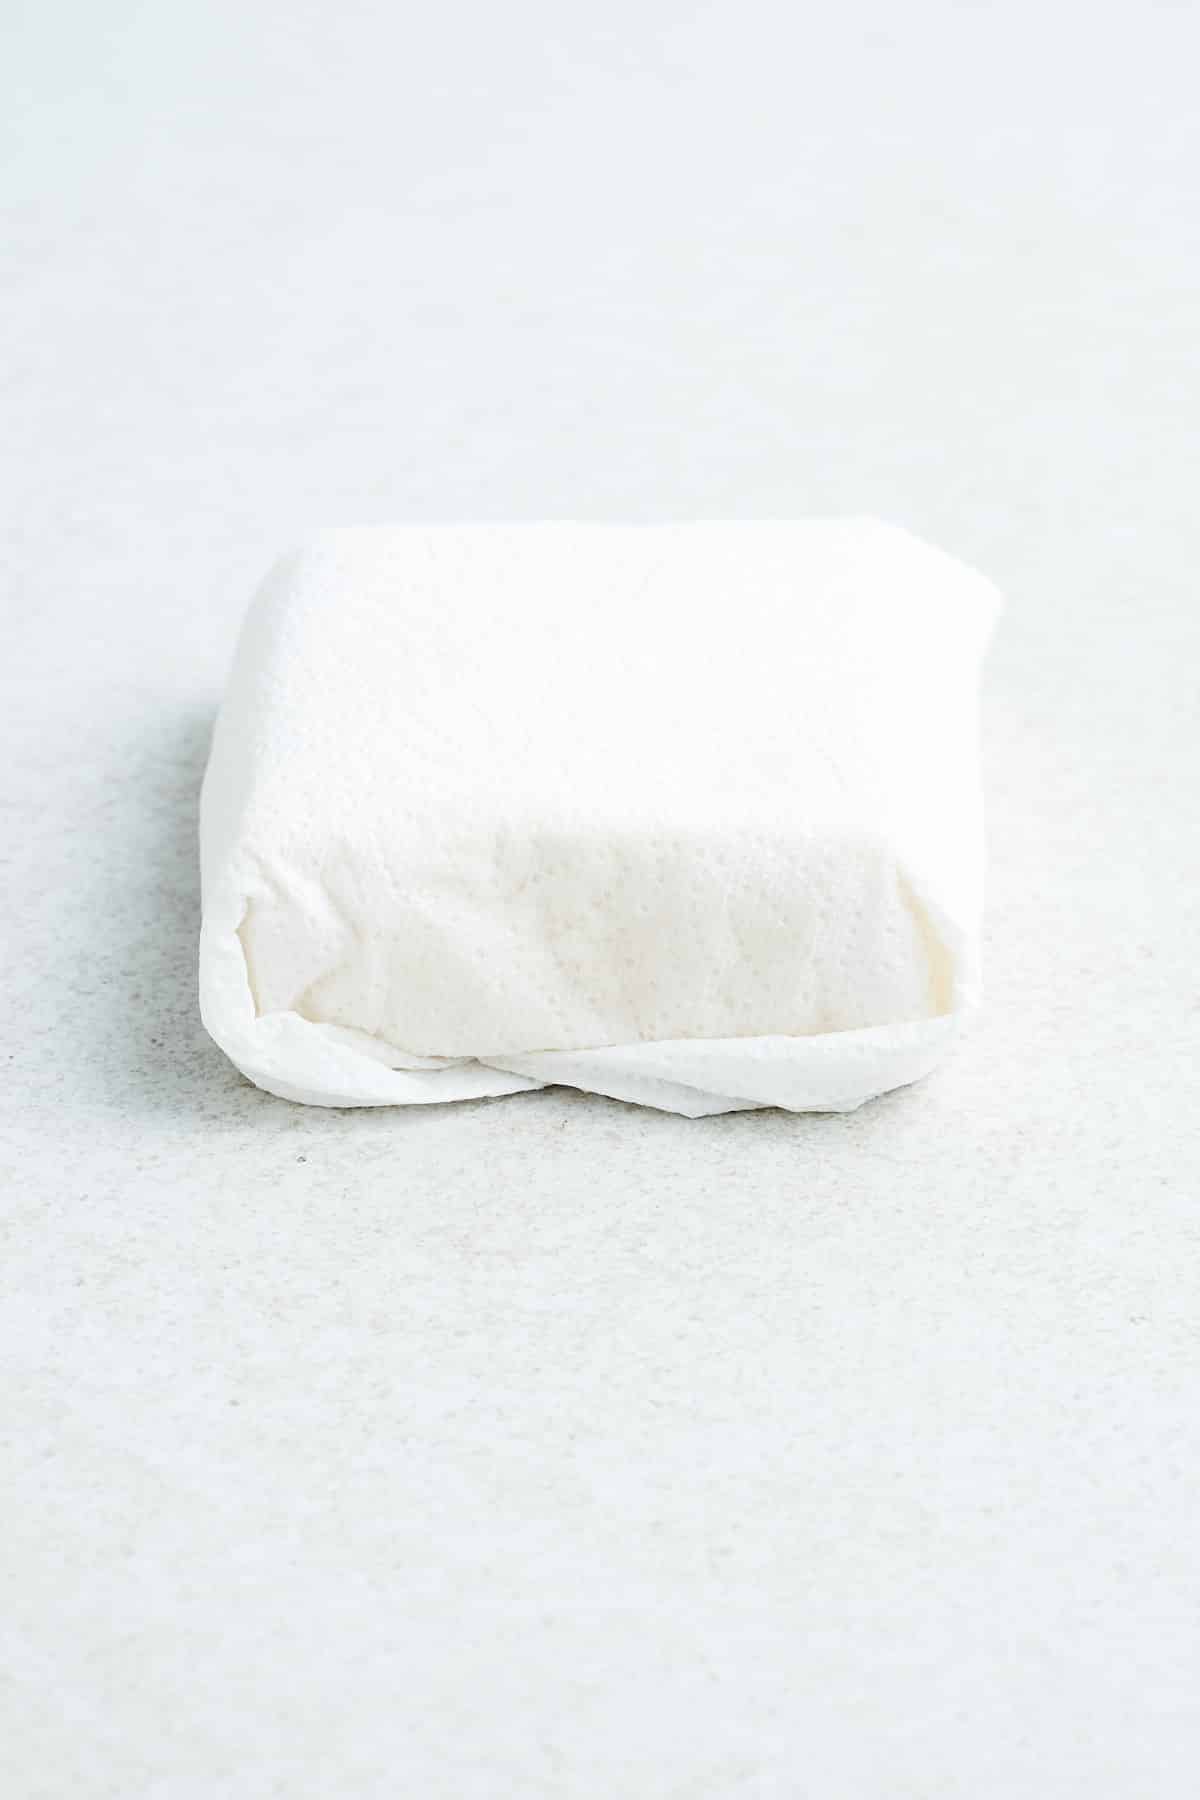
- Again, remove the tofu from its packaging and drain the liquid.
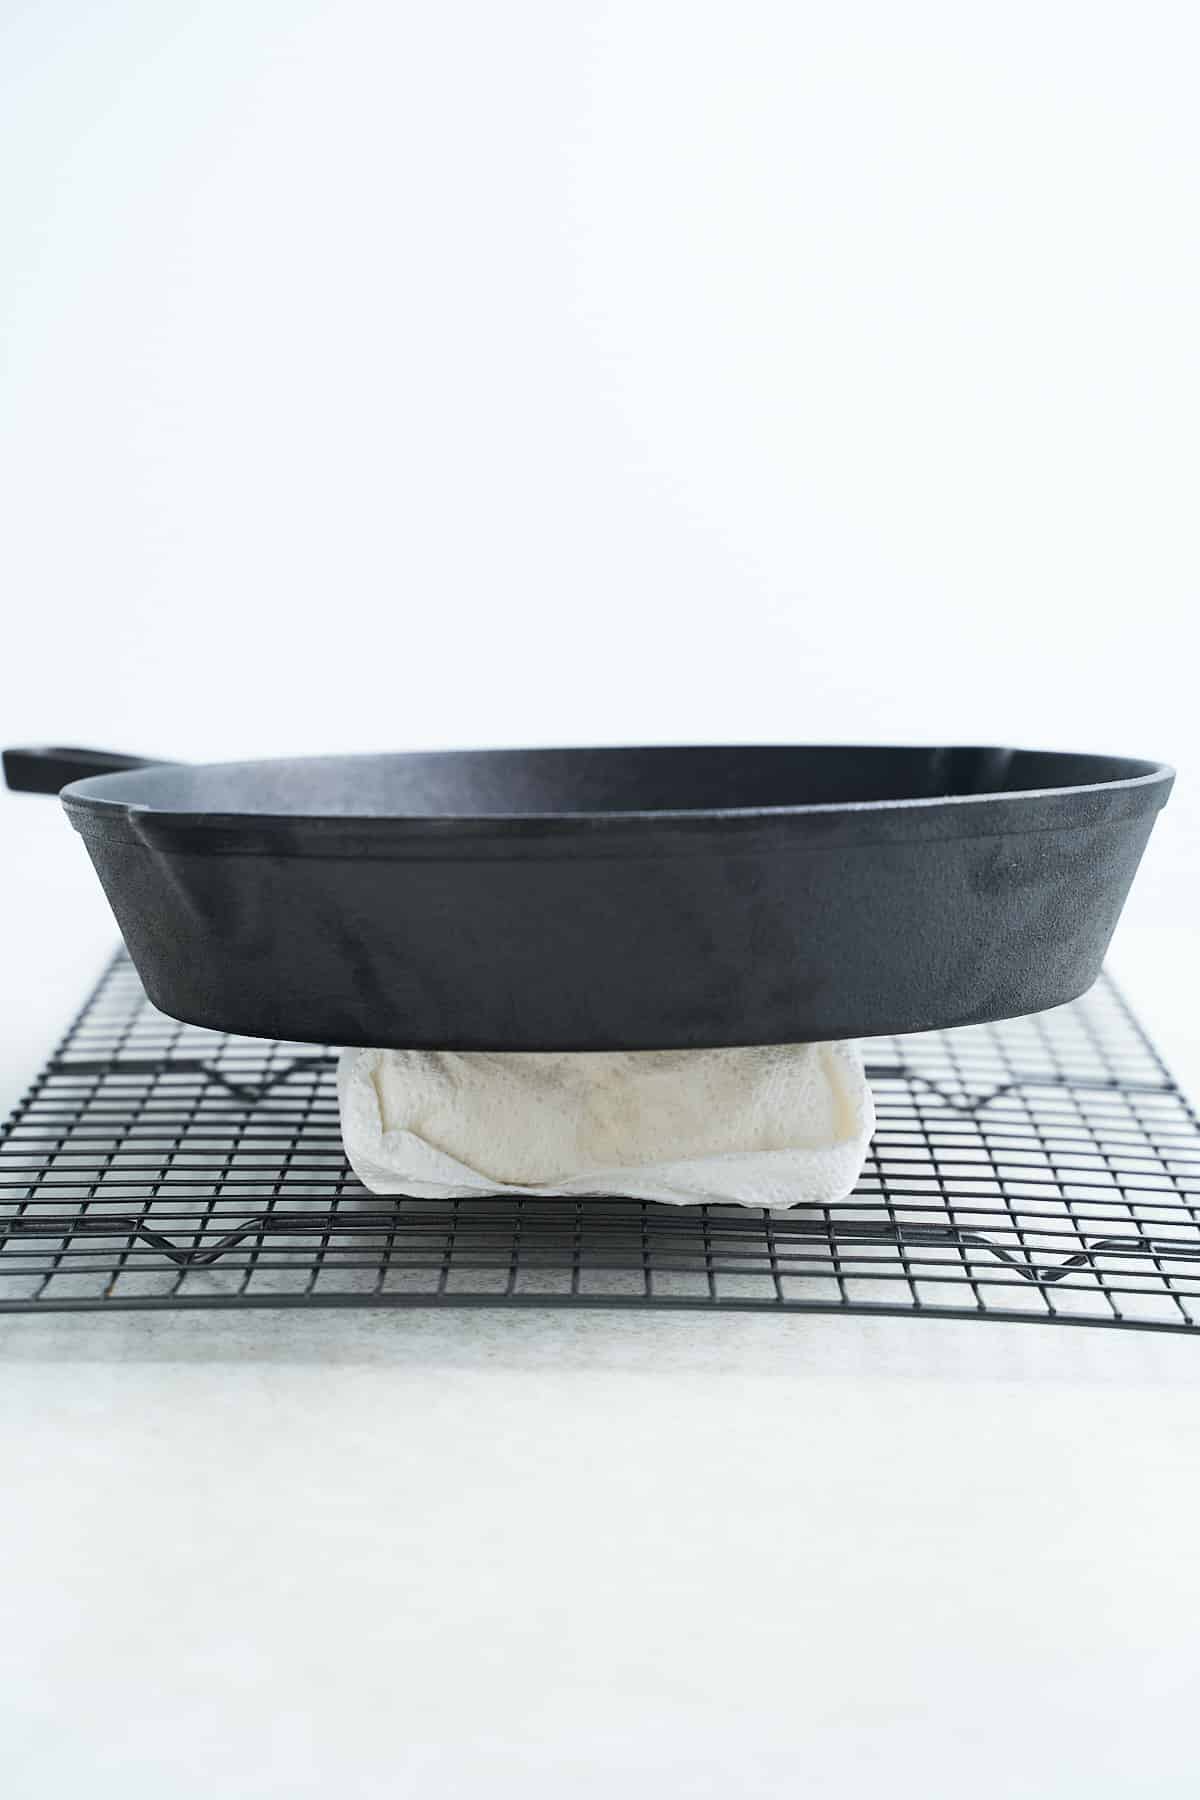
- Wrap the tofu block in a clean kitchen towel or several layers of paper towels, then place it on top of a cooling rack or pan that’s tilted to allow for drainage.
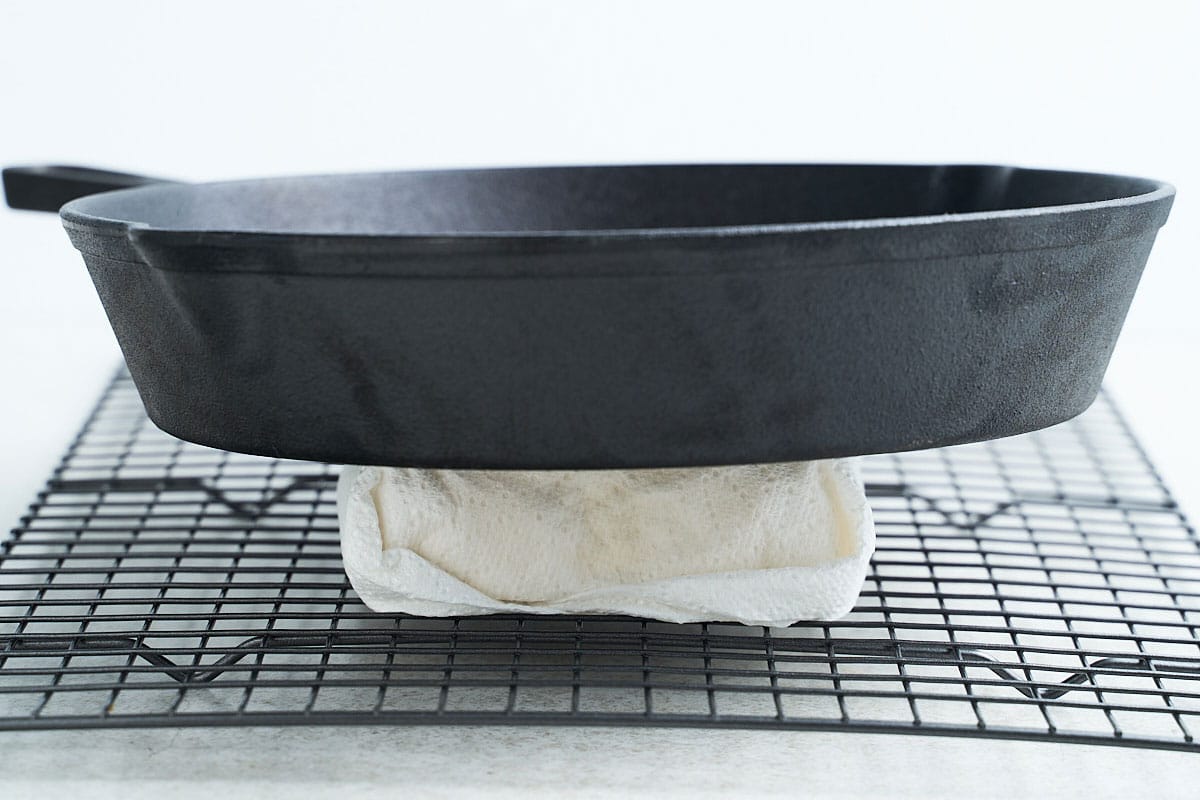
- Set a cutting board, flat plate, or cast iron pan on top of the wrapped tofu.
- Depending on the weight of the plate or pan, you can add more items to the top. Some great options include cans of food, cookbooks, or a heavy pot. The goal here is to apply gentle, even pressure to the tofu without crushing it.
- Allow the tofu to press for 15-30 minutes, periodically changing out the towels if they are becoming too wet.
- Once you reach your desired firmness, unwrap the tofu and start your recipe!
Tips for pressing tofu
- Choose the right tofu: Extra-firm or firm tofu is best for pressing since it holds its shape better than softer varieties.
- Be patient with pressing: Press the tofu for at least 15 minutes. If you want a firmer texture, you should press it for around an hour.
- Marinate it afterward: Pressing tofu removes moisture so it’s able to absorb marinades and seasonings better. Make sure you marinate after pressing your tofu.
- Storing pressed tofu: It’s always nice to have pressed tofu ready to go. If you’re not using it right away, transfer it to an airtight container in the refrigerator for up to a week.


How To Press Tofu (With AND Without A Tofu Press)
Ingredients
- 1 block firm or extra-firm tofu
Instructions
- Prep: Remove the tofu from its packaging and drain any excess liquid.

If Using A Tofu press
- Assemble: Place the tofu block between the two plates of the tofu press. Adjust the press and lock it in place to apply gentle, even pressure. Be careful not to press too hard, as this can cause the tofu to crumble.
- Press: Let the tofu press for a minimum of 15-30 minutes. The longer you press tofu, the firmer its texture will be. Once it has reached your preferred firmness, remove the tofu from the press and carry on with your recipe.
Without A Tofu Press
- Assemble: Wrap the tofu block in a clean kitchen towel or several layers of paper towels, then place it on top of a cooling rack or pan that’s tilted to allow drainage. Set a cutting board, flat plate, or cast iron pan on top of the wrapped tofu.
- Press: Allow the tofu to press for 15-30 minutes, periodically changing out the towels if they are becoming too wet. Once you reach your desired firmness, unwrap the tofu and start your recipe!


Hello Sarah!
This post is so helpful with easy- to- follow explanations and great pictures! I am a visual and auditory learner so this post was really easy to understand! Thank you so much for providing such wonderful informative content!
I can’t eat soy due to medical issues even though I love the flavor of it! I recently discovered soy- free tofu from REAL Good Food Big Mountain (Canadian). This was a wonderful discovery since my family eats mostly plant- based. We have tried 2 recipes with this product and absolutely love it!However, they only carry medium firm tofu in their plain version. 2 Questions: 1) Will following your directions above work for this type of tofu? 2) Can I use pressed/frozen/thawed/pressed again medium firm soy- free tofu in lieu of recipes calling for firm or extra firm tofu?
Thank you so much for sharing your expertise! Happy New year and be well!
Jordanna
I’m so happy you found this post helpful, Jordanna! I need to try out that type of tofu, I haven’t played with it before so I can’t say for sure if it will press the same. I would *think* they would act the same! Also, you should try making our chickpea tofu! It’s soy-free 😀
I tried the medium firm tofu with your steps today for lunch and it worked great for a roasting recipe ( The texture of the medium- firm tofu transformed into a meaty, chewy texture after freezing). However, part of the block turned to crumbs because it hadn’t thawed- out enough. Next time, not only will I thaw- out this medium- firm tofu for 24 hrs. in the fridge, but also I will place it in a bowl of warm water to properly thaw before drying and pressing it.
I can’t believe you have a post on how to create chickpea tofu!!! That is so awesome!!! We use chickpeas and chickpea flour a lot and always have them on hand! Would so love to try! What kind of tofu will the homemade chickpea tofu be a good substitute for ( ex. silken, soft, medium- firm, firm, extra firm)? Thanks so much! 🙂
It’s a bit like medium-firm tofu! I like to marinate it then pan fry or air fryer to make the outsides crispy! 😀