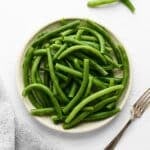
How to Blanch Green Beans (Step-By-Step + Video)
Learn how to blanch green beans for a healthy addition to any meal! Whether preparing a quick side dish, incorporating them into a recipe, or freezing them for later, this kitchen technique is a fundamental skill to add to your home cook toolbox.
Servings: 4 servings
Ingredients
- 4 cups green beans
Instructions
- Prep: Before cooking, prepare your green beans by washing them under cold water. Trim the ends off of each bean to remove any tough parts.

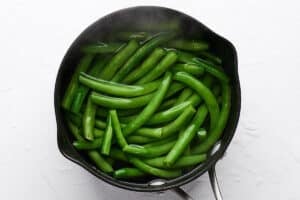
- Boil: Fill a large pot with enough water to cover the green beans and bring it to a rolling boil. I recommend adding salt to the water, which helps enhance the beans' flavor.Add the prepared green beans to the boiling water. Cook them for 2 to 3 minutes until they are bright green and tender-crisp. Keep in mind that cooking times can be slightly longer at higher elevations due to the lower boiling point of water.
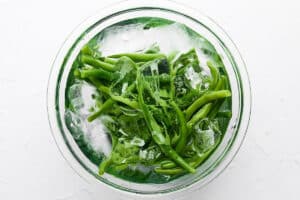
- Ice Bath: Once the green beans have reached the desired level of doneness, quickly remove them from the boiling water and transfer them to an ice bath for the same amount of time that you blanched them. This step stops the cooking process immediately, preserving the beans' vibrant color and crisp texture.
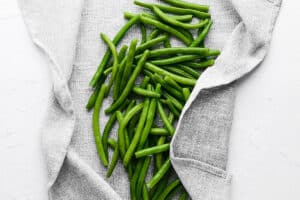
- Dry: After cooling them in the ice bath for a few minutes, remove the green beans and pat them dry with a clean towel. Removing excess moisture is important, especially if you plan to sauté or further cook the beans in any way.
Video
Notes
Storage: Ensure the green beans are completely cooled after blanching and drying. Place them in airtight containers or resealable plastic bags. They should remain fresh for up to 3-5 days this way.
Freezer: Spread the beans in a single layer on a baking sheet and freeze them for 1-2 hours. Once the green beans are frozen solid, transfer them into freezer bags or airtight containers. Stored properly, they can last for 8-12 months.
Nutrition
Serving: 1cup cooked green beans | Calories: 44kcal | Carbohydrates: 9.9g | Protein: 2.4g | Fat: 0.4g | Saturated Fat: 0.1g | Cholesterol: 0mg | Sodium: 1mg | Potassium: 183mg | Fiber: 4g | Sugar: 1.9g | Calcium: 55mg | Iron: 1mg
